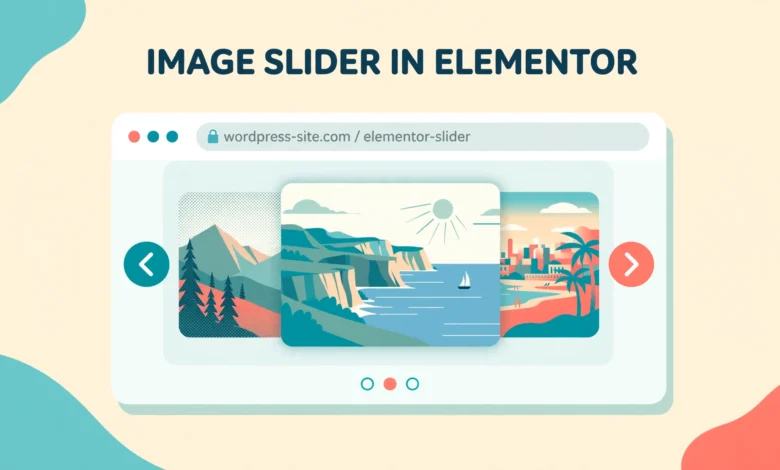
An image slider shows several photos in one small space, and it is one of the most popular features on homepages, portfolios, and product pages. Visitors can swipe or click through your best photos without scrolling down a long page, which makes a slider a simple way to show more in less space. The good news is that you do not need Elementor Pro or a paid slider plugin to build one.
The free version of Elementor includes the Image Carousel widget, and it covers everything most beginners need: multiple images, autoplay, arrows, dots, and basic styling. This guide shows you how to add an image slider in Elementor for free, step by step, from adding the widget to making it look good on phones.
What Is the Image Carousel Widget in Elementor?
The Image Carousel is a free Elementor widget that turns a set of images into a sliding gallery. You add the widget to a page, choose the images you want to show, and Elementor displays them one or several at a time with navigation controls. Visitors can move through the images by clicking arrows, tapping dots, or swiping on a touch screen.
It is different from a static image gallery, where every photo is shown at once and takes up a lot of space. A carousel keeps your page short and tidy while still showing many images. It works well for a homepage hero area, a portfolio, a set of product photos, a gallery of client work, or a row of testimonials with photos. If you want a plain grid of photos instead of a moving slider, our guide on how to add an image gallery in Elementor for free covers that option.
How Do You Add an Image Slider in Elementor for Free?
Adding a slider takes only a few minutes once your images are ready. Work in the Elementor editor on the page where the slider should appear, and follow these steps in order.
- Open the page with Elementor and click the plus icon to add a new section, then choose a single column layout for a full width slider.
- Search for Image Carousel in the widget panel on the left and drag it into the empty column.
- Click Add Images in the widget settings, then upload new photos or pick existing ones from your media library.
- Drag the images in the media picker to set the order they will appear in, then click Create a new gallery and Insert gallery.
- Choose how many images to show at once in the Slides to Show setting. One is best for a large hero slider, while three or four work well for a row of smaller photos.
- Set the image size to Large or Full, depending on how sharp the images need to look, and check the preview on the canvas.
- Click Update to save the page, then view the live page to test the slider in a real browser.
That is all it takes to get a working slider on your page. The default settings look fine for most sites, but you will probably want to adjust the navigation and timing next, so the slider behaves the way your visitors expect. If you are new to sliders in WordPress generally, our guide on how to add an image slider in WordPress without a plugin explains the basic ideas that apply here too.
How Do You Control Autoplay, Arrows, and Dots?
The navigation settings live in the same Image Carousel panel, under the settings for slides and effects. Three controls matter most: autoplay, arrows, and dots. Each one changes how visitors move through your images, so choose them based on what the slider is for.
- Autoplay: turn it on when the slider sits in a hero area and you want it to move on its own. Set the autoplay speed to around 4000 to 6000 milliseconds, which is four to six seconds per slide, so visitors have time to read any text on the image.
- Pause on hover: keep this on when autoplay is on. It stops the slider while a visitor hovers over it, so they can look at a photo without it sliding away.
- Arrows: turn them on when visitors need to move back and forth, for example in a product gallery or a portfolio. Turn them off for a simple hero slider where autoplay does the work.
- Dots: turn them on when you have many slides, because dots show visitors how many images there are and let them jump straight to one.
- Infinite loop: keep this on so the slider starts again from the first image instead of stopping at the last one.
- Speed: this controls how fast one slide moves to the next. A value around 500 to 800 milliseconds feels smooth without feeling slow.
A common beginner mistake is to turn on everything at once. Arrows, dots, autoplay, and a fast speed together can make a slider feel busy and distracting. Pick the controls that help visitors and leave the rest off.
How Do You Make the Slider Look Good on Mobile?
Most of your visitors will see the slider on a phone, so always check the mobile view before you publish. Elementor lets you preview the tablet and mobile layouts from the bottom bar of the editor, and you can change settings for each device separately.
- Reduce Slides to Show on mobile to one, so each photo fills the screen width and stays easy to see.
- Keep arrows on for mobile, because swiping is natural but some visitors still look for arrows to move forward.
- Check that dots do not overlap any text or buttons on the slide, especially on narrow screens.
- Test the slider by swiping on a real phone, not only in the editor preview, because touch behaviour can differ.
- Hide the slider on mobile if it adds nothing on a small screen, using the Responsive settings in the Advanced tab.
Also check the height of your images on mobile. A wide desktop photo can become a tiny strip on a phone, with text too small to read. If your slider images contain text, keep the text large and short, or use separate mobile friendly images. A slider that looks great on a laptop and unreadable on a phone will hurt more than it helps.
How Do You Keep Slider Images Fast?
Sliders load several images at once, so they can slow a page down if the photos are too large. A slider with five uncompressed photos from a phone camera can easily add several megabytes to a page, which hurts both speed and search rankings. Optimise every image before you upload it.
- Resize images to the size they will actually display. A slider that shows at 1200 pixels wide does not need a 4000 pixel wide photo.
- Compress images with a free tool or plugin before uploading, aiming for each photo to stay under 200 kilobytes where possible.
- Use the WebP format when you can, because it gives smaller files than JPEG at similar quality.
- Keep the number of slides reasonable. Five to seven images is enough for most sliders, and more slides mean more loading time.
- Use the same image size setting for every slide, so the browser does not load mixed sizes.
Speed is not only about images. Heavy page builder content, unused plugins, and unoptimised settings all add up. Our guide on how to speed up an Elementor website walks through the full checklist, from caching to image optimisation, and it is worth working through if your slider page feels slow.
What Can the Free Version Not Do?
The free Image Carousel is honest about its limits, and it helps to know them before you plan a complex slider. The free widget shows images only, so you cannot add a title, a caption, or a button on top of a slide. Each slide is just a photo, with no text layer and no link on the whole slide. You can link an image to its media file or to a custom URL in the media settings, but you cannot build a slide that mixes a heading, a paragraph, and a call to action button.
- No captions or text overlays on slides, so any text must be baked into the image itself.
- No advanced effects such as fade transitions, ken burns zoom, or layered animations between slides.
- No video slides, so you cannot mix a video clip into the carousel.
- No thumbnail navigation, so visitors cannot pick a slide from a row of small preview images.
- Limited styling for arrows and dots compared with paid slider plugins.
For most beginner sites these limits do not matter. A clean photo slider with autoplay and dots is enough for a homepage, a portfolio, or a gallery. Do not pay for a slider plugin or Elementor Pro until the free widget has actually blocked something you need.
Are There Free Slider Addons Worth Trying?
If the free Image Carousel is too basic for your project, a few genuinely free addons extend it without asking for payment. The free version of Essential Addons for Elementor includes an Advanced Data widget set with extra slider options, and the free version of HappyAddons includes a slider widget with more layout choices. Both install from the WordPress plugin directory and add new widgets to the Elementor panel, so you can test them without changing your existing pages.
Before you install any addon, check three things: that it is updated regularly, that it works with your version of Elementor, and that the feature you want is actually in the free version and not locked behind a pro upgrade. Many addons advertise a slider in the free version and then show a pro badge when you try to use it. Install one addon at a time, test it on a draft page, and remove it if it slows your site or does not deliver the feature you need. For most beginners, the built in Image Carousel plus well prepared images will do the job, and an addon is only worth it when you have a specific feature in mind. You can read more about the free page builder itself at Elementor or download it from the official listing at WordPress.org.
Frequently Asked Questions
Can I add an image slider in Elementor without Pro?
Yes, the free version of Elementor includes the Image Carousel widget, which builds a working image slider with autoplay, arrows, and dots. You do not need Elementor Pro or a paid plugin for a basic photo slider. Pro adds advanced slider widgets with text layers and more effects, but the free widget covers the common cases.
How many images should I put in a slider?
Five to seven images is a good range for most sliders. Fewer than three can feel pointless, while more than ten slows the page down and most visitors will never reach the later slides. Put your strongest images first, because many visitors only see the first two or three slides.
Why is my Elementor slider not showing on the live page?
The most common causes are a caching plugin serving an old version of the page, images deleted from the media library after being added to the slider, or a JavaScript error from another plugin. Clear your cache, check that the images still exist, and confirm you clicked Update in Elementor after adding the widget.
Can I add text or a button on slider images in free Elementor?
Not directly. The free Image Carousel shows images only, with no text layer or button on each slide. A common workaround is to add the text into the image file itself before uploading, but that text will not scale well on small screens. If you need real headings and buttons on slides, use a free slider addon or upgrade to Elementor Pro.
Last updated: November 2026.