

Building a WordPress site on your own computer is one of the smartest ways to learn and experiment. Tools like XAMPP, LocalWP, and MAMP let you design pages, test plugins, and break things without any risk, because nobody else can see your work. But sooner or later, every local project reaches the same milestone: it has to go live so real visitors can find it.
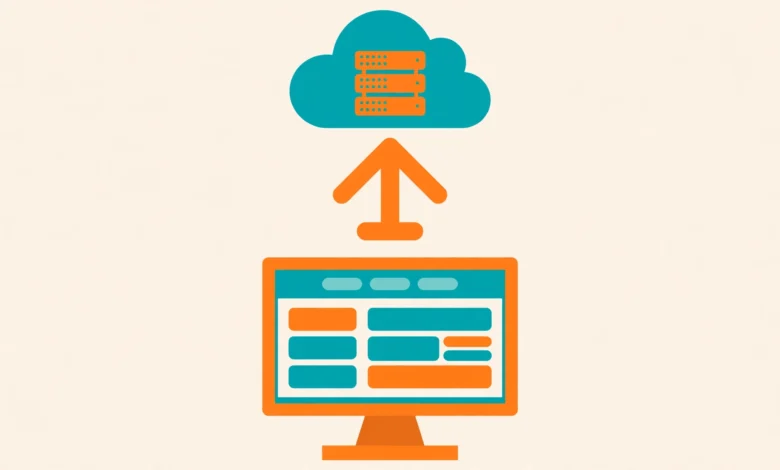
Moving a WordPress site from localhost to a live server is a sequence of small, logical steps: copy your files to the server, move your database, point WordPress at the new database, and update all the old localhost URLs. This guide shows you how to move WordPress localhost to live server manually, with no paid migration plugin required.
What Do You Need Before Moving Your Site?
Good preparation prevents most migration headaches. Before you touch anything, gather everything on this checklist so you do not get stuck halfway through the process.
- A complete backup of your local site, including both the files and the database. If anything goes wrong during the move, the backup is your safety net.
- A live hosting account with a domain name already pointed at it. If you are still deciding on a provider, read our guide on choosing the right web hosting plan for a WordPress site.
- Access to your hosting control panel (usually cPanel) so you can create a database, plus FTP or SFTP login details for uploading files.
- The exact live domain name you will use, including whether it will be the www version or the non-www version, because you will replace every localhost URL with it.
How Do You Back Up Your Local WordPress Site?
Your local site has two parts that must travel to the live server: the files and the database. The files live in your local server folder, usually something like C:/xampp/htdocs/mysite. The database holds all your posts, pages, settings, comments, and widget content.
Start with the files. Open your local server directory and copy the entire site folder to a safe place on your computer, or compress it into a ZIP file as your restore point if the upload fails midway.
Next, export the database. Open phpMyAdmin in your browser (usually at http://localhost/phpmyadmin), select your site database from the left sidebar, and click the Export tab. Choose the Quick export method with the SQL format, then click Go to download a .sql file. Save this file with your file backup. If you want a deeper walkthrough of the database side, our tutorial on how to back up your WordPress database without a plugin covers the same phpMyAdmin technique in detail.
How Do You Set Up the Live Server?
Your live server needs an empty MySQL database waiting for your local data. Log in to cPanel on your hosting account and open the MySQL Databases tool. Create a new database and give it a clear name, such as yourdomain_wp1. Hosting companies often add a prefix to database names automatically, so write down the full name exactly as cPanel shows it.
Now create a database user. Scroll to the MySQL Users section in the same tool, create a user with a strong password, and then add that user to your new database with ALL PRIVILEGES. Without full privileges, WordPress cannot read and write its tables. Save the database name, username, and password in a text file to paste into wp-config.php shortly.
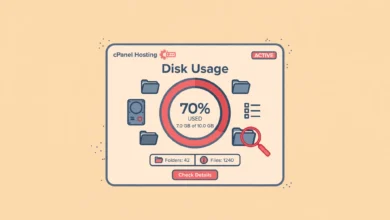
Media-heavy sites can be surprisingly large, so take a minute to check how much disk space your hosting plan offers in cPanel so the upload does not run out of room halfway through. If you prefer to test the migration before pointing your main domain at the new site, you can create a subdomain in cPanel and run the whole process there first as a safe staging area.
How Do You Upload WordPress Files to the Live Server?
With the database ready, it is time to move the files. Connect to your hosting account with an FTP client such as FileZilla, using the FTP credentials from your hosting provider. Navigate to the public_html folder, which is the web root where your live site will live.
Upload the contents of your local site folder into public_html. That means uploading wp-admin, wp-content, wp-includes, and all the individual files like index.php and wp-config.php, not the site folder itself as an extra nested directory. A common beginner mistake is uploading the whole folder, which puts the site at yourdomain.com/mysite instead of yourdomain.com. Depending on your internet speed and media library size, this can take from a few minutes to over an hour.
Once the upload finishes, open wp-config.php on the server and update the database credentials to the new live values you saved earlier:
define( 'DB_NAME', 'cpaneluser_yourdomain_wp1' );
define( 'DB_USER', 'cpaneluser_wpuser' );
define( 'DB_PASSWORD', 'your-strong-password-here' );
define( 'DB_HOST', 'localhost' );
The DB_HOST value is localhost on most shared hosting plans, but some hosts use a separate database server address. If you are unsure, check your hosting provider documentation. Save the file, and WordPress will now connect to the live database instead of your local one.
How Do You Import the Local Database on the Live Server?
Your live database is currently empty, so now you will fill it with your local data. In cPanel, open phpMyAdmin, select the new empty database you created, and click the Import tab. Choose the .sql file you exported from your local site and click Go.
When it completes, you will see the familiar WordPress tables in the sidebar. If the import fails with a file size error, your host upload limit is smaller than the SQL file. In that case, compress the file as a .zip or .gz and import the compressed version, since phpMyAdmin accepts compressed SQL dumps.
At this point, every table still contains your old localhost URLs. Do not try to visit the live site yet. The next step, updating those URLs, is the most important part of the entire migration.
How Do You Fix the Site URLs After Migration?
WordPress stores full URLs in the database: in post content, image links, widget settings, menu items, and plugin data. If you skip this step, your live site will keep loading images, stylesheets, and links from http://localhost/mysite, which means broken images and a site that only half works for visitors.
The safest manual method is the free Better Search Replace plugin. Install and activate it on the live site, then go to Tools and then Better Search Replace. Enter your old localhost URL in the Search field and your new live domain in the Replace field, for example replacing http://localhost/mysite with https://yourdomain.com. Select all tables, uncheck the dry run option after a test run, and click Run Search/Replace. The plugin correctly handles serialized data, which is data stored in a special encoded format by themes and page builders. Never edit the SQL file with a plain text editor for URL changes, because that breaks serialized data.
If you have SSH access and prefer the command line, WP-CLI does the same job in seconds:
wp search-replace 'http://localhost/mysite' 'https://yourdomain.com' --all-tablesDo a trial run first to preview how many replacements will happen before committing to the change. For the full technical background on this process, the official guide at wordpress.org on moving WordPress is the authoritative reference.
What File Permissions Should You Set?
After uploading via FTP, file permissions are usually correct, but it is worth verifying. The standard secure setup for WordPress is 755 for all folders, 644 for all files, and 600 or 640 for wp-config.php so that other users on the server cannot read your database password.
In FileZilla, right click a folder, choose File permissions, and apply the values recursively. If you see 403 Forbidden errors or cannot upload media right after migration, permissions are the first thing to check.
How Do You Fix Common Problems After Moving to Live?
Here are the issues that appear most often after a migration, and how to resolve each one.
Why are images broken or loading over HTTP?
This is mixed content: the page loads over HTTPS but images or scripts still point to HTTP or localhost URLs. Run the search and replace step again, replacing both the localhost URL and any http:// version of the live domain with the https:// version. Browsers block mixed content, so this fix is essential.
Why does the site look broken but the homepage works?
This usually means permalinks need refreshing. Go to Settings and then Permalinks and click Save Changes without changing anything to regenerate the rewrite rules. Also clear any caching plugin data left over from the local environment.
Why do Elementor pages look wrong after migration?
Elementor stores absolute URLs and compiled CSS files that reference the old domain. After running search and replace, go to Elementor and then Tools, click Regenerate Files and Data, then Sync Library. This rebuilds the CSS with the correct live URLs.
Why do I see a database connection error?
The error establishing a database connection message almost always means the credentials in wp-config.php do not match the live database. Reopen the file and compare the DB_NAME, DB_USER, DB_PASSWORD, and DB_HOST values character by character with what cPanel shows, remembering that many hosts prefix names with your cPanel username.
What Should You Test Before Announcing the Site Is Live?
Walk through the site as a first time visitor: submit every contact form and confirm the emails arrive, click through the main navigation, and check the site on a phone as well as a desktop. Verify that your SSL certificate is active by loading the site with https:// and looking for the padlock icon, then force all traffic to HTTPS.
Update anything that pointed at the local environment: analytics properties, sitemap URLs, and API keys restricted to localhost. Set up automated backups on the live server from day one. Our WordPress website launch checklist covers these final verification steps in full, so run through it before you share the site publicly.
Frequently Asked Questions
How long does it take to move WordPress from localhost to a live server?
For a typical small site, the process takes 30 to 60 minutes, with the file upload being the slowest part. Large sites with gigabytes of uploads can take several hours, so use a stable connection and plan accordingly.
Can I move my local WordPress site to live without a plugin?
Yes, and this guide shows you exactly how. The manual method uses phpMyAdmin and FTP, both free and available on almost every hosting plan. The only plugin mentioned, Better Search Replace, is free and only needed for the URL replacement step. You can remove it afterward if you prefer a plugin free site.
Will moving from localhost to live affect my SEO?
The move itself does not hurt SEO, because search engines never indexed your localhost site. What matters is the live setup: use HTTPS, submit the new sitemap to Search Console, remove all leftover localhost URLs, and verify your SEO plugin settings carried over.
What is the biggest mistake people make during this migration?
Forgetting to update URLs inside the database. Everything looks fine at first glance, but images, internal links, and stylesheets silently point back to localhost, which visitors cannot reach. Always run a proper search and replace across all tables, and never try to fix URLs by editing the SQL file in a text editor, because that corrupts serialized data. You can learn more about the plugin method on the Better Search Replace plugin page.
Last updated: October 2026.