

You spent an evening customizing your theme. You tweaked the stylesheet, adjusted a template file, added a clever little function. Then the theme released an update, you clicked the button, and every single change vanished into thin air. If that story sounds familiar, you have learned the hard way why WordPress has child themes.
A child theme is a safe home for all your customizations. It inherits everything from the parent theme, and when the parent updates, your changes stay exactly where you left them. Creating one takes about ten minutes, needs no plugin, and involves just a folder and two small files. This guide walks you through each step, including the one line that most beginners get wrong.
What is a WordPress child theme?
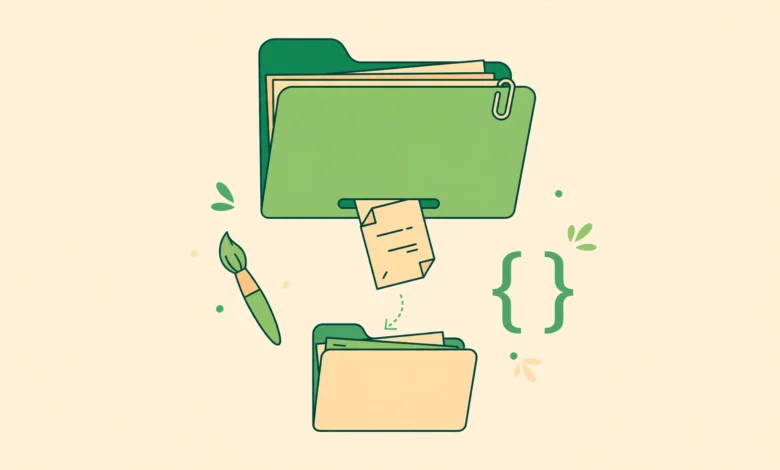
A child theme is a theme that borrows everything from another theme, called the parent theme. It uses the parent’s layout, functions, and template files by default, and it only overrides the specific parts you choose to change. Your custom stylesheet rules, your extra functions, and your modified templates live in the child theme’s own folder, completely separate from the parent’s files.
When the parent theme updates, WordPress replaces only the parent’s files. Your child theme folder is never touched, so your customizations survive every update without any extra effort. Think of it as a transparent layer over the parent: you paint only on your own layer, and the parent can be replaced underneath without disturbing your work.
When do you actually need a child theme?
Not every customization needs one, so here is an honest breakdown to help you decide:
- You edit PHP template files. If you ever open single.php, header.php, or functions.php in the theme file editor, you need a child theme. There is no debate here. Those edits will be wiped out by the next update.
- You add custom PHP functions. Snippets that add new features belong in the child’s functions.php, never in the parent’s copy.
- You make extensive CSS changes. A few rules can live in the Customizer, but a heavily restyled site deserves a proper stylesheet in a child theme. If you are only adding CSS, first look at the proper ways to add custom CSS to WordPress to see which method fits your situation.
- You do NOT need one for settings, widgets, menus, or Customizer options. Those live in the database, not in theme files, so they survive theme updates entirely on their own.
What you need before you start
- The parent theme’s exact folder name. Look inside wp-content/themes using File Manager or FTP. The folder name, with its exact capitalization, is what the child theme must reference in its header. This is the step where most mistakes happen, so copy it carefully.
- File access. You need FTP or your host’s File Manager to create one folder and two small text files.
- A plain text editor. Notepad, VS Code, or the editor built into File Manager all work fine. Do not use Word or Google Docs, which add hidden formatting.
Step 1: Create the child theme folder
Inside wp-content/themes, create a new folder for your child theme. The standard convention is the parent folder name plus -child, so a parent called twentytwentyfive gets a child folder called twentytwentyfive-child. Use lowercase letters and no spaces.
Step 2: Create style.css with the theme header
Inside your new folder, create a file named style.css. At the very top of the file, paste the theme header comment. This header is how WordPress recognizes the folder as a child theme and learns which parent theme it belongs to:
/*
Theme Name: Twenty Twenty-Five Child
Theme URI: https://example.com/
Description: Child theme of Twenty Twenty-Five for my customizations
Author: Your Name
Author URI: https://example.com/
Template: twentytwentyfive
Version: 1.0.0
*/
The Template line is the critical one: it must match the parent theme’s folder name exactly, character for character. Write TwentyTwentyFive instead of twentytwentyfive and WordPress will report a broken theme. Everything below the header comment is your own CSS, so add your custom rules there as normal.
Step 3: Create functions.php to load the parent stylesheet
Every child theme needs a functions.php file. Unlike style.css, the child’s functions.php does not replace the parent’s file. WordPress loads both of them, the child’s first and then the parent’s, so you only ever add your own code here and never copy the parent’s code into it.
The first job of this file is to load the parent theme’s stylesheet the modern way, using wp_enqueue_style:
<?php
add_action( 'wp_enqueue_scripts', 'mychild_enqueue_parent_styles' );
function mychild_enqueue_parent_styles() {
    wp_enqueue_style( 'parent-style', get_template_directory_uri() . '/style.css' );
    wp_enqueue_style( 'child-style', get_stylesheet_uri(), array( 'parent-style' ), wp_get_theme()->get( 'Version' ) );
}
In short: get_template_directory_uri points to the parent theme, get_stylesheet_uri points to the child’s style.css, and listing parent-style as a dependency makes your rules load after the parent’s so they can override them.
You will find old tutorials telling you to load the parent stylesheet with @import inside style.css instead. Do not follow them. The @import method is slower because stylesheets load one after another instead of in parallel, and WordPress has recommended the enqueue approach for many years now.
Step 4: Activate the child theme
Go to Appearance and then Themes in your WordPress dashboard. If you are still learning your way around the admin area, our WordPress dashboard guide walks through every menu in plain language. You should see your child theme listed alongside the parent, usually with a placeholder screenshot since you have not added a custom one yet.
Click Activate, then visit your site. It should look exactly the same as with the parent theme active, because the child currently changes nothing. That identical look is the success signal: the inheritance chain is working.
If the site appears completely unstyled, go back and recheck two things: the Template name in style.css and the enqueue code in functions.php. In almost every case, one of them has a small typo.
Step 5: Override a template file
This is where the child theme earns its keep. Suppose you want to change how single blog posts look. Copy single.php from the parent theme’s folder into your child theme’s folder, keeping the exact same filename, then edit the copy freely. WordPress always checks the child theme first when loading a template, a behavior documented in the template hierarchy handbook, so your version wins and the parent’s original stays untouched.
The same rule applies to any template file: header.php, footer.php, page.php, archive.php. Copy it into the child, edit the copy, and never touch the parent’s original. When the parent updates, your customized copy keeps working, because updates never reach into the child folder.
Small branding tweaks make a perfect first project here. Many beginners create their first child theme just to restyle the header or adjust how the site title and tagline display, and a template override plus a few CSS rules is all it takes.
What about block themes and theme.json?
If you use a block theme such as Twenty Twenty-Four or Twenty Twenty-Five, child themes work the same way at the file level: a folder, a style.css with the Template header, and activation through the Themes screen. The difference is that block themes store most of their design decisions in theme.json instead of in PHP templates and style.css.
To customize a block theme, add your own theme.json to the child folder with only the settings you want to change, such as brand colors or font sizes. WordPress merges it with the parent’s file automatically. For PHP customizations, the Step 5 template override technique still applies inside the templates folder.
Common mistakes to avoid
- Wrong Template name. The number one error by far. The value must match the parent folder exactly, including lowercase letters and hyphens. The “parent theme is missing” error always means this line is wrong.
- Editing the parent’s files anyway. After creating the child theme, always edit the child’s copies and never the parent’s originals, or you are back to losing work on update day.
- Forgetting to enqueue the parent styles. A child theme with only style.css and no functions.php often produces a completely unstyled site, because nothing told WordPress to load the parent’s stylesheet.
- Using @import for the parent stylesheet. It technically works, but it is slower and outdated. Use the enqueue snippet from Step 3 instead.
- Copying the parent’s functions.php into the child. This causes fatal errors from duplicate function names. The child’s functions.php should contain only your own additions.
- Naming the folder with spaces or capitals. Stick to lowercase letters, numbers, and hyphens to avoid path problems on some servers.
Frequently asked questions
Do I need a child theme if I only use the Customizer?
No. CSS added through Appearance, then Customize, then Additional CSS is stored in the database, so it survives theme updates on its own. You need a child theme when you touch PHP files or want your CSS in a proper stylesheet.
Will a child theme slow down my website?
No, not in any measurable way. WordPress simply checks the child folder first when loading each file, which is a trivial lookup. Your site’s speed depends on your hosting, your caching setup, and your image sizes, not on whether a child theme is active.
Can I use a child theme with Elementor or other page builders?
Yes. Page builders operate on top of the active theme, and a child theme is a fully valid active theme. Many Elementor users keep a child theme precisely for the custom functions and extra CSS that the builder itself does not cover.
What happens to my child theme when the parent theme updates?
Nothing at all. Updates replace only the parent theme’s folder, while your child theme folder is left completely alone. That separation is the entire point, and it is why professionals never edit parent themes directly.
Last updated: October 2026.