

If your visitors already chat with you on WhatsApp, why force them through a contact form they will abandon? A floating WhatsApp chat button lets anyone start a conversation with one tap, and you can build it without installing yet another plugin. Most chat-button plugins are bloated: they load extra JavaScript on every page, slow down your site, and show nagging upsells in your dashboard. The no-plugin approach uses WhatsApp’s official wa.me link format plus a tiny HTML and CSS snippet you add yourself. It takes about ten minutes, adds almost zero weight to your site, and you keep full control over how the button looks and where it appears.
How Does the wa.me Link Work?
WhatsApp provides an official click-to-chat feature: a link in the format https://wa.me/<number> opens a chat with that phone number. The number must be in international format without the plus sign, spaces, or dashes. So if your business number is +92 300 1234567, the link becomes https://wa.me/923001234567. Tapping it opens WhatsApp on phones, or WhatsApp Web on desktops if the app is not installed.
You can also pre-fill the message box so visitors do not stare at a blank chat. Add ?text= with URL-encoded text at the end:
https://wa.me/923001234567?text=Hi%2C%20I%20want%20to%20ask%20about%20your%20servicesHere, %20 stands for a space and %2C for a comma. The visitor can edit or delete this text before sending, so keep it short and friendly. This link format is documented in the official WhatsApp FAQ on click-to-chat, which is the authoritative reference if the format ever changes.
Step 1: Create Your WhatsApp Link
Before writing any code, prepare the link. Take your business WhatsApp number, drop the plus sign and any spaces or dashes, and add the country code. Pakistani numbers become 92 followed by the 10 digits, for example 923001234567. Add a pre-filled message that matches your site’s purpose: a store might use “Hi, I have a question about an order”, while a services site might use “Hi, I would like a quote”. Test the full link in your own browser first and confirm it opens your WhatsApp chat correctly.
Step 2: Add the Floating Button Without a Plugin
There are two parts: the button HTML and the styling CSS. If you have never added code to your site, the approach in our guide on making site changes without a plugin covers the same safe workflow you will use here.
Add the Button HTML
The button needs to appear on every page, so the best home for it is your theme’s footer area or a site-wide widget. The simplest reliable method is the Customizer’s footer text field, or a Custom HTML widget placed in the footer. Alternatively, use the free Code Snippets plugin to add it to the wp_footer hook, which works with any theme. Paste this HTML, replacing the number and message with your own:
<a href="https://wa.me/923001234567?text=Hi%2C%20I%20have%20a%20question" class="vtg-whatsapp-btn" target="_blank" rel="noopener" aria-label="Chat on WhatsApp">
  <svg viewBox="0 0 32 32" width="32" height="32" fill="#ffffff"><path d="M16 3C8.8 3 3 8.8 3 16c0 2.3.6 4.5 1.7 6.5L3 29l6.7-1.6C11.6 28.5 13.7 29 16 29c7.2 0 13-5.8 13-13S23.2 3 16 3zm5.9 17.6c-.3.7-1.5 1.4-2.1 1.4-.5.1-1.1.2-3.6-.8-3-1.2-5-4.3-5.1-4.5-.2-.2-1.3-1.7-1.3-3.3 0-1.6.8-2.3 1.1-2.6.3-.3.7-.4 1-.4h.7c.2 0 .5 0 .8.6l1.1 2.7c.1.2.1.4 0 .6l-.5.7-.6.6c-.2.2-.4.5-.2.8.2.4.9 1.5 2 2.4 1.4 1.2 2.5 1.6 2.9 1.8.4.2.6.1.8-.1l1.1-1.3c.2-.3.5-.2.8-.1l2.6 1.2c.4.2.6.3.7.4.1.2.1.7-.2 1.4z"/></svg>
</a>
The SVG icon keeps the button sharp on all screens without loading an image file, and the aria-label keeps it accessible for screen readers. Using an icon instead of an emoji also looks far more professional.
Add the Styling CSS
Now style it into the familiar green circle pinned to the bottom-right corner. Go to Appearance and click Customize, then open Additional CSS and paste this:
.vtg-whatsapp-btn {
    position: fixed;
    bottom: 25px;
    right: 25px;
    width: 60px;
    height: 60px;
    background-color: #25D366;
    border-radius: 50%;
    display: flex;
    align-items: center;
    justify-content: center;
    box-shadow: 0 4px 12px rgba(0, 0, 0, 0.25);
    z-index: 9999;
    transition: transform 0.2s ease;
}

.vtg-whatsapp-btn:hover {
    transform: scale(1.08);
}
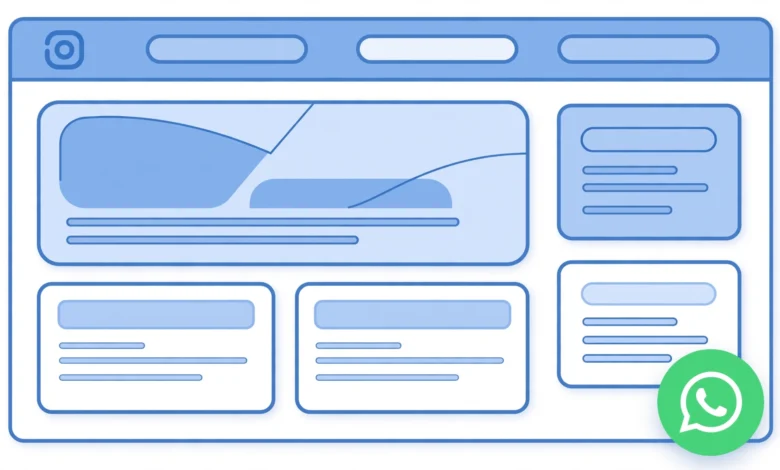
Click Publish in the Customizer and open your site. The green button should now float in the bottom-right corner on every page, following visitors as they scroll. This same CSS workflow works for other no-plugin tweaks, like the snippet in our guide on limiting login attempts without a plugin.
How Do You Style and Position the Button?
Once the basics work, adjust the button to fit your design. Here are the most useful tweaks.
- Move it to the left: change
right: 25px;toleft: 25px;and remove the right line. - Make it bigger or smaller: change the
widthandheightvalues together so it stays a perfect circle. - Adjust the distance from the edge: increase
bottomandrightto push it further in, or lower them to bring it closer to the corner. - Add a tooltip label: many sites show a small “Chat with us” bubble next to the button. Add a
spaninside the link with its own styling if you want this extra touch.
If your button overlaps a cookie banner or a back-to-top button, change the z-index value or shift the bottom distance until they no longer collide. On mobile, test on a real phone: the button should not cover your call-to-action buttons or the mobile menu.
Can You Show the Button on Some Pages Only?
Sometimes you want the button everywhere except certain pages, like the checkout page where it could distract from payment. The easiest way is a small CSS rule scoped to the page. WordPress adds a unique class to the body tag of every page, such as page-id-42. Find it by viewing the page source, then add a rule like this to Additional CSS:
body.page-id-42 .vtg-whatsapp-btn {
    display: none;
}
Replace 42 with the real page ID. For the opposite case, showing the button only on the contact page, hide it globally with display: none on .vtg-whatsapp-btn and re-enable it with display: flex inside the body.page-id-XX rule. If you are redesigning your layout around this, our tutorial on editing headers with Elementor Free shows how placement decisions work in a page-builder workflow.
Common Mistakes to Avoid
- Wrong number format: the number must include the country code and no plus sign, spaces, or dashes.
wa.me/03001234567fails;wa.me/923001234567works. - Unencoded pre-filled text: spaces and punctuation in the
?text=part must be URL-encoded, or the link breaks on some phones. Use an online URL encoder if you are unsure. - Using a personal number for business: visitors will see your profile photo and “last seen” status. Use WhatsApp Business with a business profile instead; it also gives you greeting messages and quick replies for free.
- Installing a heavy chat plugin anyway: every extra plugin adds update burden and page weight. This snippet does the job with a few lines of code, which is the whole point.
For background on why keeping plugins lean matters, the official WordPress plugin management guide explains the performance and security trade-offs of adding more plugins to your site.
Frequently Asked Questions
Does the visitor need WhatsApp installed for the button to work?
On phones, tapping the button opens the WhatsApp app. On desktops without the app, it opens WhatsApp Web in the browser, so visitors can still chat as long as they have a WhatsApp account.
Can I track clicks on the WhatsApp button in Google Analytics?
Yes. Add an onclick event to the link that fires a Google Analytics event before the chat opens. Because you control the HTML directly, this is a one-line addition with no plugin settings involved.
Will this button slow down my website?
Practically not at all. The snippet is a few lines of HTML and CSS with an inline SVG icon, adding no extra requests, scripts, or images. That is exactly why the no-plugin approach beats installing a chat plugin.
Can I use a WhatsApp Business number with this button?
Yes, and you should. WhatsApp Business numbers work with the same wa.me format, and visitors get your business profile, greeting message, and quick replies automatically.
Last updated: October 2026.