A good pricing table can make or break a sales page. Visitors compare plans side by side, look for the option that fits their budget, and click the plan that feels right. Elementor users often search for a Price Table widget, only to discover that it is locked behind Elementor Pro. That discovery is frustrating, but it does not mean you cannot build a professional pricing table with the free version. You just need a different method.
This guide shows you how to create a pricing table in Elementor free version, honestly and practically. You will learn why the dedicated widget is Pro only, how to build a clean three column table using free columns and content widgets, how to use a free addon widget if you want a faster route, how to highlight the middle plan, how to make the table stack neatly on mobile, and how to design call to action buttons that actually get clicked.
Is the Price Table Widget Available in Elementor Free?
No, the Price Table widget is an Elementor Pro widget, and it does not appear in the free version widget panel. This is a common point of confusion, because many tutorials show the widget without clearly saying it requires Pro. If you search your free Elementor panel for Price Table and find nothing, your installation is not broken. The widget is simply not included in the free plan.
That limitation does not block you. A pricing table is, at its core, a layout problem: columns side by side, each containing a plan name, a price, a feature list, and a button. Free Elementor gives you every building block needed for that layout, including columns or containers, headings, text, lists, dividers, and buttons. You assemble those blocks by hand, which takes a little longer than dropping in a ready made widget, but gives you full control over spacing, colours, and styling.
Which Free Method Should I Choose?
You have two solid free routes, and the right one depends on how much control you want and how comfortable you are installing an addon. The first route uses only free Elementor itself, with columns and basic widgets. The second route uses a free addon plugin, such as Essential Addons for Elementor, which adds a pricing table widget to the free version. Both routes produce a good result, so choose based on your preferences, not on a claim that one is the only correct way.
- Free Elementor only: maximum control, no extra plugin, more manual styling work, best for simple three plan tables.
- Free addon widget: faster setup, preset pricing layouts, one extra plugin to maintain, best if you want several styled tables quickly.
- What to avoid: installing three different addon plugins just for pricing tables, which bloats your site for a single layout need.
How Do I Plan the Pricing Table Before Building It?
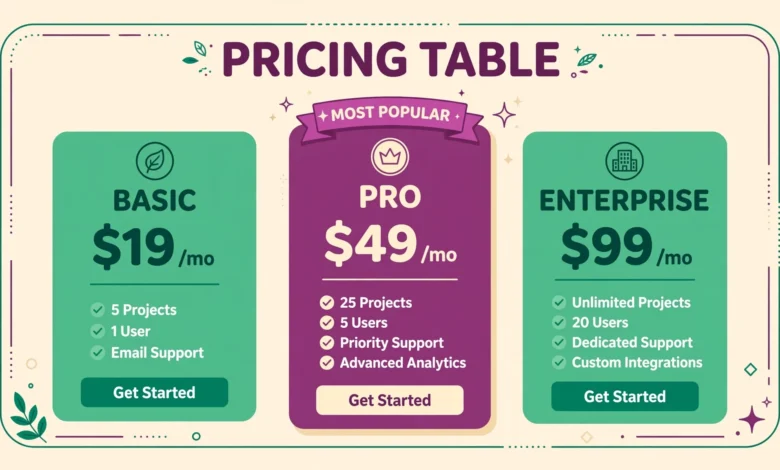
Good pricing tables are planned on paper before they are built in Elementor. Decide your plans first, because layout decisions follow from content, not the other way around. Most small businesses do well with three plans: a starter plan, a popular middle plan, and a premium plan. Three plans give visitors a clear choice without overwhelming them. Two plans can work for a simple service, while four or more plans usually make comparison harder, especially on mobile.
For each plan, write down four things: the plan name, the price and billing period, a short one line description of who the plan is for, and a feature list of five to seven items. Keep feature lists parallel across plans, meaning the same features appear in the same order where possible, with check marks for included features and a muted style for excluded ones. Parallel lists make comparison instant, while random lists force visitors to hunt for differences.
How Do I Build a Three Column Pricing Table in Free Elementor?
Start by opening the page in Elementor and adding a section or container for the table. In older Elementor versions, you add a three column section. In newer versions using containers, you add a container with three child containers inside it, each set to one third width. If containers feel unfamiliar, our guide on Elementor containers versus sections explains the difference and when to use each approach.
- Add a new section or container to your page, and set it to three columns of equal width.
- In each column, add a Heading widget for the plan name, such as Starter, Growth, or Business.
- Below the name, add a short Text Editor widget with one line describing who the plan suits.
- Add a Heading or Text Editor widget for the price, with the currency symbol, amount, and billing period clearly shown.
- Add a Divider widget to separate the price from the feature list visually.
- Add an Icon List widget for features, with check icons for included features and a muted style for excluded ones.
- Add a Button widget at the bottom of each column, linked to your checkout, contact, or signup page.
Build the first column completely, style it to your liking, then duplicate it twice and edit the text for the other plans. Duplicating saves time and keeps spacing consistent, which is the hardest part of a manual build. After duplicating, change only the plan specific content: name, description, price, feature ticks, and button link. Do not restyle each column from scratch, or small inconsistencies will creep in and the table will look uneven.
How Do I Highlight the Middle Plan?
Highlighting the middle plan is a styling job, not a separate widget. Select the middle column or container, open its Style settings, and give it a distinct background colour, a stronger border, or a subtle shadow that lifts it above the other columns. A light tint of your brand colour for the background, plus a coloured top border, is usually enough. Avoid garish effects that make the table look like an advertisement rather than a comparison.
Add a badge above the middle plan using a small Heading or Text Editor widget with a contrasting background, for example a pill shaped label that says Most Popular. Keep the badge text short and honest: only label a plan Most Popular if it genuinely is your recommended or best selling plan. Misleading badges erode trust, and visitors who feel manipulated are less likely to buy, not more.
Can I Use a Free Addon Widget Instead?
Yes, and for many users this is the faster route. Free addon plugins for Elementor, such as Essential Addons, include pricing table widgets that work with free Elementor. After installing and activating the addon, a new pricing widget appears in your Elementor panel, often with several preset styles. You drag it onto the page, fill in plan details through its settings, and style it from one panel, rather than assembling headings, lists, and buttons separately.
Before installing any addon, check three things: that it is actively maintained and compatible with your WordPress and Elementor versions, that it does not slow your site noticeably, and that you actually need more than one of its widgets. Installing a large addon for a single pricing table is acceptable if you plan to use its other widgets too, but it is wasteful if the addon will sit unused for everything else. Our guide on how to edit a header in Elementor free version covers similar free version workarounds that help you judge when an addon is worth it.
How Do I Make the Table Stack Well on Mobile?
Mobile stacking is where many pricing tables fail. On desktop, three columns side by side look great. On a phone, those same columns must stack vertically, one plan on top of the next, or the text becomes unreadably small. Free Elementor handles this automatically in most cases: columns stack on mobile by default. Your job is to verify the stacked result and adjust spacing so it reads well.
- Switch to mobile view in Elementor and scroll through all three stacked plans in order.
- Check that the highlighted middle plan still reads clearly when stacked, and that its badge does not overlap neighbouring content.
- Reduce column padding on mobile if the stacked plans feel cramped or overly tall.
- Make buttons full width on mobile, so they are easy to tap with a thumb.
- Shorten feature lists if a stacked plan becomes excessively long, since mobile visitors scroll less patiently.
Test on a real phone, not only in the Elementor preview, because preview widths do not always match real devices. Open the live page on your phone, tap each button to confirm the link works, and check that no text overflows its column. This two minute check catches most mobile issues before visitors do. For other free Elementor layouts, our guide on how to add an image gallery in Elementor free version shows a similar mobile checking routine.
How Should I Design Pricing Buttons That Get Clicked?
Buttons are the point of the whole table, so design them deliberately. Use action oriented button text that matches the next step, such as Start Free Trial, Choose Growth, or Contact Sales, rather than a vague Learn More on every plan. Different button text per plan also helps you track which plan attracts clicks, if you later review button performance.
Finally, link each button to the correct destination and test every link. A pricing button that leads to a broken page or to the wrong plan checkout loses a sale at the exact moment a visitor decided to buy. If a plan requires contacting you first, link to a contact form with the plan name preselected or mentioned, so the visitor does not have to explain which plan they chose. For official Elementor resources, see Elementor.com.
Frequently Asked Questions
Can I create a pricing table in Elementor free version?
Yes. The dedicated Price Table widget is Pro only, but you can build a full pricing table with free Elementor using columns, headings, text, icon lists, and buttons. Alternatively, a free addon such as Essential Addons adds a pricing table widget that works with free Elementor.
Why is the Price Table widget missing from my Elementor panel?
It is missing because it is an Elementor Pro widget and is not included in the free version. Your installation is working correctly. Use the manual column build in this guide, or install a free addon that provides a pricing widget, instead of searching for a widget that free Elementor does not contain.
How many plans should a pricing table have?
Three plans work best for most small businesses: a starter plan, a popular middle plan, and a premium plan. Three choices are easy to compare without overwhelming visitors. Highlight only the middle plan, keep feature lists parallel, and keep descriptions short so prices and buttons align across columns.
Will my pricing table work on mobile phones?
Yes, if you check the mobile view. Free Elementor columns stack vertically on mobile by default, so each plan appears one after another. Verify the stacked order, reduce padding if needed, make buttons full width for easy tapping, and test the live page on a real phone before publishing.
Last updated: November 2026.