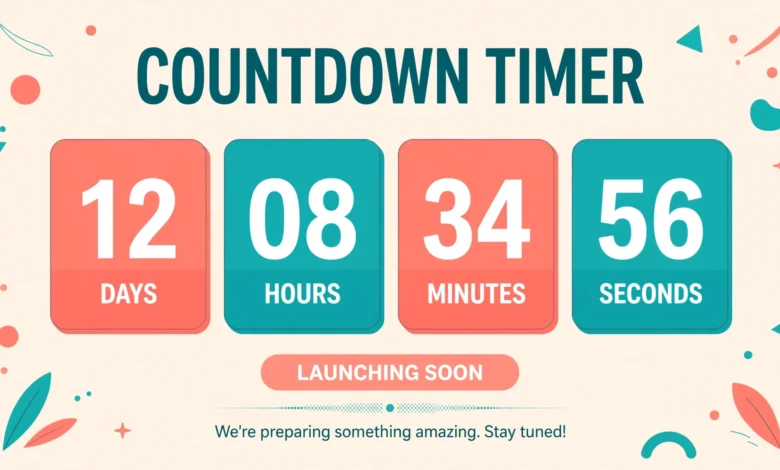
A countdown timer is one of the simplest ways to make a landing page feel urgent. It works for a sale ending soon, a course launch, a webinar, or an event registration deadline. Visitors see time slipping away, and that visible deadline often pushes them to act instead of leaving the page open for later. If you build pages with Elementor Free, though, you will quickly hit a wall: the Countdown widget is a Pro feature, and it does not appear in the free version at all.
The good news is that you do not need to upgrade to Pro just for a timer. You can add a countdown timer in Elementor Free with two practical workarounds. The first uses a free countdown plugin and embeds its output in your page. The second uses a small piece of custom HTML and JavaScript inside an Elementor HTML widget. Both methods are free, both work on a normal WordPress site, and both let you control what happens when the timer reaches zero.
Why Is the Countdown Widget Missing from Elementor Free?
Elementor splits its widgets between the free plugin and the paid Pro version. Basic building blocks such as headings, images, buttons, and text editors are free. More advanced marketing widgets, including forms with extra fields, popups, and the Countdown widget, are reserved for Pro. This is a deliberate product decision, not a bug, so reinstalling Elementor or clearing your cache will not make the widget appear. If you compare the two versions side by side, our guide on Elementor Free vs Pro explains which widgets are locked and whether an upgrade is worth it for your site.
Knowing this saves you a lot of wasted searching. Instead of hunting for a hidden setting, you can pick one of the two free routes below. The plugin route is easier if you dislike code. The custom code route gives you full control over the design and behaviour, and it adds no extra plugin to maintain. For most simple sale or launch timers, either route is fine, so choose the one that matches your comfort level.
Method 1: How Do You Add a Countdown Timer with a Free Plugin?
The plugin route is the fastest way to get a timer on the page. WordPress has several free countdown plugins, and most of them work the same way: you create a timer in the plugin settings, and the plugin gives you a shortcode to place anywhere on your site. Elementor Free can display that shortcode, so the timer appears exactly where you want it in your layout. The official plugin directory at wordpress.org is the safest place to find one, since every listing there shows its last update date, ratings, and active install count.
- Go to Plugins, then Add New, and search for a countdown timer plugin with recent updates and good ratings.
- Install and activate the plugin, then open its settings or timer creation screen.
- Set the target date and time for your sale, launch, or event, and pick a display style.
- Copy the shortcode the plugin generates for your timer.
- Open your page in Elementor, drag a Shortcode widget to the right section, and paste the shortcode into it.
- Update the page and check the timer on the live page, not just inside the editor.
The main advantage of this method is the settings panel. You can usually change colours, labels, and the end action without touching code, and some plugins let you schedule recurring timers or show different timers on different pages. The trade off is dependence on a third party plugin. If the plugin is abandoned or conflicts with another plugin, your timer can break, so pick a plugin that was updated recently and test it after every major WordPress update. Keep the number of extra plugins low, because each one adds a little load to your pages.
One practical tip: build the section around the timer before you paste the shortcode. Add a heading such as “Sale ends in”, a button below the timer, and a short line of supporting text. A timer floating alone on a blank section looks unfinished, while a timer inside a clear offer section tells visitors exactly what to do next. If your landing page also collects leads, you can pair the timer with a form, as explained in our guide on how to add a contact form in Elementor.
Method 2: How Do You Build a Custom Countdown with HTML and JavaScript?
If you prefer full control and zero extra plugins, the custom code route is the better choice. Elementor Free includes an HTML widget, and that widget accepts ordinary HTML, CSS, and JavaScript. You paste a small snippet into it, set your target date inside the code, and the timer counts down live on the page. The snippet below shows a simple version. Paste it into an HTML widget, then change the date in the first line to your own deadline.
<div id="countdown" style="font-size:32px;font-weight:bold;text-align:center;"></div>
<script>
const target=new Date("2026-12-25T00:00:00+05:00").getTime();
function updateTimer(){
const now=new Date().getTime();
const diff=target-now;
if(diff<=0){document.getElementById("countdown").innerHTML="Sale ended";return;}
const days=Math.floor(diff/(1000*60*60*24));
const hours=Math.floor((diff%(1000*60*60*24))/(1000*60*60));
const mins=Math.floor((diff%(1000*60*60))/(1000*60));
const secs=Math.floor((diff%(1000*60))/1000);
document.getElementById("countdown").innerHTML=days+"d "+hours+"h "+mins+"m "+secs+"s";
}
setInterval(updateTimer,1000);
updateTimer();
</script>
Here is what each part does. The first line creates an empty container on the page where the numbers will appear. The target line sets the deadline, and the rest of the script works out the remaining days, hours, minutes, and seconds, then writes them into the container once every second. The final two lines start the repeating update and run it once immediately, so visitors never see a blank timer while the page loads. You can change the “Sale ended” text to anything that fits your offer, such as “Registration closed” or “Offer expired”.
The timezone part of the target date deserves attention. The example uses +05:00, which is Pakistan Standard Time. If most of your visitors are in another timezone, change that offset to match your audience, or use a UTC time with a Z at the end, such as 2026-12-25T00:00:00Z. Without an explicit timezone, browsers may interpret the date in the visitor’s local time, which means the timer can end at a different moment for different people. For a sale or a launch, that inconsistency can cause complaints, so always set the timezone deliberately and test the timer in a second browser with a different system timezone if you can.
How Do You Style the Timer So It Matches Your Page?
A plain number string works, but a styled timer converts better because it looks like part of the offer instead of an afterthought. With the plugin route, use the plugin’s own colour and font settings first. With the custom code route, you can wrap each unit in its own box with a little CSS, giving days, hours, minutes, and seconds separate backgrounds and labels.
- Use large, bold numbers with small labels underneath, such as Days, Hours, Minutes, and Seconds.
- Give each unit its own box with padding and a subtle background so the timer reads at a glance.
- Keep contrast high: dark numbers on a light background, or white numbers on a dark offer banner.
- Test on a phone, since a four unit timer that fits on desktop can overflow on a narrow screen.
- Place the timer near the call to action button, not far above or below it.
Responsive behaviour is the part most people forget. On mobile, four wide boxes in a row can overflow the screen or shrink the text until it is unreadable. A simple fix is to let the boxes wrap into two rows on small screens, or to reduce the font size slightly with a media query. Page speed matters here too: a timer should never slow down a landing page, and a lightweight host helps, which is one reason our web hosting guide covers speed alongside price.
What Should Happen When the Timer Reaches Zero?
A timer that simply stops at zero wastes the urgency it created. Decide the end action before you publish. The simplest option is a message swap: when the countdown finishes, the timer text changes to “Sale ended” or “Registration closed”. A stronger option is to also change the offer below the timer, for example by replacing the discount button with a regular price button. Most countdown plugins offer an end action setting for this.
Where Does a Countdown Timer Work Best?
Countdown timers work best where a real deadline already exists. A seasonal sale, a course enrolment window, a webinar with limited seats, an event registration cutoff, or a product launch are all natural fits. In each case the timer simply makes an existing deadline visible, which is why visitors accept it. The timer works less well on ordinary blog posts or service pages with no real deadline, because there is nothing for the visitor to miss out on, and a forced timer there feels like a gimmick. Use timers sparingly as well: one timer per page is plenty, and a page covered in flashing countdowns looks desperate rather than urgent.
Why Is Your Timer Showing the Wrong Time?
Wrong times are the most common timer complaint, and the causes are usually simple. The first suspect is the timezone in your target date, as explained above. The second is caching: a cached page can serve an old timer state, or a caching plugin can delay the JavaScript, so clear your site cache and your browser cache after changing the date, and test in a private browser window. The third suspect is a conflicting plugin or theme script that stops the timer code from running; if the timer shows nothing at all, temporarily switch to a default theme or disable other plugins on a staging copy to isolate the conflict.
- Timer ends early or late: check the timezone offset in the target date.
- Timer shows an old date: clear the site cache, the CDN cache, and the browser cache.
- Timer shows nothing: check the browser console for JavaScript errors from other plugins.
- Timer works in the editor but not live: update the page and test the published URL directly.
- Timer resets on reload: you used a relative countdown instead of a fixed target date.
Frequently Asked Questions
Is the Countdown widget free in Elementor?
No. The Countdown widget is part of Elementor Pro, so it does not appear in the free version. The two workarounds in this guide, a free countdown plugin with a shortcode and a custom HTML and JavaScript snippet, give you the same result without upgrading.
Will a custom countdown timer slow down my site?
No, not in any meaningful way. The snippet in this guide is tiny and updates once per second in the browser, so it adds almost nothing to page load. A heavy countdown plugin with extra styles and scripts can add more weight, which is why the custom code route is the lighter option if you only need a simple timer.
Can I use a countdown timer for an evergreen offer?
You can, but a fixed timer is the honest choice. Set a real end date for each promotion and update it when the promotion changes, instead of using a timer that restarts for every visitor. Visitors trust a deadline they can verify, and a resetting timer can damage that trust once it is noticed.
Why does my timer show a different time on my phone?
Your phone and your computer may be set to different timezones, or your target date may lack an explicit timezone offset. Add the correct offset to the target date, clear the cache on both devices, and test again. If the timer still differs, check whether a caching plugin is serving a stale copy of the page to mobile visitors.
Last updated: November 2026.