Every commenter on your WordPress site gets a small picture next to their name, and when they have not set one up, WordPress shows a grey Mystery Person silhouette instead. That grey icon is the default avatar, and it appears everywhere a user has no profile picture: in comments, in author boxes, and in user lists. Changing it takes a few minutes, and you can do it without installing a plugin.
You have three ways to change the default avatar. You can set your own picture through Gravatar, pick one of the built in styles in your Discussion settings, or upload your own image and register it with a small code snippet. This guide covers all three, so you can choose the option that fits your site.
What Is the Default Avatar in WordPress?
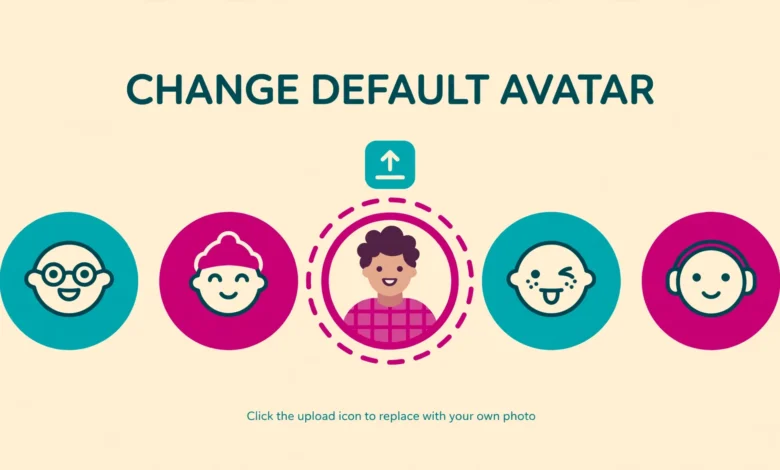
The default avatar is the fallback image WordPress shows for any user or commenter who has no avatar of their own. WordPress looks up each commenter by their email address and asks Gravatar, the avatar service owned by Automattic, whether that email has a picture. If it does, WordPress shows that picture. If it does not, WordPress shows the default avatar you selected in your Discussion settings.
The default avatar shows up in more places than most site owners realise. It appears next to every comment on your posts, in author boxes under articles, and in the user list in your dashboard. A site full of identical grey silhouettes looks unfinished, while a branded default avatar makes comments feel like part of your site design. If you publish author boxes on your posts, our guide on how to add an author box in WordPress without a plugin pairs well with this one, because the author box is one of the first places visitors notice your avatar.
It helps to understand the difference between your own avatar and the default avatar. Your own avatar is tied to your email address through Gravatar, and it follows you to every WordPress site where you comment with that email. The default avatar is a site setting: it is what your site shows for everyone else who has no Gravatar picture. Changing the default avatar never changes anyone personal picture.
How to Change Your Own Picture with Gravatar
The fastest way to change the picture next to your own name is Gravatar, because WordPress reads your avatar from there automatically. You do not need to change any setting on your site. You only need a free Gravatar account using the same email address you use on your WordPress site.
- Go to gravatar.com and create a free account, or log in if you already have one.
- Make sure the email address on the Gravatar account matches the email address on your WordPress user profile exactly.
- Upload the picture you want to use, crop it to a square, and set its rating to G so it shows on all sites.
- Go to Users, then Profile, in your WordPress dashboard and confirm the email address there matches your Gravatar account.
- Visit a post where you have commented and reload the page to see your new picture next to your name.
The most common reason a Gravatar picture does not appear is an email mismatch. WordPress looks up the exact email address stored in your user profile, so even a small difference means Gravatar finds no picture and shows the default avatar instead. Check the email under Users, then Profile, character by character, and make sure it matches your Gravatar account. If your site has several authors, each one needs their own Gravatar account, and our guide to WordPress user roles explained will help you set up their accounts with the right permissions first.
Gravatar pictures can take a few minutes to appear everywhere because of caching. Clear your browser cache and your caching plugin if the old picture still shows. Remember that Gravatar serves the image from its own servers, so your site makes an extra external request for every avatar it displays. If you want your site to load avatars from your own server instead, the custom avatar method later in this guide removes that dependency.
How to Pick a Built-In Default Avatar in Discussion Settings
WordPress ships with several built in default avatar styles, and you can switch between them from your Discussion settings in seconds. This changes the fallback image for every commenter without a Gravatar picture, and it needs no code and no extra upload.
- Go to Settings, then Discussion, in your WordPress dashboard.
- Scroll down to the Avatars section near the bottom of the page.
- Make sure the Show Avatars checkbox is ticked, or no avatar will display at all.
- Look at the Default Avatar options and pick the style you like best.
- Click Save Changes at the bottom of the page, then check a post with comments to see the new style.
The built in options include Mystery Person, the grey silhouette that WordPress uses by default, Blank, which shows nothing at all, and several generated styles that create a unique picture for each commenter based on their email address. The generated styles, such as the geometric patterns and the monster faces, give every commenter a different image, which makes a busy comment section look more lively than a wall of identical silhouettes.
WordPress lets you limit avatars to a content rating, and Gravatar pictures rated above your limit will be replaced by the default avatar. The official WordPress support documentation at wordpress.org support describes each option and the rating settings in detail.
How to Upload Your Own Default Avatar Image
If you want your site logo, a branded illustration, or a custom character as the fallback avatar, you need to upload your own image first. The image should be square, at least 256 by 256 pixels, and saved as a PNG or JPG. A simple design works best at small sizes, because avatars display at around 32 to 96 pixels on most themes, and fine detail disappears at that size.
- Prepare a square image of your logo or illustration, at least 256 by 256 pixels, with clear contrast and no tiny text.
- Go to Media, then Library, in your WordPress dashboard and click Add New Media File.
- Upload the image and click on it in the library to open its attachment details.
- Copy the File URL from the attachment details panel on the right side.
- Keep that URL safe, because the code snippet in the next section needs it.
Uploading the image to your own Media Library is the key step that removes the Gravatar dependency for the fallback picture. Once the image lives on your server, WordPress serves it directly, so the default avatar loads from your own site with no request to an outside service. If you are choosing a host and want full control over your media files and server settings, our web hosting guide explains what to look for.
How to Set a Custom Default Avatar with the avatar_defaults Filter
WordPress does not offer an upload button for a custom default avatar, so you register your uploaded image with a small snippet that uses the avatar_defaults filter. The filter adds your image to the list of Default Avatar options in Discussion settings, and once it appears there, you select it like any built in style. You can add the snippet to a child theme functions.php file or to the Code Snippets plugin.
// Add a custom default avatar option in WordPress
function vtg_custom_default_avatar( $avatar_defaults ) {
    $avatar_defaults['https://yourdomain.com/wp-content/uploads/custom-avatar.png'] = 'Custom Avatar';
    return $avatar_defaults;
}
add_filter( 'avatar_defaults', 'vtg_custom_default_avatar' );
Replace the example URL in the snippet with the File URL you copied from your Media Library, and keep the image path exactly as WordPress shows it. The text ‘Custom Avatar’ is the label that appears under your image in the Discussion settings, so give it a clear name you will recognise later. If you use a child theme, add the snippet to its functions.php file. If you prefer not to edit theme files, the Code Snippets plugin lets you add and activate the same code from your dashboard, and you can switch it off just as easily if you change your mind.
- Add the snippet to your child theme functions.php file or activate it in the Code Snippets plugin.
- Go to Settings, then Discussion, and scroll down to the Default Avatar options.
- Find your new Custom Avatar option in the list and select it.
- Click Save Changes, then open a post with a comment from someone without a Gravatar picture.
- Confirm your uploaded image shows next to that comment instead of the grey silhouette.
Your custom avatar now applies to every commenter without a Gravatar picture, while commenters who do have a Gravatar picture keep showing their own photo. If you ever replace the image in the Media Library, update the URL in the snippet to match, because the snippet points to the exact file address.
Troubleshooting: Why Is My New Avatar Not Showing?
Avatar changes sometimes seem to do nothing, and the cause is usually caching, an email mismatch, or a theme that hides avatars. Work through the checks below in order, because the first two fix most cases.
- Clear your browser cache and your caching plugin, then reload the page in a private or incognito window, because cached pages can show the old avatar for hours.
- Check that the email on your Gravatar account matches the email in your WordPress user profile exactly, including the domain and any dots.
- Go to Settings, then Discussion, and confirm Show Avatars is ticked and the Maximum Rating is set to G.
- Confirm your custom avatar URL in the snippet still points to an image that exists in your Media Library.
- Check whether your theme shows avatars at all, because some themes hide comment avatars with CSS or in their comment template.
- Test with a different browser or a logged out session, because a logged in view can differ from what visitors see.
If avatars show in the dashboard but not on the front of your site, your theme is the likely cause. Some themes remove avatars from comments on purpose for a minimal look. Check your theme settings for an avatar or comment display option, and if there is none, ask the theme author whether avatars are supported.
Frequently Asked Questions
How do I change the default avatar in WordPress without a plugin?
Upload your image to the Media Library, then add a small snippet using the avatar_defaults filter to your child theme functions.php file or the Code Snippets plugin. The snippet registers your image as a new Default Avatar option. Then go to Settings, then Discussion, select your custom avatar, and save your changes.
Why is my Gravatar picture not showing on my WordPress site?
The most common cause is an email mismatch between your Gravatar account and your WordPress user profile. WordPress looks up the exact email address in your profile, so even a small difference means no picture is found. Check that both addresses match exactly, confirm Show Avatars is ticked under Settings, then Discussion, and clear your cache before testing again.
What is the best size for a custom WordPress avatar image?
Use a square image of at least 256 by 256 pixels, saved as PNG or JPG. Avatars usually display at 32 to 96 pixels, so keep the design simple with strong contrast and no small text. A square logo, a clear illustration, or a simple character works best, because fine detail disappears at small sizes.
Does changing the default avatar affect commenters who already have a Gravatar picture?
No, changing the default avatar only affects commenters who have no Gravatar picture. Anyone with a Gravatar account tied to their comment email keeps showing their own picture. The default avatar is only the fallback image, so your change replaces the grey silhouette for everyone else while leaving personal pictures untouched.
Last updated: November 2026.