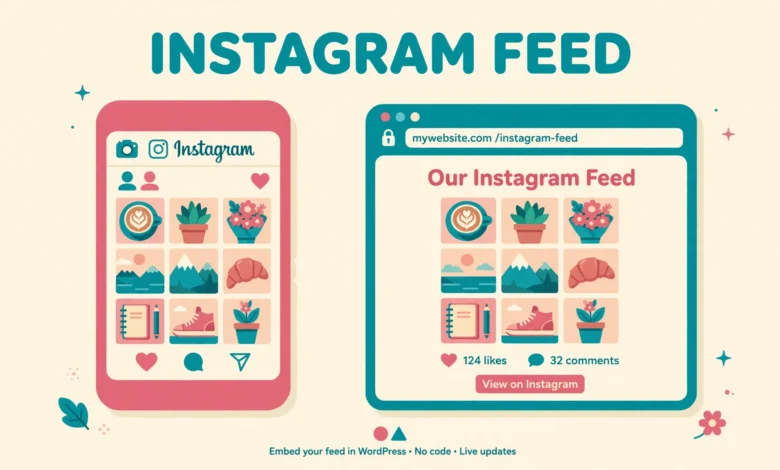
An Instagram feed on your WordPress site keeps your homepage fresh, shows visitors your latest photos, and turns casual readers into followers. On WordPress, though, there is an honest catch: a full auto-updating Instagram feed is not possible without a plugin or an API connection.
This guide gives you the straight answer. You will learn what you can do without a plugin: embed single posts, build a manual photo grid, or use a free widget snippet. You will also learn when the plugin route is the practical choice.
Why does WordPress have no built-in Instagram feed?
Until October 2020, WordPress had native Instagram embeds. You could paste an Instagram link into a post, and WordPress would automatically turn it into an embedded post with the photo, caption, and like button. That relied on a service called oEmbed, which let WordPress ask Instagram for the embed code automatically.
In October 2020, Facebook, which owns Instagram, removed support for unauthenticated oEmbed requests. WordPress can no longer fetch Instagram embeds on its own, and pasting a link now shows a plain grey box, or just the link text. Instagram also tightened its API, so pulling a live feed now requires an authenticated connection, either through a plugin or a developer app.
What can you do without a plugin, and what can you not do?
- You can embed a single Instagram post using Instagram official embed code in a Custom HTML block.
- You can build a manual photo grid with the Gallery block or a few lines of HTML, linking each photo to its post.
- You can use a free aggregator widget snippet, code you paste rather than a plugin, to show a small feed.
- You cannot get a feed that updates itself when you post, because that needs API access.
- You cannot pull live like counts, follower counts, or stories without an authenticated connection.
If your goal is to show a few favorite posts on your homepage, the no-plugin methods are perfect. If your goal is a live grid that always shows your six newest posts, you will need the plugin route in Method 4.
Method 1: Embed a single Instagram post with the official Embed code
This is the closest thing to the old automatic embed, and it works because Instagram itself provides the code. You copy the embed code from Instagram, paste it into a Custom HTML block, and Instagram servers render the post with its photo, caption, and buttons. The Instagram embedding help page explains the same steps.
- Open instagram.com on desktop and go to the post you want. The mobile app has no embed option.
- Click the three dots on the post and choose Embed.
- Tick the caption box if you want it shown, then click Copy embed code.
- In WordPress, add a Custom HTML block where you want the post and paste the code. The official Custom HTML block documentation shows where to find the block.
- Publish the page and view it live. The post should appear with its photo, caption, like count, and a Follow button.
The embed loads a small script from Instagram, so the post renders nicely, but that script adds one extra request to your page. For one or two embeds, the cost is negligible. For a page full of embeds, it adds up, so this method suits one or two highlight posts, not a whole feed. Embeds also show the caption and comments link, which is great for a featured post.
Method 2: Build a manual multi-post grid (no plugin)
If you want a grid of several Instagram posts rather than a single embed, the manual method is your best no-plugin option. Upload your Instagram photos to your media library, arrange them in a grid, and link each photo to its original Instagram post. Visitors click any photo and land on your Instagram profile.
The easiest version uses the Gallery block. Add a Gallery block, upload six or nine of your Instagram photos, set the columns to three, and click each image to paste its Instagram post URL into the link field. The result looks like an Instagram profile grid, and it loads fast because the images sit on your own server.
If you want more control over the layout, use a small HTML snippet in a Custom HTML block instead. This version gives you a tidy three column grid with square images.
<div class="vtg-ig-grid">
  <a href="https://www.instagram.com/p/YOUR-POST-URL/" target="_blank" rel="noopener">
    <img src="https://vutechgeek.com/wp-content/uploads/2026/11/photo-1.jpg" alt="Instagram photo 1">
  </a>
  <a href="https://www.instagram.com/p/YOUR-POST-URL/" target="_blank" rel="noopener">
    <img src="https://vutechgeek.com/wp-content/uploads/2026/11/photo-2.jpg" alt="Instagram photo 2">
  </a>
  <a href="https://www.instagram.com/p/YOUR-POST-URL/" target="_blank" rel="noopener">
    <img src="https://vutechgeek.com/wp-content/uploads/2026/11/photo-3.jpg" alt="Instagram photo 3">
  </a>
</div>

<style>
.vtg-ig-grid {
  display: grid;
  grid-template-columns: 1fr 1fr 1fr;
  gap: 8px;
}
.vtg-ig-grid img {
  width: 100%;
  aspect-ratio: 1 / 1;
  object-fit: cover;
  display: block;
}
</style>
Before uploading, optimize your photos. Instagram images are already compressed, but re-uploading the full size version wastes bandwidth. Resize them to around 800 pixels wide and compress them first, as we explain in our WordPress image SEO tips, and add descriptive alt text so the grid helps your search rankings.
The honest downside is maintenance. When you post something new on Instagram, your grid does not change. You have to swap in the new photo yourself, which takes about two minutes per update. For a homepage grid you refresh once a week, that is a fair trade for a fast, plugin-free setup. For a feed you update daily, Method 4 is the better choice. Use only your own photos.
Method 3: Use a free aggregator widget snippet (no plugin install)
A middle ground exists between a fully manual grid and a full plugin: aggregator widgets. Services like Elfsight, Tagembed, and Juicer let you create a small Instagram widget on their website, connect your Instagram account, and give you a short snippet of code to paste into a Custom HTML block. No plugin is installed on your WordPress site, because the widget runs from the aggregator servers.
- Sign up for a free plan and create a new feed widget.
- Connect your Instagram account and choose which posts to show, such as your latest six posts or a hashtag.
- Pick a grid layout and adjust the colors to match your site.
- Copy the embed snippet, then paste it into a Custom HTML block in WordPress.
- Publish the page and check the live view. Your feed should appear and update when you post.
This method genuinely updates itself, which is its big advantage over the manual grid. The tradeoff is that you now depend on a third-party service. Free plans usually show a small “Powered by” badge, limit the number of posts or views, and add an external script to your page. Your feed also breaks if that service has an outage or changes its free plan. Read the privacy terms before you connect your account, because the aggregator gets access to your Instagram data. For a client site, the manual grid or the plugin route keeps your data in your own hands.
Method 4: The plugin route for a real auto-updating feed
Here is the honest recommendation. If you want a real auto-updating Instagram feed that always shows your newest posts, use a plugin. The best known option is Smash Balloon Instagram Feed.
Install the plugin from Plugins, then Add New, and search for Instagram Feed by Smash Balloon. After activation, connect your Instagram account, choose a grid layout, and place the feed on any page with the plugin block or its shortcode. The plugin handles the API login, the token refresh, and the caching. The free version shows a simple grid of your latest posts.
To place the feed with a shortcode, use this inside a Shortcode block: [instagram-feed]. Paste it exactly as shown.
Using one well maintained plugin for a real feed is not a failure of the no-plugin goal. It is a deliberate choice. A feed plugin replaces a manual chore you would otherwise repeat every week. The no-plugin methods in this guide are best when you only need a few posts, or when you want full control.
Adding your feed with Elementor (free version)
If you build your pages with Elementor, you do not need a special Instagram widget. Every method above works inside Elementor through the HTML widget, which is available in the free version. Drag an HTML widget into place, then paste your code: the single post embed, the grid snippet, or the aggregator code.
For the manual grid, Elementor also gives you a visual alternative. Use the Image Gallery widget, add your Instagram photos, and link each image to its Instagram post URL. Our guide to add an image gallery in Elementor for free walks through that widget. One warning: the editor preview sometimes shows embed code as a blank space until you save and view the live page.
Which method should you choose?
- Show one featured post or testimonial: use Method 1, the single post embed. It takes two minutes.
- Show a small grid you refresh weekly: use Method 2, the manual grid. It is fast and free.
- Want auto-updates with no plugin install: use Method 3, the aggregator snippet. Accept the free plan badge.
- Want a true live feed with zero maintenance: use Method 4, the Smash Balloon plugin. It is the only method that handles the API.
Design tips for a feed that looks good
A feed that looks sloppy does more harm than no feed at all, so finish with a little polish. Keep your grid images the same shape, usually square, so the rows line up cleanly. Use three columns on desktop and two on mobile.
Add a short heading above the feed, such as “Follow us on Instagram”, with a link to your profile. That turns the feed from decoration into a growth tool. Our guide to add social share buttons without a plugin covers the same idea for your posts.
Finally, connect the feed to your contact options. A visitor who discovers you through your Instagram grid is a warm lead, so make it easy to reach you. A WhatsApp chat button lets them message you in one tap, and a click to call button does the same for phone calls. A feed plus a button that converts is a combination worth having, as our web hosting guide explains.
Frequently Asked Questions
Can I add an Instagram feed to WordPress without a plugin?
Yes, for a static or manual feed. You can embed single posts with Instagram official code, build a manual photo grid, or paste a free aggregator widget snippet, all without installing a plugin. A fully auto-updating feed genuinely needs a plugin or an API connection.
Why did my old Instagram embeds stop working?
WordPress removed native Instagram oEmbed support in October 2020, after Facebook stopped allowing unauthenticated embed requests. Old posts that relied on pasting an Instagram link now show a plain link or an empty box. Replace those with the official embed code from Method 1.
Is it legal to show my own Instagram photos on my website?
Yes, showing your own photos is fine. You own the copyright to photos you took and posted yourself, so embedding them or re-uploading them to your own site is your right. Never re-upload other people photos without their permission, even if you credit them.
Do Instagram feed widgets slow down my site?
It depends on the method. A manual grid with optimized images adds almost nothing to your load time, because the images sit on your own server. Official embeds and aggregator widgets load scripts from Instagram or the widget provider, which adds requests. If speed is your top priority, the manual grid is fastest.
Last updated: November 2026.