


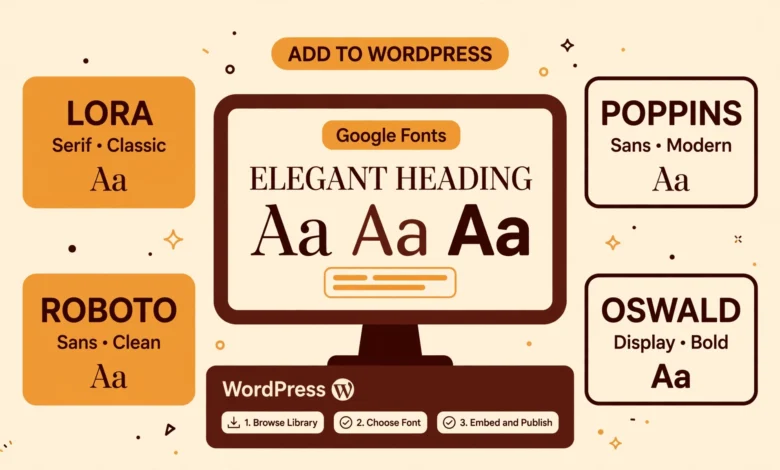
Typography is one of the quickest ways to make a WordPress site look professional. The right font pairing can turn a plain blog into something that feels designed, trustworthy, and worth reading. Google Fonts is the most popular source of free, high quality fonts on the web, with more than 1,500 open source typefaces you can use on any site, including commercial ones. The best part is that you do not need another plugin to use them. In this guide you will learn three reliable ways to add Google Fonts to WordPress without a plugin, from the built in Font Library to a few lines of code, plus how to keep your site fast while doing it.
Why Add Google Fonts Without a Plugin?
Nothing is wrong with font plugins, and they are the easiest option for complete beginners. But every plugin you install adds weight to your site: more code to load, more updates to manage, and a small new attack surface. Fonts are a simple feature that WordPress can already handle natively, so doing it manually is a clean way to keep your plugin list short.
There are three more reasons to go plugin free. First, you get full control over exactly which fonts and weights load on your site, which matters for speed. Second, you avoid plugin conflicts, which are one of the most common causes of strange layout bugs. Third, if you host the fonts locally (method 3 below), you remove a third party request to Google servers entirely, which is better for both privacy and performance.
Each method below takes between two and fifteen minutes.
Method 1: Use the Built In Font Library (WordPress 6.5 and Newer)
Since WordPress 6.5, block themes come with a native Font Library. It lets you install fonts directly from Google Fonts through your dashboard, and WordPress downloads the files and serves them from your own server. No code, no plugin, and the fonts are GDPR friendly by default because nothing loads from Google servers.
Here is how to use it:
- Go to Appearance, then Editor in your WordPress dashboard. This menu item only appears if you are using a block theme like Twenty Twenty Four or Twenty Twenty Five.
- Click the Styles icon (the half filled circle) in the top right of the editor.
- Open the Typography section and click Manage fonts.
- Click Install fonts and switch to the Google Fonts tab.
- Search for the font you want, select the weights you need, and click Install.
- Go back to Typography and assign the font to text, headings, links, or buttons, then click Save.
The important detail here is to install only the weights you actually use. If your design uses regular and bold, do not install light, medium, and extra bold too. Every extra weight is an extra file your visitors have to download. Two or three weights per font family is the sweet spot for most sites.
The catch with this method is theme compatibility. If your site uses a classic theme (one without the Appearance, Editor menu), the Font Library is not available, and you need method 2 or 3 instead. Most modern themes released in the last two years support it.
Method 2: Enqueue Google Fonts With a Few Lines of Code
If you use a classic theme, the clean way to load Google Fonts is through WordPress enqueue system. This registers the font stylesheet the official WordPress way instead of pasting a link tag into your header file, which avoids duplicate requests and keeps everything working correctly with caching plugins.
First, pick your fonts at fonts.google.com. Select the families and weights you want, then copy the stylesheet URL. It will look something like this:
https://fonts.googleapis.com/css2?family=Poppins:wght@400;600;700&family=Inter:wght@400;500&display=swapNow add this code to your child theme functions.php file, or paste it into a small code snippet using the Code Snippets plugin. Never edit your parent theme functions.php directly, because theme updates will wipe out your changes.
function vtg_load_google_fonts() {
    wp_enqueue_style(
        'vtg-google-fonts',
        'https://fonts.googleapis.com/css2?family=Poppins:wght@400;600;700&family=Inter:wght@400;500&display=swap',
        array(),
        null
    );
}
add_action( 'wp_enqueue_scripts', 'vtg_load_google_fonts' );
Replace the URL with your own from Google Fonts, and change the handle name vtg-google-fonts to anything unique. Once this is saved, the font stylesheet loads on every page of your site, and you can start using the fonts in your CSS.
If the idea of touching functions.php makes you uneasy, that is normal. Our guide on how to add custom CSS in WordPress covers the same safety principles, including why a child theme or snippet plugin matters, and the habits there will serve you well here too.
Method 3: Host Google Fonts Locally for Maximum Speed
This is the method performance focused site owners prefer. Instead of loading fonts from Google servers on every page view, you download the font files once, upload them to your own server, and serve them from your own domain. The result is one less third party connection, which helps page load times and removes the privacy concern of sending visitor IP addresses to Google.
The easiest way to get the files is a free tool called google-webfonts-helper. You pick a font, choose the weights and character sets, and it gives you the font files plus the exact CSS to load them. Here is the process:
- Visit the helper site and search for your font.
- Select the weights you need (regular and bold is enough for most sites) and the latin character set.
- Download the woff2 files, the modern format every current browser supports.
- Upload the files to a folder inside your theme, for example wp-content/themes/your-child-theme/fonts/.
- Copy the generated CSS into your child theme stylesheet or the Customizer additional CSS panel.
The generated CSS uses the font face rule, which looks like this:
@font-face {
    font-family: 'Poppins';
    font-style: normal;
    font-weight: 400;
    font-display: swap;
    src: url('fonts/poppins-v20-latin-regular.woff2') format('woff2');
}
Notice the font-display: swap line. It tells the browser to show your fallback font immediately and swap in the Google Font the moment it finishes downloading. Without it, visitors can see invisible text for a second or two on slow connections, which feels broken. Always keep this line.
How to Apply Your Fonts With CSS
Loading the fonts is only half the job. Now you have to tell your theme where to use them. The simplest approach is to assign one font to your body text and another to your headings:
body {
    font-family: 'Inter', -apple-system, Arial, sans-serif;
}

h1, h2, h3, h4, h5, h6 {
    font-family: 'Poppins', Georgia, serif;
}
The fonts after the first one in each list are fallbacks. If the Google Font fails to load for any reason, the browser uses the next font in the list, so your layout never breaks. A good fallback stack matches the general shape of your main font: a sans serif fallback for a sans serif Google Font, and a serif fallback for a serif one.
A pairing rule that works for almost any site: use a clean, readable sans serif for body text, and something with a little more personality for headings. Limit yourself to two font families total.
Common Mistakes That Slow Down Your Site
Fonts are small files, but mistakes add up fast. Watch out for these:
- Loading every weight. A font family can ship with nine weights plus italics. Loading all of them when you use two is pure waste. Audit your site and remove unused weights.
- Loading fonts you never apply. It is common to enqueue a font, change your mind, and forget to remove the code. Check your CSS and make sure every loaded font is actually used somewhere.
- Skipping preconnect. If you load fonts from Google servers (methods 1 and 2), add preconnect hints so the browser opens the connection early. Many caching plugins do this automatically.
Typography is one piece of the performance puzzle. Pair good font habits with optimized images, which our WordPress image SEO guide covers, and you cover the two biggest visual factors that affect load times.
Frequently Asked Questions
Are Google Fonts really free for commercial use?
Yes. Every font in the Google Fonts library is open source, released under licenses like the SIL Open Font License. You can use them on personal sites, client projects, and commercial products without paying or asking permission. You can even modify the fonts themselves if a license allows it.
Will Google Fonts slow down my website?
Only if you use them carelessly. A well configured setup with two font families, a few weights, font display swap, and local hosting adds barely any load time. The slowdowns come from loading ten weights of four families from an external server with no optimization, which is exactly what this guide helps you avoid.
Can I use Google Fonts with Elementor?
Yes. Elementor ships with the Google Fonts library built in, so you can pick fonts from a dropdown in the Site Settings panel. If you want the performance benefits of local hosting though, you can still use method 3 above and reference the fonts in Elementor custom CSS. Our guide on editing the header in Elementor free shows how comfortable the free version is for this kind of customization.
Do I need a plugin if I use a classic theme?
No. Method 2 (the enqueue code) works with any classic theme and takes about five minutes. The only requirement is a child theme or a code snippet plugin so your changes survive theme updates. If you are not comfortable with code at all, a font plugin is a reasonable compromise, but it is never a requirement.
Last updated: October 2026.