

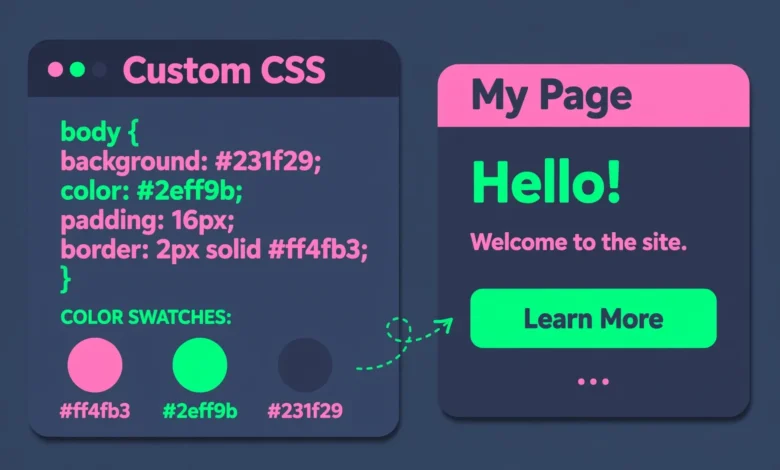
Sooner or later every WordPress site owner runs into the same wall: the theme looks great, but one small detail is wrong. The links are the wrong shade of blue, a widget has too much padding, or a button needs to be bigger. You do not need to switch themes or install a bulky plugin for tweaks like these – a few lines of custom CSS can fix them in minutes. In this guide you will learn how to add custom CSS in WordPress using three safe methods, how to find the right selectors with your browser’s developer tools, and which mistakes to avoid so an update never wipes out your changes.
Why Custom CSS Beats Editing Theme Files
Every WordPress theme ships with a style.css file, and the temptation is to open it and start typing. Do not do that. The moment your theme releases an update, WordPress overwrites the theme folder and every change you made vanishes. Custom CSS kept in the right place survives updates, is easy to remove if something looks wrong, and keeps your site maintainable. The three methods below all respect this rule – they store your CSS somewhere updates cannot touch.
Method 1: Use the Additional CSS Panel in the Customizer (Easiest)
The WordPress Customizer has a built-in “Additional CSS” box that works on every theme. It shows a live preview of your changes, highlights syntax errors, and requires zero technical setup. For most beginners this is the only method you will ever need.
- Go to Appearance – Customize in your WordPress dashboard.
- In the left panel, click Additional CSS.
- Type or paste your CSS rules in the code box on the left.
- Watch the live preview on the right update instantly as you type.
- When you are happy, click Publish to save.
The editor is surprisingly helpful: it underlines typos, auto-completes properties, and shows a red warning icon when a rule is invalid. If your changes make something look worse, just delete the lines and publish again – nothing else on your site is affected. This is the perfect place for small tweaks like changing link colors or hiding an element, and it pairs well with other visual changes such as adding a logo to your WordPress header.
Method 2: Add CSS to a Child Theme’s style.css (Best for Larger Projects)
A child theme is a small theme that inherits everything from your main (parent) theme but has its own stylesheet that WordPress loads on top. Because the parent theme stays untouched, updates apply cleanly and your custom CSS survives. Use this method when you have more than a screenful of custom styles, or when you are also adding PHP customizations.
- Install a free child theme creator plugin (like Child Theme Configurator) from the plugin directory, or create a child theme manually with a
style.cssandfunctions.phpfile. - Activate the child theme under Appearance – Themes.
- Add your custom CSS to the child theme’s
style.cssfile using the Theme File Editor (Appearance – Theme File Editor) or an FTP client.
The advantage over Method 1 is organization: you can structure your CSS with comments, keep a separate file per section of the site, and version-control the child theme with your other code. The trade-off is a little more setup work up front. If you are new to WordPress file structure, our WordPress dashboard guide for beginners explains where menus like Appearance and Themes live.
Method 3: Per-Block CSS in the Block Editor (Targeted Tweaks)
Sometimes you only want to style one specific paragraph, button, or image – not every element of that type site-wide. The block editor lets you add a CSS class to an individual block and then target it with a rule.
- Select the block you want to style in the editor.
- In the right sidebar, open the Advanced panel.
- Type a custom class name (for example,
my-special-button) in the Additional CSS class(es) field. - Now write a rule that targets that class in the Customizer’s Additional CSS box (Method 1).
.my-special-button {
    background-color: #d9480f;
    color: #ffffff;
    padding: 14px 28px;
    border-radius: 30px;
    font-weight: bold;
}
This keeps your styles reusable: give the same class to other blocks and they all pick up the same styling. It is the cleanest way to create one-off designs inside content without touching templates.
How Do You Find the Right CSS Selector?
CSS rules need a selector that points at the exact element you want to change. You do not have to guess – your browser’s developer tools reveal every selector for you.
- Open your site in Chrome or Firefox and press F12 (or right-click the element and choose Inspect).
- Click the inspect arrow icon, then click the element on the page.
- The Elements panel highlights the HTML and shows its classes and IDs.
- In the Styles panel you can test CSS live before copying it into WordPress.
A few selector basics will take you far. A dot targets a class (.entry-title), a hash targets an ID (#site-title), and combining them narrows things down (.widget-area h3 styles every H3 inside widgets). Keep selectors as simple as possible – long chains like body div#content main article.post p are hard to maintain and easy to break.
Practical CSS Examples to Try Right Now
Here are three safe, useful examples. Paste them into the Customizer’s Additional CSS panel and watch the live preview.
1. Change your link color site-wide:
a {
    color: #0d6efd;
}
a:hover {
    color: #084298;
    text-decoration: underline;
}
2. Hide an element you do not need (for example, an unwanted “Powered by” credit):
.site-info .powered-by {
    display: none;
}
3. Make post titles stand out:
.entry-title {
    font-size: 2.2rem;
    letter-spacing: -0.5px;
}
What NOT to Do: Common Custom CSS Mistakes
- Editing the parent theme’s style.css – updates will erase everything. Use a child theme instead.
- Overusing !important – it forces a rule through, but stacking !important flags makes future debugging miserable. Fix specificity properly instead.
- Targeting overly broad selectors – a rule on bare
pordivelements will restyle half your site. Always scope rules to a class or section. - Copying CSS without understanding it – a snippet from a forum might reference selectors your theme does not have. Test each snippet in dev tools first.
Always Test Your CSS on Mobile
Custom CSS looks perfect on desktop and breaks on phones more often than you would think. A fixed pixel width that fits your monitor will overflow a small screen, and hover-only effects do nothing on touch devices. In the Customizer, use the device icons at the bottom to preview your site on tablet and mobile before publishing. For width values, prefer percentages and max-width over fixed pixels. Changing your site title and tagline styles is a good example – long titles that fit desktop can wrap awkwardly on mobile, so check both.
Frequently Asked Questions
Will custom CSS slow down my website?
No. CSS added through the Customizer or a child theme is cached like the rest of your styles and has a negligible effect on load time. Hundreds of lines of CSS weigh far less than a single unoptimized image.
Is it better to use the Customizer or a CSS plugin?
The built-in Customizer is better for most people: no extra plugin means no extra maintenance, no security surface, and no dependency on a developer who might abandon the plugin. Use a CSS plugin only if you need features the Customizer lacks, like revision history or SCSS support.
Why is my custom CSS not working?
The usual causes are: a typo in the selector, targeting a class that does not exist in your theme, or a more specific theme rule winning over yours. Inspect the element with F12 and check the Styles panel – it shows which rules apply and which are crossed out. Avoid !important unless you have confirmed the specificity issue and cannot solve it cleanly.
Can I add custom CSS to a specific page only?
Yes. Combine Method 3 with WordPress body classes: each page gets a unique class like page-id-42 on the body tag. Write your rule as .page-id-42 .entry-title { ... } and it will only affect that page. To learn more about CSS fundamentals, the official Introduction to CSS lesson from WordPress.org is an excellent free resource, and the Customizer documentation covers every panel in detail.
Last updated: October 2026.