

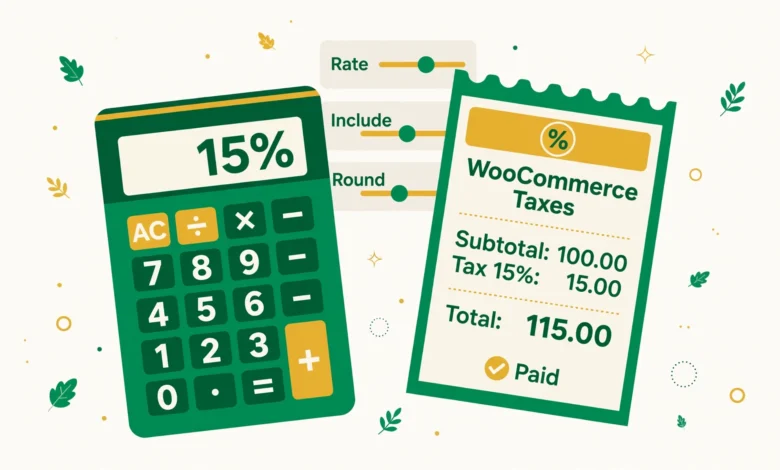
Taxes are the part of running an online store that nobody looks forward to, but getting them wrong is far more painful than setting them up. If your store charges the wrong tax rate, shows prices inconsistently, or misses tax on shipping, you end up with unhappy customers and messy accounting. The good news is that WooCommerce has a complete tax system built in – you just need to enable it and configure it once. This beginner guide walks you through how to set up taxes in WooCommerce step by step, from enabling tax calculations to adding your first tax rates and testing everything with a test order.
Important note: this guide explains the mechanics of configuring taxes in WooCommerce. It is not tax advice. Tax rules vary by country, region, and product type, so always confirm the actual rates and rules that apply to your business with a local tax professional or accountant before going live.
Step 1: Enable Tax Rates and Calculations
Taxes are disabled by default in a fresh WooCommerce installation. To turn them on:
- Go to WooCommerce – Settings – General in your WordPress dashboard.
- Check the box labeled Enable tax rates and calculations.
- Click Save changes.
A new Tax tab now appears in your WooCommerce settings. That is where almost everything in this guide happens. If you have never touched WooCommerce settings before, our guide on setting up cash on delivery in WooCommerce walks through the settings area in a similarly step-by-step way.
Step 2: Understand the Tax Tab Options
Open WooCommerce – Settings – Tax. The top of the page has several important settings. Here is what each one does:
- Prices entered with tax – choose whether the prices you type on products are inclusive or exclusive of tax. Most stores enter prices exclusive of tax and let WooCommerce add it at checkout, but some regions legally require tax-inclusive pricing.
- Calculate tax based on – pick the customer address WooCommerce uses to determine which tax rate applies: customer shipping address, customer billing address, or your shop’s base address. For most stores, the customer shipping address is correct.
- Shipping tax class – decides how tax is calculated on shipping costs. “Shipping tax class based on cart items” is the safest default, because it taxes shipping at the same rates as the products in the cart.
- Display prices in the shop / cart and checkout / orders – controls whether customers see prices including or excluding tax on product pages, in the cart, and on admin orders. Keep these consistent so the price on the product page matches the price at checkout.
- Display tax totals – choose “As a single total” for a simple tax line, or “Itemized” to show a separate line for each tax rate applied.
The display settings are where beginners make the most mistakes. A common one is showing prices excluding tax in the shop but including tax in the cart, which makes customers think the price changed at checkout. Pick one approach and apply it everywhere.
Step 3: Set Up Tax Classes (Standard, Reduced, Zero Rate)
WooCommerce ships with three tax classes: Standard, Reduced rate, and Zero rate. These exist because different products are often taxed at different rates – for example, food and books may carry a reduced rate while electronics carry the standard rate. Under WooCommerce – Settings – Tax you can rename these classes or add new ones (one per line in the “Additional tax classes” field) to match your local rules. If every product in your store is taxed the same way, you can ignore tax classes entirely and just use Standard.
Step 4: Add Your Tax Rates
Tax rates are the actual percentages applied per location. Click the Standard rates sub-tab (or the sub-tab for any other class you created) and follow these steps:
- Click Insert row to add a new rate row.
- Country code – enter the two-letter ISO code of the country this rate applies to (for example,
PKfor Pakistan,USfor the United States). Leave blank for all countries. - State code – optionally narrow the rate to a state or province. Leave blank for the whole country.
- ZIP / Postcode – optionally limit the rate to specific postcodes. Wildcards like
100*are supported. - City – optionally limit the rate to a specific city.
- Rate % – enter the tax rate using four decimal places. For a 20 percent rate, enter
20.0000. For 7.25 percent, enter7.2500. - Tax name – give the rate a name like “VAT” or “Sales Tax”. Customers see this name on their invoice.
- Priority – leave at
1unless you need stacked rates (for example, a federal plus a state rate). Rates with the same priority are added together; different priorities apply in sequence. - Compound – check this only for rates that must be calculated on top of other taxes (rare; most stores leave it unchecked).
- Shipping – check this box to apply the rate to shipping costs as well. If your region taxes shipping, this matters.
Click Save changes when you are done. Repeat the process on the Reduced rate rates and Zero rate rates sub-tabs if your store uses those classes.
Step 5: Assign Tax Classes to Your Products
Setting up rates is only half the job – WooCommerce needs to know which rate class each product belongs to. Open any product for editing and look in the General tab of the Product data box for the Tax status and Tax class dropdowns.
- Taxable – the product is taxed using its assigned tax class (the default).
- Shipping only – tax applies to shipping for this item, but not the item itself.
- None – no tax is charged for this product at all.
Leave the tax class on “Standard” unless the product genuinely qualifies for a reduced or zero rate in your jurisdiction. Getting this right per product is what separates a correctly configured store from one that undercharges or overcharges tax. If you are also running store promotions, make sure your WooCommerce coupon codes are set up to handle tax correctly, since discounts can change the taxable amount depending on your settings.
Step 6: Test Everything with a Test Order
Never assume the configuration is correct – run a test order before accepting real payments:
- Add a product to the cart and proceed to checkout.
- Enter a test address in a region where your tax rate applies.
- Confirm the tax line appears with the correct name and amount.
- Try a second address in a region with a different rate (or no tax) and confirm the totals change accordingly.
- Complete a test order using a payment method you can refund or cancel – if you use JazzCash or EasyPaisa on your WooCommerce store, place a small real payment and refund it to verify the full flow including tax.
Pay special attention to the order totals in the admin area (WooCommerce – Orders). The tax amount there is what your accounting will rely on, so verify it matches your manual calculation for the test order.
Common Tax Setup Mistakes to Avoid
- Forgetting to enable taxes – rates configured but the “Enable tax rates and calculations” box unchecked means nothing is applied.
- Entering the rate as a whole number with wrong decimals –
20and20.0000work, but double-check you did not type0.20expecting 20 percent. - Calculating tax on the wrong address – a store shipping internationally should almost always use the customer shipping address, not the shop base address.
- Missing shipping tax – if your jurisdiction taxes shipping and you left the Shipping checkbox empty, you are undercharging on every order.
- Inconsistent price display – exclusive-tax prices in the shop with inclusive-tax prices in the cart confuses customers and causes abandoned carts.
Frequently Asked Questions
Do I need a plugin to handle taxes in WooCommerce?
For most stores, no. WooCommerce’s built-in tax system handles multiple rates, classes, locations, and shipping tax. Tax plugins are only worth considering if you need automatic rate lookups for many jurisdictions (for example, automated US sales tax by state and county) or complex cross-border rules. The official WooCommerce tax documentation is the best reference for what the built-in system can do.
Why is tax not showing on my checkout page?
Check these in order: taxes are enabled under WooCommerce – Settings – General, at least one rate row exists for the customer’s country, the product’s tax status is “Taxable”, and the “Calculate tax based on” address matches the address you are testing with. A blank rate for the customer’s country is the most common cause.
Should prices include tax or exclude tax?
It depends on your market and local law. Many B2B stores show prices excluding tax, while consumer stores in regions like the EU and the UK are legally required to show tax-inclusive prices. Set “Prices entered with tax” to match how you type prices on products, and set the display options to match what your customers expect to see. Whatever you choose, keep it consistent across the shop, cart, and checkout.
Does WooCommerce handle VAT for digital products sold internationally?
WooCommerce can apply different rates by customer country, which covers the basics, but EU digital-goods VAT rules (charging the rate of the buyer’s country) are complex enough that most stores use a dedicated VAT extension for automatic rate lookups and reporting. If you sell digital products across borders, the free WooCommerce plugin page lists compatible extensions, and a tax professional can confirm exactly what your store owes.
Last updated: October 2026.