Custom fields are one of the most useful features in WordPress, and also one of the least understood. They let you attach extra information to a post or page, such as a rating, a price, a source link, a reading time, or a subtitle, and then display that information exactly where you want it. You do not need a plugin to use them. WordPress has a built in custom fields system, and with a small amount of code you can display fields in your theme or build a cleaner input box for your editors. This guide shows you how to add custom fields in WordPress without a plugin, from the built in panel to a simple custom meta box.
What are custom fields in WordPress?
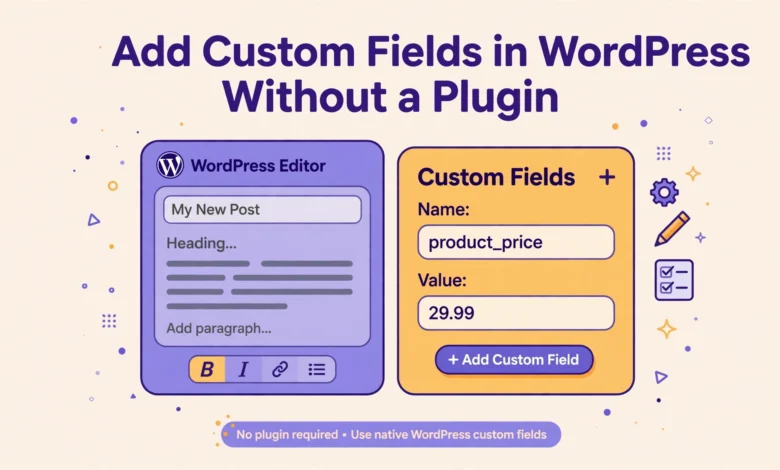
Custom fields store post meta, which is extra data attached to a post, page, or custom post type. Each field has a name, also called a key, and a value. The name identifies the field, such as book_author or event_date, and the value holds the content, such as J K Rowling or 2026-12-15. WordPress stores this pair in the wp_postmeta database table, linked to the post by its ID. You can add as many fields as you need to a single post, and different posts can use different fields.
Custom fields are different from categories and tags. Categories and tags group posts together, while custom fields describe a single post. They are also different from the post content itself. Content is the main article text, while a custom field is structured data that your theme can format, sort, or filter. For example, a numeric rating stored as a custom field can be sorted from highest to lowest, which plain text inside the article cannot do. If you are still deciding how to organise posts, our guide to WordPress categories vs tags explains the grouping side in detail.
How do I enable the Custom Fields panel in the block editor?
The Custom Fields panel is hidden by default in the block editor, which is why many users think WordPress removed it. It is still there, and you can turn it on in a few clicks. Open any post or page in the editor. Click the three dot menu in the top right corner, then choose Preferences. In the Preferences panel, open the Panels tab and turn on the Custom Fields option. WordPress will ask you to reload the editor, because enabling the panel changes the editor layout.
After the reload, scroll to the bottom of the editor, below the main content area. You will see a Custom Fields section with a name dropdown and a value box. The name field lets you pick an existing field name or type a new one. The value field holds the content for this post. Click Add Custom Field to save the pair. You can add more fields by repeating the same steps. Each field appears in a small list under the panel, with Edit and Delete links beside it.
Use clear, consistent names for your fields. Use lowercase letters and underscores, such as reading_time or featured_quote, instead of spaces or capital letters. A field named Reading Time on one post and reading_time on another is two different fields to WordPress, and your theme code will only find one of them. Pick a naming pattern once and use it everywhere. Prefix your field names with something short and unique, such as your site initials, to avoid clashing with a field created by a plugin or theme. For example, vg_rating is safer than rating on its own.
How do I add a custom field to a post?
Adding a field is simple once the panel is visible. Open the post, scroll to the Custom Fields section, and choose or type the field name. Enter the value in the value box, then click Add Custom Field. Save or update the post. The field is now stored with that post, but it will not appear on the front end until your theme displays it. That surprises many beginners, because the field is saved correctly and yet nothing changes on the live page. The panel only stores data. Displaying it is a separate step, covered next.
Here are some practical field ideas you can try on a test post:
- subtitle: a short subtitle shown under the post title.
- reading_time: a number such as 6, shown as 6 min read.
- source_url: a link to the original source for a news post.
- review_score: a number from 1 to 10 for a review post.
- event_date: a date shown in a list of upcoming events.
How do I display a custom field in my theme?
To show a custom field on the front end, use the get_post_meta function in your theme template. This function reads one field value for the current post. The basic code looks like this, placed inside the WordPress loop in a template file such as single.php:
$subtitle = get_post_meta(get_the_ID(), 'subtitle', true);
if ($subtitle) {
    echo '<p class="post-subtitle">' . esc_html($subtitle) . '</p>';
}
The three parts of get_post_meta are the post ID, the field name, and a true or false value that asks for a single value instead of a list. The if check means nothing shows when the field is empty, so posts without a subtitle look normal. The esc_html function is important, because it escapes the output and stops harmful code from running if someone saves bad data in the field. Always escape output, even when you trust the person who entered the data.
Where you place this code matters. A subtitle belongs near the title, while a source link belongs near the end of the article. Put the code in a child theme, not the parent theme, so a theme update does not wipe out your changes. If you have not made one yet, our guide to create a WordPress child theme shows the safe way to do it.
How do I build a simple custom meta box?
The built in Custom Fields panel works, but it is plain and easy to misuse. Editors can mistype a field name, and there is no label explaining what the field is for. A custom meta box fixes that. It adds a clean box to the editor with a proper label and a single input, and it saves the value to the same post meta system. You need a small amount of PHP, but the pattern is standard and you can reuse it for any field.
Add this code to your child theme functions.php file or to a small site plugin. It creates a meta box called Post Subtitle with one text input, and it saves the value when the post is saved:
function vg_add_subtitle_meta_box() {
    add_meta_box('vg_subtitle_box', 'Post Subtitle', 'vg_subtitle_box_html', 'post', 'normal', 'high');
}
add_action('add_meta_boxes', 'vg_add_subtitle_meta_box');

function vg_subtitle_box_html($post) {
    $value = get_post_meta($post->ID, 'subtitle', true);
    wp_nonce_field('vg_save_subtitle', 'vg_subtitle_nonce');
    echo '<label for="vg_subtitle_field">Subtitle shown under the title</label>';
    echo '<input type="text" id="vg_subtitle_field" name="vg_subtitle_field" value="' . esc_attr($value) . '" style="width:100%; margin-top:6px;" />';
}

function vg_save_subtitle_meta($post_id) {
    if (!isset($_POST['vg_subtitle_nonce'])) {
        return;
    }
    if (!wp_verify_nonce(sanitize_text_field(wp_unslash($_POST['vg_subtitle_nonce'])), 'vg_save_subtitle')) {
        return;
    }
    if (defined('DOING_AUTOSAVE') && DOING_AUTOSAVE) {
        return;
    }
    if (!current_user_can('edit_post', $post_id)) {
        return;
    }
    if (isset($_POST['vg_subtitle_field'])) {
        update_post_meta($post_id, 'subtitle', sanitize_text_field(wp_unslash($_POST['vg_subtitle_field'])));
    }
}
add_action('save_post', 'vg_save_subtitle_meta');
That code looks long, but each part has one job. The first function registers the box. The second function prints the input and a security nonce. The third function runs when the post saves, checks the nonce, checks user permission, skips autosaves, and sanitizes the input before saving. Sanitizing is not optional. The sanitize_text_field function strips harmful characters and tags, so a bad value cannot break your site. Never save raw POST data without sanitizing it first. Test the box on a draft post, enter a subtitle, update the post, and reload the editor to confirm the value is still there.
What is Block Bindings and do I need it?
Block Bindings is a newer WordPress feature that connects a block to a custom field, so the block shows the field value without theme code. For example, a paragraph block can be bound to a subtitle field, and it will show that subtitle automatically. This is promising for block themes, but it still needs code to register the binding source, and support varies by theme. For most classic and hybrid themes, get_post_meta in a template remains the simpler and more reliable method. Learn Block Bindings later, after you are comfortable with the basic custom fields workflow in this guide.
Read the official block editor handbook at developer.wordpress.org before you try bindings, because the API is still evolving. The main WordPress site at wordpress.org also lists current documentation and examples.
When is ACF worth using instead?
Use the built in system when you need one to three simple text, number, or URL fields and you are comfortable adding a few lines of code. Use ACF when you need repeatable field groups, image pickers, galleries, relationship fields, or a polished editor interface for a client who should never see raw field names. ACF also handles field validation, conditional display, and export of field groups, which saves hours on a large site. The free version covers most needs, and the pro version adds repeaters and flexible content.
What mistakes should I avoid with custom fields?
- Never edit parent theme files directly. Use a child theme or a small site plugin, so updates do not erase your code.
- Never output a field value without escaping it. Use esc_html for text, esc_url for links, and esc_attr for values inside HTML attributes.
- Never save user input without sanitizing it. Use sanitize_text_field for text and intval for numbers.
- Never use spaces or capital letters in field names. Use lowercase letters and underscores only.
- Never store large content in a custom field when the post body is the right place. Fields are for short structured data.
Back up your site before you edit functions.php or add a meta box. A small PHP error in that file can lock you out of wp-admin, and you will need FTP or the file manager to fix it. If that happens, remove the code you just added and the site will recover. Our guide to creating a WordPress staging site without a plugin shows how to test code changes safely before they touch the live site. That habit is worth building now, while your field setup is still simple.
Frequently asked questions
Where are custom fields in WordPress?
Custom fields live in the block editor under Preferences, then Panels, where you can turn on the Custom Fields panel. After you reload the editor, the panel appears below the main content area. Each field has a name and a value, and it is stored as post meta for that post.
Why does my custom field not show on the front end?
The panel only stores the data, it does not display it. Your theme must output the field with get_post_meta in a template file, or you must use Block Bindings in a block theme. Add the display code to a child theme, check that the field name matches exactly, and confirm the field has a value for that post.
Can I add custom fields without a plugin?
Yes, WordPress includes custom fields by default. Enable the Custom Fields panel in the editor, add a name and value pair, and display it with get_post_meta in your theme. For a cleaner editor interface, build a simple meta box with add_meta_box and save_post, and always sanitize the input.
Should I use custom fields or ACF?
Use built in custom fields for one to three simple fields when you are comfortable with a little code. Use ACF when you need repeaters, image fields, galleries, conditional logic, or a polished interface for clients. The built in method has no extra dependency, while ACF saves time on complex sites.
Last updated: November 2026.