Most WordPress themes ship with one sidebar, and that single sidebar appears on every page whether it fits or not. Blog posts may need a newsletter box and recent posts, while product pages may need a price summary and a support link, and landing pages may need no sidebar at all. When one widget area has to serve every purpose, it ends up serving none of them well.
You can fix that without a plugin by registering your own widget areas and telling WordPress where each one should appear. The method uses two core functions, register_sidebar() and dynamic_sidebar(), plus a small conditional check when you want a different sidebar on a specific page. This guide shows the complete method, from registering the sidebar to displaying it, adding widgets, and styling it.
What Is a Custom Sidebar in WordPress?
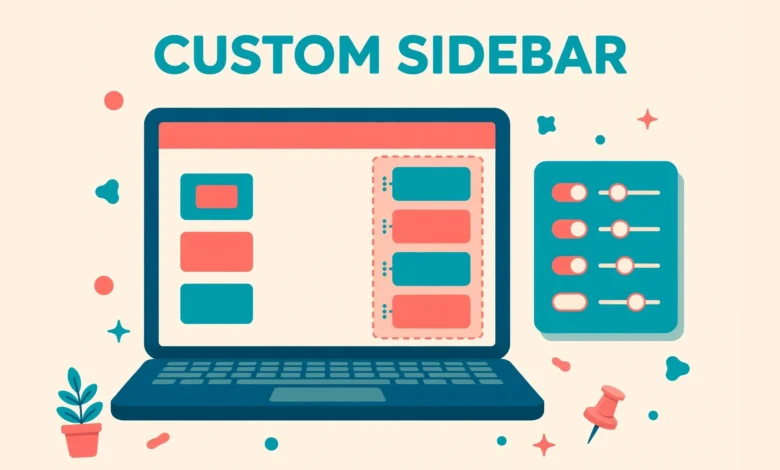
A custom sidebar is a widget area that you define yourself, separate from the sidebar areas your theme already provides. Once you register it, it appears under Appearance and then Widgets in your dashboard, and you can add any widget to it, from a search box and a custom HTML block to recent posts, categories, and a newsletter form. The sidebar itself is only a container. Its contents come from the widgets you place inside it, so you can change what visitors see without touching code again.
A custom sidebar is different from a widget, and keeping that difference clear saves confusion later. The sidebar is the named area, such as Blog Sidebar or Shop Sidebar, while the widget is the single block of content inside that area. One sidebar can hold many widgets, and one widget can be reused in several sidebars if you add it to each one. When you plan a new sidebar, name it for its purpose and its location, not for its contents, because contents change often while purpose stays stable.
Custom sidebars also solve a layout problem that page builders cannot solve cleanly. A builder can place a widget inside one page, but it cannot share the same widget area across fifty blog posts and update them all at once. A registered sidebar can. Change the widgets once, and every page that displays that sidebar updates at the same time.
Where Should You Add the Sidebar Code?
Add the code to a child theme functions.php file or to the Code Snippets plugin, and never add it to a parent theme file. A parent theme update replaces functions.php and deletes your sidebar registration without warning. A child theme keeps your code safe through updates. If you have not created a child theme before, read our guide on how to create a WordPress child theme first.
Before you add any code, make a full backup of your site and test the change on a staging copy if you have one. A small typing error in functions.php can lock you out of the dashboard, and a backup is the fastest way back. If you need reliable hosting with easy staging and backups, our web hosting guide explains what to look for before you choose a plan.
Method 1: Register a Sidebar and Display It With dynamic_sidebar()
The first step is to register the sidebar with register_sidebar(). This function tells WordPress that a new widget area exists, what it is called, and what HTML should wrap each widget inside it. The id is the most important part of the registration, because you use that id later to display the sidebar. Keep the id short, lowercase, and free of spaces, such as vtg-blog-sidebar, so it is easy to type correctly every time.
function vtg_register_custom_sidebars() {
    register_sidebar( array(
        'name'          => 'Blog Sidebar',
        'id'            => 'vtg-blog-sidebar',
        'description'   => 'Widgets shown on blog posts.',
        'before_widget' => '<section class="vtg-widget">',
        'after_widget'  => '</section>',
        'before_title'  => '<h3 class="vtg-widget-title">',
        'after_title'   => '</h3>',
    ) );
}
add_action( 'widgets_init', 'vtg_register_custom_sidebars' );
The before_widget and after_widget values control the HTML around each widget, and the before_title and after_title values control the HTML around each widget title. Matching those wrappers to your theme keeps the new sidebar looking like a native part of the design instead of a pasted addition. After you save the snippet, go to Appearance and then Widgets in the dashboard. Your new Blog Sidebar area should appear there, ready for widgets.
Registering the sidebar does not display it anywhere yet. To display it, call dynamic_sidebar() with the same id inside the template where the sidebar should appear. In a classic theme, that usually means single.php for posts, page.php for pages, or sidebar.php if your theme uses a separate sidebar file. Place the call where the sidebar column belongs in the layout, and wrap it in a check so nothing empty appears when the sidebar has no widgets.
<?php if ( is_active_sidebar( 'vtg-blog-sidebar' ) ) : ?>
    <aside class="vtg-sidebar">
        <?php dynamic_sidebar( 'vtg-blog-sidebar' ); ?>
    </aside>
<?php endif; ?>
The is_active_sidebar() check matters more than it looks. Without it, an empty sidebar still outputs its wrapper HTML, which can leave a blank column and an odd gap in your layout. With the check, the column appears only when at least one widget is active. Add a few widgets to the new area, save them, and open a blog post to confirm that the sidebar appears in the right place.
Method 2: Show a Different Sidebar on a Specific Page or Category
One custom sidebar is useful, but the real power comes from showing a different sidebar in a different place. A services page may need a contact box and a testimonial, while a category archive may need a filter and a popular posts list. WordPress conditional tags make that possible. The is_page() tag checks for a specific page, is_category() checks for a category archive, and is_single() checks for a single post, and you can combine them with simple if and else logic.
First register each sidebar you need, giving each one a clear id, such as vtg-services-sidebar and vtg-shop-sidebar. Then replace the single dynamic_sidebar() call in your template with a conditional block that picks the right sidebar for the current page. The code below shows a services page getting its own sidebar, a shop category getting another, and every other page falling back to the default blog sidebar.
<?php if ( is_page( 'services' ) && is_active_sidebar( 'vtg-services-sidebar' ) ) : ?>
    <aside class="vtg-sidebar">
        <?php dynamic_sidebar( 'vtg-services-sidebar' ); ?>
    </aside>
<?php elseif ( is_category( 'shop' ) && is_active_sidebar( 'vtg-shop-sidebar' ) ) : ?>
    <aside class="vtg-sidebar">
        <?php dynamic_sidebar( 'vtg-shop-sidebar' ); ?>
    </aside>
<?php elseif ( is_active_sidebar( 'vtg-blog-sidebar' ) ) : ?>
    <aside class="vtg-sidebar">
        <?php dynamic_sidebar( 'vtg-blog-sidebar' ); ?>
    </aside>
<?php endif; ?>
Use the page slug inside is_page(), not the full page title, because slugs stay stable when you edit a title. A page id can change when you rebuild a site, while a slug usually survives the move. If you want to learn how categories and tags organise content differently, read our guide on WordPress categories versus tags.
Test each condition after you save the template change. Open the services page, a shop category page, and a normal blog post, and confirm that each shows the right sidebar. If the wrong sidebar shows, check the slug spelling first. Clear your caching plugin cache between tests, since a cached page can show the old sidebar.
Method 3: Add a Sidebar in a Block Theme With a Template Part
Block themes work differently from classic themes, because they have no sidebar.php file and no PHP templates to edit in the usual way. In a block theme, you add a sidebar through the Site Editor, using a template part and a columns layout. The process is visual, but the idea is the same: define a sidebar area once, then reuse it across the templates that need it.
- Open Appearance and then Editor to launch the Site Editor for your block theme.
- Open the template you want to change, such as Single Post or Page, from the Templates list.
- Add a Columns block with a main content column and a narrower sidebar column.
- Insert the widgets you need into the sidebar column, such as search, recent posts, or a custom HTML block.
- Save the template, then check a post and a page to confirm the sidebar appears in both places.
If you need the same sidebar in several templates, save the sidebar column as a template part. Select the column, open the block options, and choose the option to create a pattern or a template part, then give it a clear name such as Blog Sidebar. After that, you can insert the same template part into other templates, and editing the template part once updates every template that uses it. That reuse is the block theme version of registering one sidebar and calling it from several templates.
Choose the method that matches your theme type and stay with it. Mixing a PHP sidebar call into a block theme template creates confusion and makes future theme changes harder. The official theme documentation at developer.wordpress.org explains the block theme template system in full.
How Do You Style a Custom Sidebar?
A new sidebar works as soon as it displays, but it rarely looks finished until you style it. The wrappers you set in register_sidebar() give you the CSS hooks to do that. Use the wrapper class for spacing and backgrounds, the title class for widget headings, and the sidebar class for the column itself. Keep the styling consistent with the rest of your theme, so the sidebar feels like part of the design instead of an afterthought.
.vtg-sidebar {
    padding: 24px;
    background: #f7f7f7;
}
.vtg-widget {
    margin-bottom: 32px;
}
.vtg-widget-title {
    font-size: 18px;
    margin-bottom: 12px;
}
Add that CSS through the Customizer under Appearance and then Customize and then Additional CSS, or through a child theme stylesheet. Test the result on a phone as well as on a desktop, because a sidebar that looks neat on a wide screen can crowd the content on a narrow screen. If you are new to adding styles safely, our guide on how to add custom CSS in WordPress shows the safe places to put custom code.
What Mistakes Should You Avoid?
- Registering the sidebar in a parent theme functions.php file, because a theme update deletes the registration.
- Using the sidebar name instead of its id inside dynamic_sidebar(), because the function needs the id to find the right area.
- Forgetting the is_active_sidebar() check, which leaves an empty column in the layout when no widget is active.
- Adding the same widget to the wrong sidebar, then wondering why it appears on the wrong pages.
- Creating a new sidebar for every single page, which turns a simple system into a list nobody can maintain.
- Skipping the mobile test, because a sidebar that overflows on a phone hurts every mobile visitor.
The most common mistake is creating too many sidebars too early. Start with two or three clear ones, such as a blog sidebar, a shop sidebar, and a services sidebar, and add more only when a page genuinely needs different content. Review your sidebars once a quarter and remove the ones nobody uses.
Frequently Asked Questions
Can I add a custom sidebar in WordPress without a plugin?
Yes. Register the sidebar with register_sidebar() in a child theme or in Code Snippets, then display it with dynamic_sidebar() in the template where it belongs. After that, add widgets from Appearance and then Widgets, and the sidebar works without any extra plugin.
How do I show a different sidebar on a specific page?
Use a conditional tag such as is_page() or is_category() around your dynamic_sidebar() calls. Register one sidebar per location, then check the current page inside the template and display the matching sidebar, with a fallback sidebar for every other page.
Why is my custom sidebar not showing on the front end?
Check three things in order: the sidebar id in dynamic_sidebar() must match the id in register_sidebar(), at least one widget must be active in that sidebar, and the template file you edited must be the template WordPress actually loads for that page. Clear your cache after each fix and test again.
Can I add a sidebar to a block theme without code?
Yes. In a block theme, use the Site Editor to add a Columns block to a template, place your widgets in the sidebar column, and save the column as a template part if you want to reuse it. That method needs no PHP and follows the block theme system.
Last updated: November 2026.