Spam bots attack WordPress sites every hour of every day. They try thousands of passwords on the login form, and they post junk links through the comment form. A strong password and a login limit help, but they do not stop the flood. Google reCAPTCHA does, because it checks whether the visitor is a human before WordPress processes the form.
reCAPTCHA is free for most sites, and Google gives you the keys in a few minutes. The code is short, and it works on the login form, the comment form, and most custom forms. This guide shows you how to get your keys, choose between version 2 and version 3, and add the protection without installing a plugin.
You will also learn how to test reCAPTCHA with the official test keys before going live, and what to do when real users get blocked by mistake. If you have not hardened your site yet, read our WordPress security checklist for beginners first. For the official service overview, visit Google reCAPTCHA.
What is Google reCAPTCHA and how does it work?
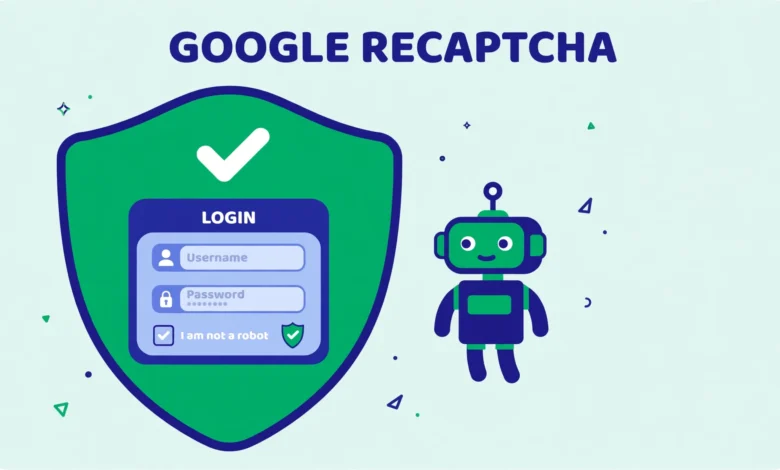
Google reCAPTCHA is a free service that separates humans from bots. When a visitor submits a form, reCAPTCHA analyses their behaviour, such as mouse movement and typing speed, and decides how likely they are to be human. A human passes with one click or with no interaction at all, while a bot gets blocked or faces a challenge it cannot solve.
The service runs in two parts. The front end part is a small script you load on your page, which shows a checkbox or runs invisibly in the background. The back end part is a check your server makes with Google, where your site sends a token and your secret key, and Google replies with a pass or fail result. Both parts matter, because a bot can fake the checkbox, but it cannot fake the server side verification.
Every WordPress form that accepts input from strangers benefits from reCAPTCHA. The login form is the top priority, because a bot that guesses a password gets full access to your site. The comment form is next, because spam comments hurt your search rankings.
Should I choose reCAPTCHA v2 checkbox or v3 score?
Version 2 shows a checkbox labelled “I am not a robot”. A visitor clicks it, and most humans pass at once. If Google is unsure, it shows an image challenge, such as picking all the traffic lights. It is visible and very effective, but the checkbox adds friction to every form.
Version 3 is invisible. It runs in the background on every page and returns a score from 0.0 to 1.0, where 1.0 means almost certainly human and 0.0 means almost certainly a bot. Your code decides what to do with the score, for example by blocking anything below 0.5. It gives a smoother experience, but it needs more code, because you must choose a threshold and handle borderline scores.
For most WordPress sites, version 2 checkbox is the better starting point. It is simple to add, it is obvious to visitors, and it stops nearly all bots on the login and comment forms. Choose version 3 when you run a high traffic site where every extra click costs conversions. You can also mix them, because each form can use its own keys.
How do I get my reCAPTCHA site and secret keys?
Go to google.com/recaptcha/admin and sign in with a Google account. Click the plus button to register a new site, give it a label such as your site name, choose reCAPTCHA v2 checkbox or v3, and add your domain without the https part. Accept the terms, submit the form, and Google shows two keys: a site key for your page HTML, and a secret key that stays on your server.
Keep the secret key private. Anyone with it can verify tokens on your behalf, so treat it like a password. Store it in your code on the server only, never in JavaScript that visitors can read, and never commit it to a public code repository. If a key leaks, generate a new pair in the admin console and update your code.
One key pair works for one domain and its subdomains, so a key made for yoursite.com also works on blog.yoursite.com. A local test site needs its own key pair, or you can use the official test keys covered later in this guide.
How do I add reCAPTCHA to the WordPress login form?
Protecting the login form needs two code pieces. The first loads the reCAPTCHA script and shows the checkbox under the login fields, using the login_enqueue_scripts hook and the login_form action. The second verifies the token when the form is submitted, using the wp_authenticate_user filter, and blocks the login if Google says the token failed.
function vu_recaptcha_login_field() {
    echo '<div class="g-recaptcha" data-sitekey="YOUR_SITE_KEY"></div>';
}
add_action( 'login_form', 'vu_recaptcha_login_field' );
function vu_recaptcha_login_scripts() {
    wp_enqueue_script( 'vu-recaptcha', 'https://www.google.com/recaptcha/api.js' );
}
add_action( 'login_enqueue_scripts', 'vu_recaptcha_login_scripts' );
function vu_verify_recaptcha_login( $user ) {
    if ( empty( $_POST['g-recaptcha-response'] ) ) {
        return new WP_Error( 'captcha_missing', 'Please complete the reCAPTCHA check.' );
    }
    $response = wp_remote_post( 'https://www.google.com/recaptcha/api/siteverify', array(
        'body' => array(
            'secret' => 'YOUR_SECRET_KEY',
            'response' => sanitize_text_field( $_POST['g-recaptcha-response'] ),
        ),
    ) );
    $result = json_decode( wp_remote_retrieve_body( $response ), true );
    if ( empty( $result['success'] ) ) {
        return new WP_Error( 'captcha_failed', 'reCAPTCHA check failed. Please try again.' );
    }
    return $user;
}
add_filter( 'wp_authenticate_user', 'vu_verify_recaptcha_login', 10, 1 );
Replace YOUR_SITE_KEY and YOUR_SECRET_KEY with your keys from the reCAPTCHA admin console. The verify function runs during login, so a failed check stops the login before WordPress checks the password, which means a bot cannot test passwords without passing reCAPTCHA first.
Add this code to your child theme functions.php file or with the Code Snippets plugin, never to the parent theme, because a theme update would erase it. If your login page uses a custom design, our guide to customize the WordPress login page without a plugin shows where the login form hooks fit. Pair reCAPTCHA with a login attempt limit for the strongest defence, as explained in our guide to limit login attempts in WordPress without a plugin.
How do I add reCAPTCHA to the comment form?
Comment spam is the other big target. WordPress lets you add the checkbox to the comment form with the comment_form_after_fields action, and verify it with the preprocess_comment filter, which runs before the comment is saved. The pattern matches the login form: show the widget, then verify the token.
One detail needs care. The comment form also runs for logged in users, and forcing a CAPTCHA on your regular commenters is annoying. Wrap the field output in a check for is_user_logged_in, and skip the widget for logged in users. Guests still get the check, which is the group that produces nearly all comment spam.
Also remember that reCAPTCHA only blocks bots, not rude humans. Keep comment moderation on for first time commenters, and keep manual approval for comments with links. The two layers together keep your comment section clean without blocking genuine readers.
What about Elementor forms and contact forms?
Elementor Pro has a built in reCAPTCHA integration in its form widget settings, where you paste the same site and secret keys. That is the easiest route, because it needs no code. The free version of Elementor does not include it, so a free Elementor form needs the code method adapted to its form hooks, or a small form plugin that supports reCAPTCHA.
Contact Form 7 also supports reCAPTCHA v3 from its integration settings, where you paste your keys and choose a score threshold. The rule for every form is the same: the widget must appear on the form, and the token must be verified on the server before the submission is processed. A widget without server verification is decoration.
How do I test reCAPTCHA before going live?
Google provides official test keys that always return a fixed result, so you can test your code without registering a local domain. The test site key is 6LeIxAcTAAAAAJcZVRqyHh71UMIEGNQ_MXjiZKhI, and the matching test secret key is 6LeIxAcTAAAAAGG-vFI1TnRWxMZNFuojJ4WifJWe. With these keys, verification always succeeds.
- Put the test keys in your code on a staging site and load the login page.
- Confirm the reCAPTCHA checkbox appears under the password field.
- Submit the form without ticking the box and confirm WordPress blocks the login.
- Tick the box, submit again, and confirm the login works.
- Replace the test keys with your real keys before moving the code to the live site.
- Test the live form in a private browser window while logged out.
Never leave the test keys on a live site, because they always pass verification, so a bot can get through with no effort. Swap in the real keys from your admin console, then test the live login form once more. A fast host keeps the verification request to Google quick, so keep your hosting solid with our web hosting guide, and for the official function reference, see developer.wordpress.org.
What do I do when reCAPTCHA blocks real users?
Real users get blocked sometimes, usually because of a privacy browser extension, a VPN, or a very strict version 3 threshold. If readers report that they cannot log in, check your error logs for failed verifications, and confirm your domain is listed correctly in the admin console. A missing www version of the domain is a common cause.
If version 3 blocks too many humans, lower the threshold from 0.5 to 0.3, or switch that form to version 2 checkbox, which gives the user a clear action instead of a silent rejection. Always show a helpful error message, never a bare failure, so a blocked user knows what to try next. And keep a backup login route, so a reCAPTCHA outage never locks you out of your own site.
When is a plugin the better choice?
The code method in this guide is free, light, and perfect for the login and comment forms. A plugin is better when you need reCAPTCHA on many different forms at once, when you want version 3 score handling with a settings screen, or when a non technical team member must change keys and thresholds without editing code. If you only need the login and comment forms protected, the code here does the job with one snippet.
Frequently asked questions
Is Google reCAPTCHA free for WordPress?
Yes, reCAPTCHA is free for up to one million assessments per month, which covers nearly every WordPress site. You only pay if your site passes that limit, which is rare for blogs and small business sites.
Can I add reCAPTCHA to WordPress without a plugin?
Yes. Get your site and secret keys from the reCAPTCHA admin console, then add the code from this guide to a child theme or Code Snippets. The code shows the checkbox on the login form and verifies the token on the server with the wp_authenticate_user filter.
Should I use reCAPTCHA v2 or v3 on my site?
Use version 2 checkbox for the login and comment forms, because it is simple to add and gives visitors a clear action. Use version 3 when you want invisible protection and you are willing to choose a score threshold and handle borderline scores in code.
Why is reCAPTCHA not showing on my login page?
The usual cause is a caching plugin serving an old copy of the login page, or a custom login template that skips the login_form action. Clear the cache, confirm the snippet is active, and check that your site key is correct. Also confirm your domain is listed in the reCAPTCHA admin console.
Last updated: November 2026.