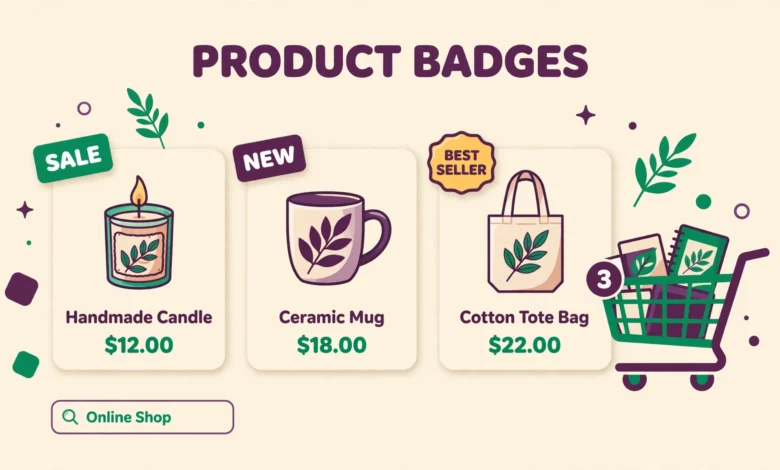
Walk through any busy online store and you will notice small labels on product images: Sale, New, Best Seller, Only 2 Left. Those labels are product badges, and they work because shoppers scan before they read. A badge answers a question in one glance: is this a deal, is it fresh, is it popular, or will it sell out soon? That fast signal can turn a scroll into a click and a click into a sale.
You do not need a premium plugin to add badges in WooCommerce. With a small PHP snippet and a little CSS, you can show a New badge on recent products, a discount percentage on sale items, and badges driven by tags or categories you already use. This guide shows both methods, plus styling, mobile checks, and the mistakes that make badges hurt trust instead of helping sales.
Before you add code, back up your site or at least your theme files, and add the snippet to a child theme or a code snippets plugin rather than editing a parent theme directly. Parent theme updates overwrite direct edits, and a lost badge snippet is a small problem that is easy to prevent.
What Are Product Badges and Why Do They Lift Sales?
A product badge is a short label overlaid on a product image on shop, category, and related product grids. It is not the product title, price, or description. It is a visual shortcut. Shoppers deciding between similar products use badges to shortlist fast, which is why badges belong on listing pages rather than only on single product pages.
Each badge type triggers a different buying reason. A Sale badge with a percentage makes the saving concrete instead of vague. A New badge creates curiosity about a fresh arrival. A Best Seller badge borrows social proof from other buyers. A Low Stock badge creates urgency, but only when the stock level is real. A badge that lies, such as a permanent Sale label on a product that was never full price, may win one click and lose repeat trust.
What Does the Built-In WooCommerce Sale Badge Do?
WooCommerce already shows a Sale badge on products with a sale price. Most themes render it as a small Sale label in a corner of the product image. That covers the simplest case, and for many stores it is enough to start with. The limits show up quickly: the label always says Sale, it never shows the discount percentage, you cannot add New or Best Seller labels from product settings alone, and styling depends on your theme.
That is where a small custom snippet helps. Instead of replacing WooCommerce behaviour, you extend it. You keep the built-in sale handling, which already manages sale prices and sale dates, and you add your own badges for the cases WooCommerce does not cover. This keeps your pricing logic in WooCommerce, where it belongs, and puts only the display logic in your snippet.
How Do You Add Custom Badges With PHP and CSS?
Method 1 uses a PHP snippet hooked into the WooCommerce sale flash area, plus CSS for positioning and colour. The snippet below does two things. It shows a New badge for simple products published in the last 14 days, and it shows a discount percentage badge on sale products instead of a plain Sale label. You can adjust the 14 day window to suit how often you add products.
add_filter('woocommerce_sale_flash', 'vutg_custom_product_badges', 10, 3);
function vutg_custom_product_badges($html, $post, $product) {
    if ($product->is_on_sale()) {
        $regular = (float) $product->get_regular_price();
        $sale = (float) $product->get_sale_price();
        if ($regular > 0 && $sale > 0 && $sale < $regular) {
            $percent = round((($regular-$sale) / $regular) * 100);
            return '<span class="vutg-badge vutg-badge-sale">-' . $percent . '%</span>';
        }
    }
    $published = get_the_time('U', $post);
    $days_old = (time()-$published) / DAY_IN_SECONDS;
    if ($days_old <= 14) {
        return '<span class="vutg-badge vutg-badge-new">New</span>';
    }
    return $html;
}
Read the snippet in plain terms. If the product is on sale and has both a regular and a sale price, it returns a percentage badge. Otherwise, if the product was published within the last 14 days, it returns a New badge. If neither condition applies, it returns the original WooCommerce badge output unchanged, so products that qualify for neither still behave normally.
Now add CSS to style and position the badges. This example places the badge in the top left corner, uses a pill shape, and gives sale and new badges different colours. Adjust the colours to match your brand, but keep contrast high enough that the text stays readable on busy product photos.
.vutg-badge {
    position: absolute;
    top: 12px;
    left: 12px;
    z-index: 5;
    padding: 5px 10px;
    border-radius: 999px;
    font-size: 12px;
    font-weight: 700;
    letter-spacing: 0.5px;
    text-transform: uppercase;
}
.vutg-badge-sale {
    background: #d92d20;
    color: #ffffff;
}
.vutg-badge-new {
    background: #067647;
    color: #ffffff;
}
How Do You Add Badges Using Product Tags and Categories?
Method 2 needs no PHP at all for some badge types, and it is ideal for badges you control by hand, such as Best Seller or Limited. Create a product tag or category with a clear name, assign it to the products you want badged, and use CSS or a small snippet to display a label for products in that tag. The tag approach is flexible because your team can badge a product from the product editor without touching code.
Low Stock badges deserve special care. WooCommerce tracks stock, so you can show a Low Stock badge only when stock falls below a threshold you set, such as 5 units. That keeps urgency honest and automatic. Never fake low stock with a tag on a well stocked product. Shoppers notice when every product claims scarcity, and payment and review platforms notice too.
How Should You Style and Position Badges?
Good badge styling follows three rules: readable, consistent, and quiet enough to let the product photo lead. Use short words only. Sale, New, Best Seller, and Low Stock all read at a glance. Longer phrases such as Limited Time Special Offer shrink to unreadable text on a product card and defeat the purpose of a badge.
Keep one position for all badges on a card, usually top left, and stack a second badge below the first if a product qualifies for two. Do not scatter badges to different corners on different products, because shoppers learn where to look and inconsistent placement slows scanning. Use a maximum of two badges per product. A third badge adds clutter faster than it adds information.
How Do You Check Badges on Mobile?
Open your shop page on a real phone, not only in a desktop browser resized to a narrow width. Real phones show touch targets, image cropping, and theme mobile layouts that a resized desktop window can hide. Scroll the full shop grid and check every badge type you added: sale percentage, new, best seller, and low stock if you use it.
Check four things on mobile. First, no badge covers the product title, price, or add to cart button. Second, no badge is cut off at the image edge. Third, badge text stays readable without zooming. Fourth, tapping the product still opens the product page, which means the badge is not blocking the image link. If any check fails, shrink the badge, move it to a safer corner, or reduce padding on small screens.
What Mistakes Should You Avoid With Product Badges?
- Too many badges: three or more labels on one product look desperate and hide the photo. Keep it to one, or two at most.
- Misleading badges: a Sale badge on a product at its normal price, a Best Seller badge on a slow seller, or fake Low Stock erodes trust and can breach advertising rules.
- Overlapping theme badges: if your theme already shows Sale, do not add a second sale badge. Replace or restyle the existing one instead.
- Stale badges: a New badge on a product added months ago, or a seasonal badge left up after the season, tells shoppers the store is not maintained.
- Badges that block actions: a badge over the add to cart button or image link costs sales directly, even if it looks attractive.
- Inconsistent wording: using New, Just Arrived, and Fresh across different products for the same idea confuses shoppers. Pick one word and use it everywhere.
Review badges as part of your normal store maintenance, alongside the other small WooCommerce improvements that compound over time. For example, our guide to adding a sticky add to cart button in WooCommerce without a plugin pairs well with badges, because badges earn the click and a sticky button keeps the purchase step visible. Similarly, clear post purchase communication matters once the badge has done its job, as shown in our guide to customizing WooCommerce order emails without a plugin.
Badges also sit inside a wider store setup. A fast shop page makes badges and images load cleanly on mobile, which is one reason our web hosting guide covers performance alongside price. If badges look fine on desktop but images load slowly on mobile, the badge cannot do its job until the page itself is fast enough to scan.
When Is a Dedicated Badge Plugin Actually Worth It?
A snippet covers most stores, but a plugin earns its place in a few cases. If you need scheduled badges that appear and expire automatically for campaigns, rule based badges across hundreds of products, badges with countdown timers, or a visual badge designer for non technical team members, a dedicated plugin saves real time. Large catalogues also benefit, because managing tags by hand across hundreds of products becomes error prone.
For most small and mid sized stores, start with the snippet method, measure which badges actually lift clicks and sales, and only pay for a plugin when you can name the specific rule or scheduling feature you need. That order keeps your store lean, keeps badge logic under your control, and keeps the focus where it belongs: on honest labels that help shoppers choose faster.
For background on the hooks and functions used here, see the official WooCommerce developer documentation at developer.woocommerce.com and the WordPress developer resources at developer.wordpress.org.
Frequently Asked Questions
Will custom badges slow down my WooCommerce shop page?
No, not in any meaningful way. A small snippet that checks sale price and publish date adds negligible work per product. Heavy badge plugins with extra scripts and styles can slow pages, which is one reason the snippet method is a good default for most stores.
Can I show a discount percentage instead of the word Sale?
Yes. The snippet in this guide calculates the percentage from the regular and sale prices and shows it as a badge. Make sure the regular price is a real previous price, not an inflated figure added only to show a large percentage.
How long should a New badge stay on a product?
Fourteen days works well for stores that add products regularly, and 30 days can suit slower catalogues. Pick one window, apply it consistently, and avoid leaving a New badge on a product for months, since shoppers stop believing it.
Do badges work with variable products?
Yes, with care. WooCommerce marks a variable product on sale when any variation is on sale, but the percentage shown should reflect a sensible calculation for that product. Test variable products after adding your snippet, and check that the badge matches the prices shoppers see on the product page.
Last updated: November 2026.