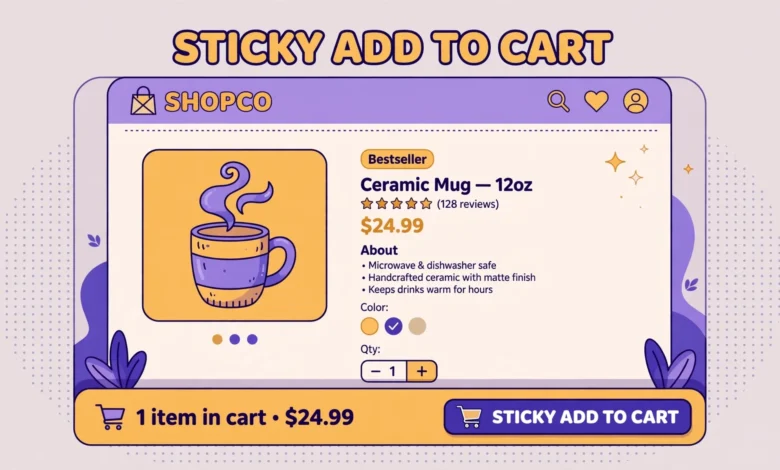
Long product pages sell well because they answer every question a shopper has. They also have a conversion problem: by the time a shopper reads the reviews at the bottom, the buy button is far above, out of sight. A sticky add to cart bar fixes this by keeping a compact buy bar visible as the shopper scrolls. The honest starting point is that WooCommerce has no native sticky add to cart bar. Some themes include one as a feature, and a few plugins add one, but you can also build a solid version with code. This guide shows you how to add a sticky add to cart WooCommerce without plugin code, using CSS and a small JavaScript snippet.
Should You Check Your Theme First?
Yes, always. Many popular WooCommerce themes, and several page builders, already include a sticky add to cart option in their customizer or product page settings. Check your theme options for anything named sticky cart, sticky add to cart, or floating buy bar before writing code. If your theme has it, enabling it is faster and safer than custom code, because the theme maker already handles variable products, mobile layout, and updates.
Only move to the code method when your theme lacks the feature or its version does not fit your design. The code below works with most standard WooCommerce product templates, but every theme structures its product page slightly differently, so test on your own theme and adjust the selectors to match. If your theme uses a heavily custom product template, the selectors in this guide may need tweaking, and that is normal.
How Does the CSS Position Sticky Approach Work?
The simplest version uses CSS position sticky on the existing add to cart form. When the shopper scrolls past the form, it sticks to the top of the viewport instead of scrolling away. Add this to your child theme stylesheet or to the Additional CSS panel in the customizer:
.single-product .cart {
  position: sticky;
  top: 0;
  z-index: 99;
  background: #ffffff;
  padding: 12px 0;
}
This is a quick win, but it has limits. The whole cart form sticks, including the quantity field and any variation dropdowns, which can take up a lot of vertical space. It also only works while the form itself is inside a scrolling container that allows sticky positioning, and some themes wrap the form in a way that breaks it. For a cleaner result, the JavaScript bar in the next section is the better choice, because it shows a compact bar instead of the full form.
How Do You Build a Sticky Bar With JavaScript?
The better approach is a slim bar fixed to the bottom of the screen that appears only after the shopper scrolls past the main add to cart button. The bar shows the product name, the price, and a buy button. When clicked, it submits the same product to the cart. Here is the structure to add to your product page template or through a code snippet in your child theme:
<div id="sticky-cart-bar" class="sticky-cart-hidden">
  <span class="sticky-cart-name">Product name here</span>
  <span class="sticky-cart-price">Price here</span>
  <button id="sticky-cart-button" type="button">Add to Cart</button>
</div>
Next, style the bar so it sits fixed at the bottom of the viewport, spans the full width, and stays above other content:
#sticky-cart-bar {
  position: fixed;
  left: 0;
  right: 0;
  bottom: 0;
  z-index: 999;
  display: flex;
  align-items: center;
  justify-content: space-between;
  gap: 12px;
  padding: 12px 20px;
  background: #ffffff;
  box-shadow: 0 -2px 12px rgba(0, 0, 0, 0.12);
  transition: transform 0.3s ease;
}
#sticky-cart-bar.sticky-cart-hidden {
  transform: translateY(100%);
}
Finally, the JavaScript watches the scroll position and reveals the bar once the main add to cart button has scrolled out of view. It also forwards the click to the real add to cart button, so the bar uses the same cart logic as the main form:
document.addEventListener('DOMContentLoaded', function() {
  var mainButton = document.querySelector('.single_add_to_cart_button');
  var stickyBar = document.getElementById('sticky-cart-bar');
  var stickyButton = document.getElementById('sticky-cart-button');
  if (!mainButton || !stickyBar || !stickyButton) {
    return;
  }
  window.addEventListener('scroll', function() {
    var rect = mainButton.getBoundingClientRect();
    if (rect.bottom < 0) {
      stickyBar.classList.remove('sticky-cart-hidden');
    } else {
      stickyBar.classList.add('sticky-cart-hidden');
    }
  });
  stickyButton.addEventListener('click', function() {
    mainButton.click();
  });
});
Because the sticky button clicks the real button, quantity and variation choices made in the main form carry over automatically. That is the key advantage of this pattern: the bar is a remote control for the real form, not a second cart system. Custom CSS is easy to add through the customizer, and our guide on how to add custom CSS in WordPress covers the safest places to put it. For the underlying WooCommerce functions, the reference at developer.wordpress.org explains the hooks this kind of snippet relies on.
How Do You Handle Variable Products and Quantity?
Variable products add a wrinkle. A shopper must pick a variation, such as size or color, before adding to cart, and the sticky bar alone cannot show those choices. The click forwarding pattern solves most of this: the shopper picks the variation in the main form, scrolls down, and the sticky button adds exactly the chosen variation. The limitation is that a shopper who scrolls down before choosing a variation will click the sticky button and get a “please choose an option” notice, which is confusing if the dropdowns are far above.
Two fixes help. First, only show the sticky bar after a variation has been selected, by checking whether the main button is enabled before revealing the bar. Second, when the sticky button is clicked while no variation is chosen, scroll the shopper back up to the variation dropdowns instead of silently failing. For quantity, the same logic applies: the sticky button uses whatever quantity is set in the main form. If you want a quantity control in the bar itself, sync its value to the main quantity field on change. Keep the bar simple, though. A bar with its own variation dropdowns and quantity controls becomes a second product form, which is much harder to keep in sync.
Getting variations right matters for conversions, and it helps to understand how they work before customizing them. Our guide on WooCommerce product variations covers setup and common mistakes, and the guide on how to set a minimum order amount in WooCommerce is useful if your sticky bar will sit on products that also carry order rules.
How Do You Style the Bar for Mobile?
Mobile is where a sticky bar earns its keep, because phone screens show so little of a long product page at once. It is also where a bad bar does the most damage, by covering content or clashing with the browser chrome. Keep the mobile bar to one line where possible: product name truncated, price, and a full width or prominent button. Hide the product name on very small screens if space gets tight, and make the button at least 44 pixels tall so it is easy to tap.
Add a media query to adjust the layout on small screens, and add bottom padding to the page body so the fixed bar never covers the footer content or the final review when a shopper reaches the bottom of the page:
@media (max-width: 600px) {
  #sticky-cart-bar {
    padding: 10px 12px;
  }
  .sticky-cart-name {
    display: none;
  }
  body.single-product {
    padding-bottom: 70px;
  }
}
Test on a real phone, not just a resized desktop browser, because mobile browsers hide and show their address bars as you scroll, which changes the visible height. A bar that looks perfect in a desktop emulator can still overlap content on a real device. Also check that the bar does not cover a cookie banner, a chat widget, or a mobile menu button, and adjust the z-index or the bar position if it does.
How Do You Test the Sticky Bar Before Going Live?
- Simple product: scroll past the main button, confirm the bar appears, click it, and confirm the product lands in the cart with the right quantity.
- Variable product: choose a variation, scroll down, click the sticky button, and confirm the correct variation is added.
- No variation chosen: click the sticky button and confirm the shopper gets a clear prompt instead of a silent failure.
- Mobile: test on a real phone in portrait mode, confirm the bar does not cover content, and confirm the button is easy to tap.
- Cart page: confirm the bar only appears on single product pages, never on the cart or checkout, where it would confuse shoppers.
- Cache: purge your caching plugin and test in a private window, so you test the live code and not a cached page.
Test with a staging copy if you can, especially if your store already takes live orders. A broken add to cart flow costs real sales, so never test unproven cart code directly on a live store during peak hours. If the bar misbehaves, remove the snippet and the bar disappears, since the main product form is untouched. That reversibility is another advantage of the click forwarding pattern.
When Is a Plugin the Better Choice?
Code is the right choice when you want a simple bar and you are comfortable maintaining a snippet. A plugin is the better choice when you need variation selectors inside the bar, a quantity control in the bar, countdown timers, or different bars for different product categories. Those features take real development time to build by hand, and a maintained plugin gives you updates and support for them. The honest rule is to match the tool to the feature list: if your needs stop at a simple sticky button, code wins on speed and weight. If your needs grow past that, a plugin saves you more time than it costs.
Whichever route you choose, keep the rest of the buying journey smooth too. A sticky bar that drives more add to carts still loses sales if checkout is rough. Our guides on how to hide prices in WooCommerce and how to recover abandoned carts in WooCommerce for free cover two common follow up improvements, and the web hosting pillar page explains why fast hosting matters for every extra interaction on a product page. If you later run promotions through the bar, the guide on how to create a coupon code in WooCommerce pairs well with it. Reference material at wordpress.org covers WooCommerce installation and theme compatibility basics.
Frequently Asked Questions
Does WooCommerce have a built in sticky add to cart feature?
No. WooCommerce itself does not include a sticky add to cart bar. Some themes offer one as a built in feature, and plugins add one, but the core plugin shows only the standard add to cart form on the product page. The code method in this guide adds the bar without a plugin.
Will a sticky bar work with variable products?
Yes, if the bar forwards its click to the real add to cart button, because the chosen variation carries over automatically. The shopper must still pick a variation in the main form first. A bar that tries to add a variable product without a chosen variation will fail, so handle that case with a clear prompt or by scrolling back to the dropdowns.
Will a sticky bar slow down my product pages?
Barely. The CSS and the small scroll listener in this guide add almost no weight. A sticky bar only hurts performance if it loads heavy extra scripts, large images, or a second product form. Keep the bar light, with text and a button only, and the impact is negligible.
Should the sticky bar appear on every page of my store?
No. Limit it to single product pages, where the buying decision happens. Showing a buy bar on the cart or checkout page confuses shoppers who are already past that step, and showing it on shop archive pages makes little sense because each product card already has its own button.
Last updated: November 2026.