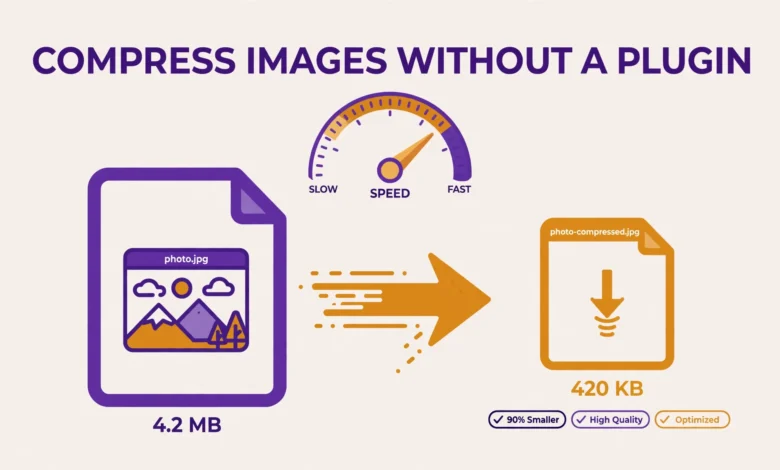
Large images are the most common reason WordPress sites load slowly. A photo straight from a phone can be 4 MB or more, and a page with five such photos asks visitors to download 20 MB before they can read anything. That hurts your Core Web Vitals and your search rankings, and it costs you visitors who leave before the page finishes loading.
You do not need a plugin to fix this. You can compress images before you upload them, using free tools on your computer or in your browser, and you can use WordPress built in settings to serve smaller sizes. This guide shows how to compress images in WordPress without a plugin, with the exact sizes and formats to use for featured images, blog photos, and product images.
Why Should I Compress Images Before Uploading to WordPress?
WordPress creates several smaller copies of every image you upload, but it does not compress the original file for you in the way a dedicated tool does. If you upload a 4 MB photo, WordPress still stores that large original, and it may serve a large size on some screens. Compressing before upload means every copy WordPress creates starts from a smaller file, so every size loads faster.
Compression also saves storage and bandwidth. Hosting plans limit storage, and a media library full of uncompressed photos fills that limit quickly. The visual difference is tiny when you compress correctly: a photo compressed to 70 to 80 percent quality looks the same as the original on a screen, but the file can be 60 to 80 percent smaller.
What Image Size Should I Use in WordPress?
Resize images to the size they will actually be shown at, not the size your camera produced. A featured image that displays at 1200 pixels wide does not need to be 4000 pixels wide. Uploading a huge image and letting the browser shrink it wastes bandwidth and slows the page, because the browser still downloads the full file.
- Featured image: resize to 1200 pixels wide, which suits most themes and social sharing.
- Blog content image: resize to 800 to 1000 pixels wide, matching your content column width.
- Thumbnail or small image: resize to 300 to 400 pixels wide, never upload a full size photo for a tiny display.
- Full width hero image: resize to 1600 to 1920 pixels wide, and compress it more aggressively because it is large.
- Logo or icon: use the exact display size, and prefer SVG or PNG for sharp lines and text.
Check your theme content width before you decide. If your content column is 800 pixels wide, an image wider than 1000 pixels adds weight with no visible benefit. Set a standard width for each image type on your site and stick to it. For more on image sizes and search, read our WordPress image SEO tips.
How Do I Compress Images on My Computer Before Upload?
The simplest method is to compress on your computer before you open WordPress. On Windows and Mac, you can use free desktop tools or built in apps to resize and export at lower quality. Open the image, resize it to the target width, then export it as JPEG at 70 to 80 percent quality for photos, or as PNG only when you need transparency. That one export often cuts the file from several megabytes to under 200 KB.
For batch work, use a free desktop tool that can process a whole folder at once. Set the output width, the quality, and the format once, then drop in all the images for a post. Name the files clearly before you upload them, using descriptive names with hyphens, such as wordpress-dashboard-settings, because WordPress uses the file name in the image URL.
How Do I Compress Images With Free Online Tools?
If you do not want to install software, free online tools can compress images in your browser. Upload the image, choose the quality or the target file size, download the compressed version, and then upload that version to WordPress. Many of these tools also convert to WebP at the same time, which saves even more space. Use a well known tool from a reputable site, and avoid uploading sensitive or private photos to any online service you do not trust.
Online tools are best for one or two images at a time. For a full post with many photos, a desktop batch tool is faster and keeps your files on your own computer. Whichever method you choose, compare the before and after file sizes, and zoom into the compressed image at 100 percent to check that text still looks clean. Small text in screenshots needs higher quality than a landscape photo.
Should I Use WebP Instead of JPEG and PNG?
Yes, for most photos and screenshots, WebP is the better choice in 2026. WebP files are typically 25 to 35 percent smaller than JPEG at the same visual quality, and they support transparency like PNG. Modern browsers all support WebP, and WordPress has supported WebP uploads since version 5.8, so you can upload WebP files directly to the media library without a plugin.
Convert to WebP when you compress, either in your desktop tool or in an online converter, then upload the WebP version. Keep JPEG as a fallback only when you need to support a very old browser or a tool that does not accept WebP. For logos and simple graphics with sharp edges, PNG or SVG may still be better, because WebP can soften crisp lines at low quality. Test one image in each format before you convert a whole library. Google documents the WebP advantage on Google Developers, and the PageSpeed tool at PageSpeed Insights will flag images that could be smaller.
How Do I Use WordPress Built In Settings to Serve Smaller Images?
WordPress already creates multiple sizes for each upload, and you should use those sizes instead of inserting the full size image every time. When you add an image to a post, choose the size that matches the display width: Medium or Large for a content image, not Full Size. The block editor shows the size options in the image settings panel, and picking the right size can cut the downloaded file by more than half.
WordPress also adds responsive images automatically, serving a smaller file to phones and a larger file to desktops. That works only if you insert the image with the standard image block. Keep the default image sizes sensible under Settings, then Media. Our guide on how to lazy load images in WordPress without a plugin shows another built in technique that delays off screen images until the visitor scrolls to them.
How Do I Compress Images I Already Uploaded?
If your media library is already full of large images, you do not need to delete and reupload everything at once. Start with the images on your most visited pages: the home page, the top blog posts, and the landing pages that bring the most traffic. Download each large image, compress and resize it on your computer, then replace it in WordPress with the new version, using the same file name where possible so links do not break.
Work through the library in small batches, a few posts per week, and check the page speed after each batch. Also delete unused images from the media library, because they take up storage and show up in backups even though no post uses them. If your site feels slow overall, our guide to fix a slow WordPress admin dashboard covers other causes beyond images, and our guide to optimising the WordPress database without a plugin helps with the database side.
What Are the Best Free Tools for Image Compression?
You do not need to pay for compression. Free desktop tools can resize, convert to WebP, and batch process a folder in minutes, and free online tools work well for single images. The exact tool matters less than the workflow: resize first, then compress, then check the result, then upload. Pick one tool you like, learn its export settings, and use it for every image, so compression becomes a habit rather than a chore.
- Desktop batch tool: best for many images, lets you set width, quality, and format once and process a folder.
- Built in photo app: good for one image at a time, use Export with a smaller size and JPEG quality around 75 percent.
- Online compressor: good for a quick single image, upload, compress, download, then upload to WordPress.
- Online WebP converter: good for turning JPEG and PNG files into WebP before upload.
- Browser screenshot tool: capture only the area you need, instead of a full screen shot that you then have to crop and shrink.
Whatever tool you use, keep a copy of the original high quality image on your computer, in case you need a larger version later. Upload only the compressed copy to WordPress. Hosting also affects image delivery, and our web hosting guide explains how server speed, caching, and CDN support change how fast images reach visitors. For the official WordPress view, see the media guidance on WordPress.org.
How Much Can Image Compression Improve Page Speed?
The improvement is often dramatic on image heavy pages. A blog post with five uncompressed photos can drop from 15 MB to under 2 MB after resizing and compression, and the Largest Contentful Paint time can fall by several seconds. That change alone can move a page from a poor Core Web Vitals score to a passing score.
Measure the result so you know it worked. Test the page in PageSpeed Insights before and after you compress the images, and note the total page weight and the Largest Contentful Paint. If the page is still slow, check whether the theme, a plugin, or the server is the next bottleneck, and fix that next. Image compression is the highest return speed fix for most WordPress sites, because it is free, it needs no code, and it helps every visitor on every device.
Frequently Asked Questions
Does WordPress compress images automatically?
WordPress creates smaller copies and applies some JPEG compression, but it does not fully optimise the original file. Uploading a large uncompressed photo still stores a large original and can serve a large size. Compress and resize before upload for the best result.
What quality setting should I use for JPEG images?
Use 70 to 80 percent quality for most photos. That range keeps the image looking clean on screen while cutting the file size by more than half. Use higher quality for screenshots with small text, and lower quality for large background photos where fine detail matters less.
Is WebP better than JPEG for WordPress?
Yes, for most photos. WebP files are typically 25 to 35 percent smaller than JPEG at the same quality, and WordPress supports WebP uploads. Convert photos to WebP when you compress, and keep PNG only for images that need sharp lines or transparency at high quality.
Can I compress images without losing quality?
Lossless compression shrinks the file a little without changing any pixels, but the savings are small. Lossy compression at 70 to 80 percent quality saves far more space, and the difference is invisible on most screens. Use lossy compression for web images, and keep the original file on your computer if you need full quality later.
Last updated: November 2026.