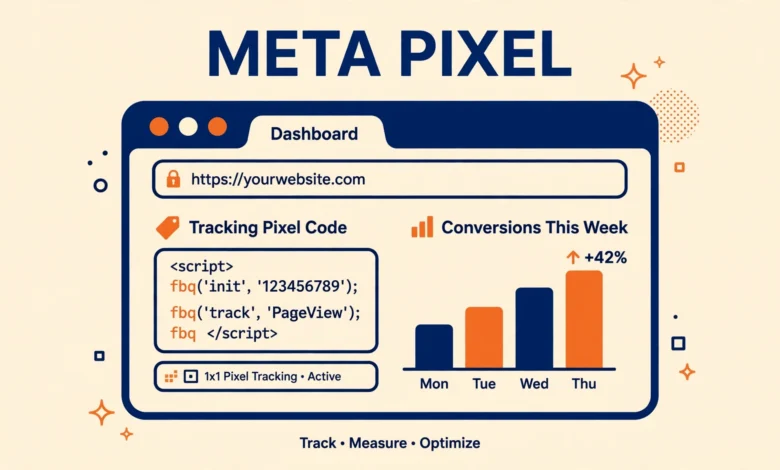
If you run a WordPress site and advertise on Facebook or Instagram, the Meta Pixel is the small piece of code that connects the two. It tells Meta when someone visits your site, views a product, or completes a purchase, so your ads can reach the right people and you can measure what actually works instead of guessing.
Facebook renamed its tracking pixel to the Meta Pixel in 2022, but the job is the same. Many site owners install a plugin to add it, yet a plugin is not required. You can add the pixel yourself in a few minutes with a small code snippet, and your site stays lighter because you skip another plugin and its extra scripts.
What is the Meta Pixel, and why does it matter?
The Meta Pixel is a small JavaScript snippet that you place on your website. Every time a visitor loads a page, the pixel sends a signal back to Meta with basic information about that visit, such as which page was viewed and which actions were taken. Meta then uses that data to build audiences, measure conversions, and optimize your ad delivery.
Without the pixel, Meta has no way to know what happens after someone clicks your ad. You can see clicks in Ads Manager, but you cannot see whether those clicks turned into signups or purchases. With the pixel installed, you can track the full journey from ad click to conversion, and that changes how you spend your budget.
The pixel also powers retargeting. When someone visits your pricing page but leaves without buying, the pixel remembers that visit, so you can show that person a reminder ad later. A lean setup also helps speed, as we explain in our web hosting guide.
What do you need before you start?
- A Meta Business account with access to Events Manager. Create one free at business.facebook.com if you do not have one yet.
- Admin access to your WordPress dashboard and theme files, through Appearance, then Theme File Editor, or through FTP.
- A child theme installed and active. Never add code to a parent theme, because the next theme update will wipe it out. If you do not have one yet, follow our guide to create a WordPress child theme first.
- A backup of your site, or at least of your theme files.
Step 1: Create your Meta Pixel in Events Manager
Your pixel lives in Meta Events Manager, the dashboard where Meta keeps all of your tracking tools. Here is how to create one.
- Go to business.facebook.com/events_manager2 and sign in with the account that owns your Business Manager.
- Click the green Connect data sources button in the top left, or the plus icon if you already have other data sources.
- Choose Web as the source type, then select Meta Pixel and click Connect.
- Name your pixel, usually your website name, enter your website URL, and click Continue.
- On the setup screen, choose Install code manually.
Meta will now show your pixel ID, a long number, usually 15 or 16 digits. Keep the Events Manager tab open, because you will copy the base code from it in a moment.
Step 2: Copy the Meta Pixel base code
The base code loads the pixel on every page of your site. It contains your unique pixel ID and a PageView event that fires automatically on every page load. Copy the whole block exactly as Meta shows it.
<!-- Meta Pixel Code -->
<script>
!function(f,b,e,v,n,t,s)
{if(f.fbq)return;n=f.fbq=function(){n.callMethod?
n.callMethod.apply(n,arguments):n.queue.push(arguments)};
if(!f._fbq)f._fbq=n;n.push=n;n.loaded=!0;n.version='2.0';
n.queue=[];t=b.createElement(e);t.async=!0;
t.src=v;s=b.getElementsByTagName(e)[0];
s.parentNode.insertBefore(t,s)}(window, document,'script',
'https://connect.facebook.net/en_US/fbevents.js');
fbq('init', 'YOUR-PIXEL-ID');
fbq('track', 'PageView');
</script>
<noscript><img height="1" width="1" style="display:none"
src="https://www.facebook.com/tr?id=YOUR-PIXEL-ID&ev=PageView&noscript=1"
/></noscript>
<!-- End Meta Pixel Code -->
Your pixel ID appears twice in this code, once in the fbq init line and once in the noscript image URL, so replace both copies. The official Meta Pixel setup documentation explains each part in detail.
Method 1: Add the pixel with a wp_head hook (recommended)
The cleanest way to add the pixel is a small PHP snippet in your child theme functions.php file. It uses the wp_head hook, the standard WordPress way to inject code into the head section of every page. The wp_head hook reference documents how this hook works.
Open Appearance, then Theme File Editor, select your child theme, and open functions.php. Paste this snippet at the end of the file, replacing YOUR-PIXEL-ID with your real pixel ID in both places.
add_action( 'wp_head', 'vtg_add_meta_pixel' );

function vtg_add_meta_pixel() {
    ?>
    <!-- Meta Pixel Code -->
    <script>
    !function(f,b,e,v,n,t,s)
    {if(f.fbq)return;n=f.fbq=function(){n.callMethod?
    n.callMethod.apply(n,arguments):n.queue.push(arguments)};
    if(!f._fbq)f._fbq=n;n.push=n;n.loaded=!0;n.version='2.0';
    n.queue=[];t=b.createElement(e);t.async=!0;
    t.src=v;s=b.getElementsByTagName(e)[0];
    s.parentNode.insertBefore(t,s)}(window, document,'script',
    'https://connect.facebook.net/en_US/fbevents.js');
    fbq('init', 'YOUR-PIXEL-ID');
    fbq('track', 'PageView');
    </script>
    <noscript><img height="1" width="1" style="display:none"
    src="https://www.facebook.com/tr?id=YOUR-PIXEL-ID&ev=PageView&noscript=1"
    /></noscript>
    <!-- End Meta Pixel Code -->
    <?php
}
Save the file and visit your homepage. The pixel now loads on every page automatically, including new posts and pages you publish later, because the hook runs on every page load. You set it up once and never think about it again.
Method 2: Add the pixel directly in header.php
The second method is simpler to understand, though slightly less flexible. Open your child theme header.php file and paste the base code from Step 2 just before the closing head tag, then save. The pixel will load on every page, just like the hook method.
The catch is that header.php is a template file, so any mistake in it can break your site layout, and the functions.php method is safer. Use Method 2 only if you are comfortable editing template files and you have a backup ready. Whichever method you choose, use only one of them. Adding the pixel twice sends every event to Meta twice and inflates your numbers.
Step 3: Verify the pixel with Meta Pixel Helper
Installing the code is only half the job. You must confirm it actually fires, and the free Meta Pixel Helper extension for Chrome makes that easy. Install it, then visit your website and click the extension icon.
A working setup shows a green checkmark with your pixel ID and a PageView event listed underneath. Click the event to see the details Meta received. If you see that, your pixel is live and collecting data.
You can also verify inside Events Manager. Open the Test Events tab, enter your website URL, and browse your site. Every page should appear in the test feed within seconds. If nothing shows up, check that you replaced YOUR-PIXEL-ID in both places, clear your cache, and confirm the snippet is in the active child theme. Ad blockers can also block the pixel, so test in a private window.
How to add basic events: PageView and ViewContent
PageView fires automatically from the base code, so you already track every page load. The next useful event is ViewContent, which fires when someone views a specific piece of content, such as a product page. It tells Meta which content people actually look at, which is far more useful than a raw page count when you build audiences.
Here is a simple ViewContent event for a product or landing page, added in a Custom HTML block on that page or through the same wp_head hook with a condition that limits it to that page.
<script>
fbq('track', 'ViewContent', {
  content_name: 'Product Name',
  content_type: 'product',
  content_ids: ['12345'],
  value: 49.00,
  currency: 'USD'
});
</script>
Replace the content name, ID, value, and currency with your real product details. Keep your first setup simple: PageView everywhere and ViewContent on product and key landing pages. A small set of accurate events beats a large set of half working ones.
Once your basic events work, connect the rest of your measurement stack. Our guide to add Google Search Console to WordPress shows you how to track the search traffic that brings visitors to your site, so you can see both halves of the picture.
What about privacy and consent rules?
The pixel collects visitor data, so privacy law applies to it. In the European Union and the United Kingdom, GDPR and the ePrivacy rules generally require you to get visitor consent before loading tracking code like the pixel. In the United States, the rules are looser, but several states now have their own privacy laws.
In practice, most sites that serve European visitors use a cookie consent banner that blocks the pixel until the visitor accepts tracking. If you already use a consent plugin, check its settings for a Meta Pixel or marketing cookies category and make sure the pixel only loads after consent. Update your privacy policy to mention the Meta Pixel by name and explain what data it collects. This is general guidance, not legal advice.
Google Tag Manager as an alternative route
If you would rather manage all your tracking tags from one dashboard instead of editing theme files, Google Tag Manager is the standard alternative. Add the Tag Manager container to your site once, then create a Custom HTML tag with the Meta Pixel base code and set it to fire on all pages. After that, you can add or change tags without touching your theme again.
The tradeoff is complexity. Tag Manager adds its own learning curve and its own script, so it makes sense when you manage several tags at once, such as the pixel plus analytics plus a chat widget. For a single pixel, the direct snippet in this guide is simpler and lighter. If you want the Tag Manager route, our guide to add Google Tag Manager to WordPress without a plugin covers the full setup. Whichever route you pick, pair the pixel with the social share buttons from our earlier guide, so visitors can spread your posts while the pixel measures the results.
Common problems and quick fixes
Most pixel problems come from a short list of causes. Fix one thing at a time and retest with Pixel Helper after each change.
- Pixel Helper shows nothing: your snippet is in the wrong theme, your cache is stale, or your ad blocker is hiding it.
- Duplicate PageView events: you installed the pixel twice, or a plugin adds it too. Remove one copy.
- Events show in Test Events but not in Ads Manager: normal for the first day, while Meta processes new data.
- Pixel fires on desktop but not on mobile: check for separate mobile caching, and confirm your child theme is active.
- Wrong pixel ID: compare the ID in your code with the ID in Events Manager. One wrong digit sends your data to the wrong pixel.
Frequently Asked Questions
Do I need a plugin to add the Meta Pixel to WordPress?
No. A small snippet in your child theme functions.php file, added through the wp_head hook, installs the pixel on every page with no plugin at all. Plugins only make the process easier for people who do not want to touch code.
Is the Facebook Pixel the same as the Meta Pixel?
Yes, it is the same tool with a new name. Facebook renamed it to the Meta Pixel in 2022 when the company rebranded. The code, the setup process, and the Events Manager dashboard all work the same way.
Will the Meta Pixel slow down my website?
Very slightly, because it loads one small JavaScript file from Meta servers. The impact is tiny compared with a typical pixel plugin, which often loads extra admin scripts of its own. The manual snippet in this guide is the lightest way to run the pixel.
Can I add the Meta Pixel without a child theme?
Technically yes, by editing your parent theme or using a code snippet plugin, but it is a bad idea. The next theme update will delete your code from the parent theme and your tracking will silently stop. A child theme protects your pixel permanently.
Last updated: November 2026.