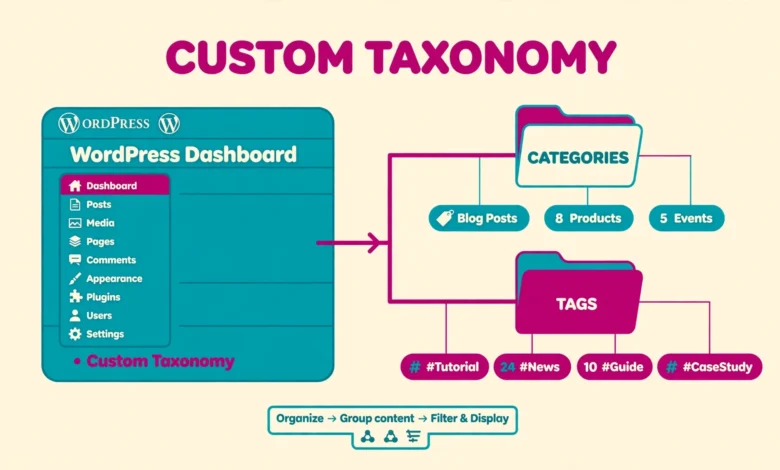
WordPress categories and tags work well for blog posts, but they do not cover every type of content. If you run a movie site, a recipe blog, or a portfolio, you need a better way to group content. A custom taxonomy lets you create your own grouping system, such as Genre for movies, Cuisine for recipes, or Skill for portfolio projects, and it works just like categories and tags.
In this guide, you will learn how to add a custom taxonomy in WordPress without a plugin. You will see the complete code, understand the important arguments, attach the taxonomy to posts or a custom post type, display terms on the front end, and fix the common 404 archive error. A plugin alternative is covered at the end too.
What Is a Custom Taxonomy in WordPress?
A taxonomy is a system for grouping content. Categories and tags are the two built in taxonomies in WordPress. Categories group posts by broad topic, while tags describe specific details. A custom taxonomy is a new grouping system that you define yourself. A book review site could add Author, a real estate site could add Property Type, and a course site could add Difficulty Level.
Each item inside a taxonomy is called a term. If your taxonomy is Genre, then Action, Comedy, and Drama are terms. If your taxonomy is Cuisine, then Italian, Mexican, and Thai are terms. Visitors can click a term to see every post that belongs to it, and WordPress creates an archive page for each term automatically. That archive helps visitors browse your site and helps search engines understand your content structure.
Custom taxonomies keep content organised without forcing everything into categories, and authors pick from a clear list of terms. To compare the built in systems, read our guide on WordPress categories vs tags.
Hierarchical vs Non-Hierarchical Taxonomies: Which One Do You Need?
Before you write code, decide whether your taxonomy should be hierarchical or non-hierarchical. This one choice changes how the taxonomy behaves in the admin area and on the front end.
A hierarchical taxonomy works like categories. Terms can have parents and children: Genre could have Action as a parent and Superhero as a child. In the editor, authors select terms with checkboxes. Use this type when your terms have a clear structure with levels.
A non-hierarchical taxonomy works like tags. Terms have no parents or children. In the editor, authors type terms separated by commas. Use this type for free form labels such as Actors, Ingredients, or Features, where any term can stand on its own.
- Hierarchical: parent and child terms, checkbox interface, best for structured groups like Genre, Location, or Department.
- Non-hierarchical: flat terms, comma separated input, best for open labels like Ingredients, Skills, or Keywords.
- Ask yourself: if a term needs a parent, choose hierarchical. If every term is independent, choose non-hierarchical.
Where Should You Put the Code?
You have two safe places for taxonomy code: a child theme functions.php file or a site specific plugin. Never add the code to a parent theme functions.php file, because a theme update will delete it. A child theme keeps your code safe when the parent theme updates, and a site specific plugin keeps it safe even if you change themes.
For most users, a site specific plugin is the best choice. It is a small plugin that holds your custom code and stays active no matter which theme you use. If you have not created one before, our guide on how to create a WordPress child theme explains the child theme route. Back up your site before you edit any PHP file, and test on a staging site first if you can.
How Do You Register a Custom Taxonomy with Code?
The core function is register_taxonomy(). You hook it to init, which is the action WordPress runs early on every page load. The function takes three main parts: a taxonomy slug, the post types it belongs to, and an array of arguments. The slug must be lowercase, with no spaces, and it should be short and descriptive, such as genre or cuisine.
The example below registers a hierarchical Genre taxonomy for posts. It includes clear labels for the admin area, a public archive, and REST API support so the taxonomy also works in the block editor. Copy the code, change the names to match your own taxonomy, and paste it into your child theme functions.php file or your site specific plugin.
function vtg_register_genre_taxonomy() {
    $labels = array(
        'name' => 'Genres',
        'singular_name' => 'Genre',
        'search_items' => 'Search Genres',
        'all_items' => 'All Genres',
        'edit_item' => 'Edit Genre',
        'update_item' => 'Update Genre',
        'add_new_item' => 'Add New Genre',
        'new_item_name' => 'New Genre Name',
        'menu_name' => 'Genres',
    );

    $args = array(
        'hierarchical' => true,
        'labels' => $labels,
        'show_ui' => true,
        'show_admin_column' => true,
        'show_in_rest' => true,
        'query_var' => true,
        'rewrite' => array( 'slug' => 'genre' ),
    );

    register_taxonomy( 'genre', array( 'post' ), $args );
}
add_action( 'init', 'vtg_register_genre_taxonomy' );
The hierarchical argument sets the taxonomy type. Set it to true for a category style taxonomy and false for a tag style taxonomy. The show_ui argument controls whether the taxonomy appears in the admin area. The show_admin_column argument adds a column on the posts list screen so you can see terms at a glance. The show_in_rest argument is essential for the block editor. Without it, the taxonomy panel may not appear in the editor sidebar.
The rewrite argument sets the URL slug for term archives. In the example above, the Action term archive will live at yoursite.com/genre/action/. Choose a slug that is short and free of conflicts with existing pages. For the official reference, see the function documentation on developer.wordpress.org.
How Do You Attach a Taxonomy to Posts or a Custom Post Type?
The second parameter of register_taxonomy() controls which post types use the taxonomy. In the example above, array( ‘post’ ) attaches Genre to standard posts. To attach it to a custom post type instead, replace ‘post’ with your post type slug. For a movie post type, use array( ‘movie’ ). To attach it to more than one post type, list them all, such as array( ‘post’, ‘movie’ ).
If the taxonomy already exists and you only want to attach it to another post type, use register_taxonomy_for_object_type(). This is useful when a plugin registered the taxonomy and you want to add it to your own post type without editing the plugin. Add it on init as well, using the same taxonomy slug and post type slug.
function vtg_attach_genre_to_movies() {
    register_taxonomy_for_object_type( 'genre', 'movie' );
}
add_action( 'init', 'vtg_attach_genre_to_movies' );
After you save the code, open any post in the editor and look for a Genres panel. Add a few terms, publish the post, and check that the terms appear on the front end. If the panel does not appear, check that show_in_rest is true and that the post type slug matches exactly.
How Do You Display Taxonomy Terms on Your Site?
Registering a taxonomy is only half the job. Visitors need a way to see the terms and browse them. The simplest tool is the_terms(), which prints a linked list of terms for the current post. You can place it in a template file. The function takes the post ID, the taxonomy slug, and optional text before and after the list.
<?php the_terms( get_the_ID(), 'genre', 'Genre: ', ', ' ); ?>To show a full list of all terms with links to their archive pages, use wp_list_categories() with the taxonomy argument, or use get_terms() in a custom loop. The get_terms() function returns an array of term objects, so you can build a custom list with term names, counts, and descriptions. This is useful for a directory page, a sidebar area, or a filter section above an archive. A good hosting setup also helps archives load fast, so review our web hosting guide for performance basics that apply to archive pages too.
What If Your Taxonomy Archive Shows a 404 Error?
The most common problem after registering a taxonomy is a 404 error on term archive pages. The taxonomy is registered and the terms exist, but clicking a term link shows a page not found error. The cause is almost always rewrite rules. WordPress caches its URL rules, and a new taxonomy slug is not in that cache until the rules are rebuilt. The fix is to flush permalinks.
Go to Settings, then Permalinks, in your WordPress dashboard. You do not need to change anything. Just click Save Changes. That single click rebuilds the rewrite rules and your archive pages should start working. Test a term archive right after saving. If it still shows a 404, check that the rewrite slug does not clash with a page, a post, or another taxonomy slug. If the 404 error affects other pages too, our guide on how to create a custom 404 page in WordPress will help you improve the fallback experience while you fix the root cause.
What Is the Plugin Alternative If You Do Not Want Code?
If you do not want to touch PHP, the Custom Post Type UI plugin is a reliable alternative. It gives you a settings screen where you can create taxonomies by filling in forms: slug, labels, hierarchical option, REST support, and rewrite slug. It is a good choice for beginners. The trade off is dependence: if you deactivate the plugin, your taxonomies disappear from the admin screens, though the terms stay in the database.
Common Mistakes to Avoid
Most taxonomy problems come from a few avoidable mistakes. Keep this list in mind before you save your code.
- Using a reserved slug: do not use post, page, category, tag, author, or other WordPress reserved terms as your taxonomy slug.
- Forgetting show_in_rest: without it, the taxonomy may not appear in the block editor sidebar.
- Registering too late: always hook register_taxonomy() to init. Registering later can break queries and archives.
- Skipping the permalink flush: always visit Settings, then Permalinks, and click Save Changes after adding a new taxonomy.
- Putting code in the parent theme: a theme update will delete it. Use a child theme or a site specific plugin instead.
- Creating too many taxonomies: start with one or two. Too many grouping systems confuse authors and visitors.
Frequently Asked Questions
Can I add a custom taxonomy without a plugin?
Yes. Add a register_taxonomy() function hooked to init in a child theme functions.php file or a site specific plugin. Set the labels, hierarchical option, REST support, and rewrite slug, then flush permalinks from Settings, then Permalinks.
What is the difference between a custom taxonomy and a custom post type?
A custom post type is a type of content, such as Movies or Recipes. A custom taxonomy is a way to group that content, such as Genre or Cuisine. A post type holds the content, while a taxonomy organises it.
Why is my taxonomy not showing in the block editor?
The most likely cause is a missing show_in_rest argument. Set show_in_rest to true in your register_taxonomy() arguments, save the file, and reload the editor. Also check that the taxonomy is attached to the post type you are editing.
Why does my taxonomy archive page show a 404 error?
WordPress has not rebuilt its rewrite rules for the new taxonomy slug. Go to Settings, then Permalinks, and click Save Changes. That flushes the rules. If the error continues, check for a slug conflict with a page, post, or another taxonomy.
Last updated: November 2026.