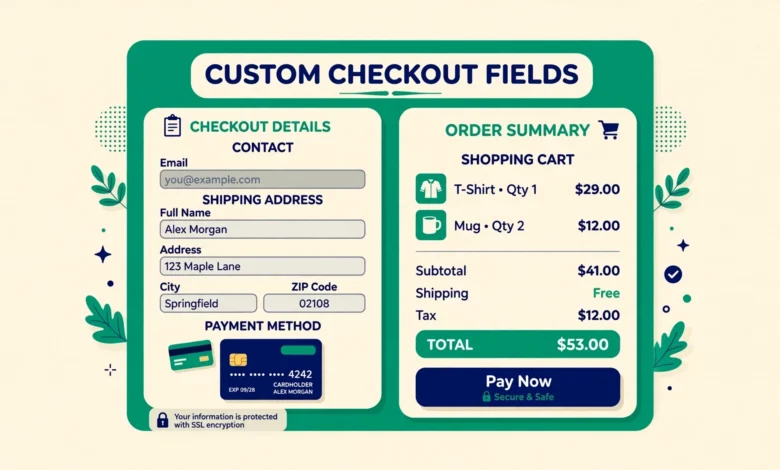
The default WooCommerce checkout asks for name, address, email, and payment details. That covers most stores, but many stores need one more piece of information. A gift shop may need a gift message. A food store may need a delivery date. A business supplier may need a company tax number. When the checkout does not ask for that detail, the store owner must chase it by email after the order, and that delay causes mistakes. You can add custom checkout fields in WooCommerce without a plugin, using a small code snippet. The classic checkout uses a filter to add fields, validate them, and save them to the order.
In this guide you will learn how the WooCommerce checkout fields system works, how to add a text field, a select field, and a checkbox with code, how to make a field required, how to validate it, how to save it so it survives the new high performance order storage system, and how to show it in the admin order screen and in order emails. The code examples use a child theme functions file or a code snippets tool that runs PHP.
How Does the WooCommerce Checkout Fields System Work?
WooCommerce groups checkout fields into three sections: billing, shipping, and order, which is the order notes area. Each field is an array with settings for type, label, placeholder, required status, CSS class, and priority. The filter woocommerce_checkout_fields lets you change that array before the checkout form is drawn. You can add a field, remove a field, change a label, or change a field from optional to required.
Adding the field is only the first step. WooCommerce does not save a custom field to the order on its own. You must also validate the field when the customer submits the checkout, save the value to order meta when the order is created, and display the value where your team needs to see it. If you skip validation, customers can submit empty values for required fields. If you skip the save step, the value will vanish after the order is placed. A complete solution covers all four steps: add, validate, save, and display. For background on store setup, see our guide on WooCommerce product variations.
How Do You Add a Custom Checkout Field With Code?
The example below adds a delivery date field to the order section of the classic checkout. It uses the text type, a clear label, a placeholder, and a priority that places it near the order notes. Field keys should use lowercase letters and underscores, such as delivery_date or gift_message.
add_filter( 'woocommerce_checkout_fields', 'vutechgeek_add_delivery_date_field' );
function vutechgeek_add_delivery_date_field( $fields ) {
    $fields['order']['delivery_date'] = array(
        'type'        => 'text',
        'label'       => 'Preferred delivery date',
        'placeholder' => 'DD MM YYYY',
        'required'    => false,
        'class'       => array( 'form-row-wide' ),
        'priority'    => 120,
    );
    return $fields;
}
Place this code in your child theme functions file and test the checkout. The new field should appear in the order section. The class form-row-wide makes the field span the full width of the form, which suits date and message fields. The priority number controls the order, and lower numbers appear earlier. If the field does not appear, confirm that your checkout page uses the classic shortcode. If it uses the Checkout block, use the block method described later in this guide.
What Field Types Can You Use at Checkout?
WooCommerce supports several field types, and the right type depends on the answer you need. A text field suits short answers such as a tax number or a delivery date. A textarea field suits longer answers such as a gift message. A select field suits a fixed list of choices, such as a delivery slot. A checkbox suits a single yes or no choice, such as Add gift wrap.
add_filter( 'woocommerce_checkout_fields', 'vutechgeek_add_delivery_options' );
function vutechgeek_add_delivery_options( $fields ) {
    $fields['order']['delivery_slot'] = array(
        'type'     => 'select',
        'label'    => 'Delivery slot',
        'required' => true,
        'class'    => array( 'form-row-wide' ),
        'options'  => array(
            ''        => 'Choose a delivery slot',
            'morning' => 'Morning, 9am to 12pm',
            'evening' => 'Evening, 5pm to 8pm',
        ),
        'priority' => 130,
    );
    $fields['order']['gift_wrap'] = array(
        'type'     => 'checkbox',
        'label'    => 'Add gift wrap',
        'required' => false,
        'class'    => array( 'form-row-wide' ),
        'priority' => 140,
    );
    return $fields;
}
Use a date picker only when you need a real calendar date. WooCommerce does not include a date field type by default, so most stores use a text field with a placeholder and validate the format. Keep it simple unless the date drives fulfilment. A text field with clear placeholder text and server side validation is often enough. If delivery dates affect your store rules, our guide on how to set a minimum order amount in WooCommerce shows how order rules and checkout work together.
How Do You Validate a Custom Checkout Field?
Validation runs when the customer clicks Place Order. If a required field is empty, or a value fails your check, WooCommerce shows an error and stops the order. Use the woocommerce_checkout_process action for this step. The example below checks the delivery slot field. If it is empty, it adds a notice with a clear message.
add_action( 'woocommerce_checkout_process', 'vutechgeek_validate_delivery_slot' );
function vutechgeek_validate_delivery_slot() {
    if ( empty( $_POST['delivery_slot'] ) ) {
        wc_add_notice( 'Please choose a delivery slot.', 'error' );
    }
}
Validate every field that drives fulfilment. Check that a tax number matches the format your country uses. Check that a date is in the future when it must be. Check that a gift message stays under a sensible length, such as 200 characters, so it fits on a printed card. Always sanitise the value before you use it. Use sanitize_text_field for text and a strict allow list for select values. Never trust raw POST data. Good validation also improves conversion, because a clear error next to the field helps the customer fix the problem at once. For cart recovery tactics, see our guide on how to recover abandoned carts in WooCommerce for free.
How Do You Save a Custom Field to the Order With HPOS?
Modern WooCommerce uses high performance order storage, known as HPOS, which stores orders in custom tables instead of the old posts table. That change means the old habit of saving order data with update_post_meta no longer works reliably. Use the order object and its update_meta_data method inside the woocommerce_checkout_update_order_meta action. WooCommerce then saves the meta when the order is stored.
add_action( 'woocommerce_checkout_update_order_meta', 'vutechgeek_save_delivery_fields', 10, 2 );
function vutechgeek_save_delivery_fields( $order_id, $data ) {
    $order = wc_get_order( $order_id );
    if ( ! $order ) {
        return;
    }
    if ( ! empty( $_POST['delivery_slot'] ) ) {
        $order->update_meta_data( '_delivery_slot', sanitize_text_field( wp_unslash( $_POST['delivery_slot'] ) ) );
    }
    if ( ! empty( $_POST['delivery_date'] ) ) {
        $order->update_meta_data( '_delivery_date', sanitize_text_field( wp_unslash( $_POST['delivery_date'] ) ) );
    }
    $order->save();
}
Notice the underscore at the start of each meta key. Keys that start with an underscore are hidden from the default custom fields panel, which keeps the admin screen tidy. Use the same key when you read the value later. Store a date as YYYY MM DD when you can, because that format sorts correctly. Store a select value as the option key, such as morning, not the full label.
How Do You Show Custom Fields in Admin and Emails?
A saved value is useless if your team cannot see it. Show it in the admin order screen first, because that is where packing and support happen. Use the woocommerce_admin_order_data_after_billing_address action to print the value under the billing address, and escape the output with esc_html. Next, show the value in order emails so the customer can confirm it. Use the woocommerce_email_order_meta_keys filter to add your meta keys to the email meta list. You can also show the value on the thank you page and in the My Account order view. If you offer coupons at checkout, our guide on how to create a coupon code in WooCommerce can help you test the full checkout flow.
What About the WooCommerce Checkout Block?
The Checkout block, which is the default in newer WooCommerce installs, does not use woocommerce_checkout_fields. It uses a registration system for additional fields. You register a field with woocommerce_register_additional_checkout_field, and you set its location, label, type, and validation rules in the registration call. This is a newer API, so check the current documentation before you build on it. The official reference at Developer.WooCommerce.com documents the registration function and the supported field types.
Many stores still use the classic checkout because their theme, payment gateway, or custom code depends on it. If your store uses the Checkout block and you need a custom field quickly, the simplest path is often to switch the checkout page back to the classic shortcode and use the filter method in this guide. That switch takes a minute: edit the checkout page, replace the Checkout block with the WooCommerce Checkout shortcode block, and test a full order. If you must stay on the block checkout, use the registration API and test the field on the front end and in the admin order screen. For general reference, the docs at Developer.WordPress.org cover the hook system that both checkout methods rely on.
What Are the Common Mistakes With Custom Checkout Fields?
The most common mistake is adding a field but never saving it. The field looks fine in the form, the customer fills it in, and the value disappears after the order. Always pair the add filter with the save action and test with a real order. The second mistake is using update_post_meta with HPOS. Use the order object and update_meta_data instead. The third mistake is making every field required. Each required field adds friction, so make only the fields required that you truly need. Another mistake is adding fields that duplicate data WooCommerce already collects. Finally, do not add heavy scripts to the checkout page without testing on a phone. If your store feels slow, review your hosting setup in our web hosting guide.
How Do You Test Custom Checkout Fields Safely?
Test on a staging site first when you can. If you do not have one, test on the live site with a low value product and a test payment method, then refund the order. Place a test order with the field filled in, and another with the field left empty when it is optional. Confirm that a required field blocks the order with a clear error. Open the order in the admin area and confirm that the value is saved and visible. Repeat the test on a phone, because select fields and checkboxes behave differently on small screens. Keep a backup of the code snippet and note which field keys you used.
Frequently Asked Questions
Can I add custom checkout fields in WooCommerce without a plugin?
Yes. For the classic checkout, use the woocommerce_checkout_fields filter to add the field, woocommerce_checkout_process to validate it, and woocommerce_checkout_update_order_meta with update_meta_data to save it. For the Checkout block, use woocommerce_register_additional_checkout_field instead.
Why is my custom checkout field not saving to the order?
The most likely cause is a missing save step. Adding the field only draws it on the form. You must also save it in woocommerce_checkout_update_order_meta using the order object. If you used update_post_meta with HPOS enabled, switch to update_meta_data on the order object.
How do I make a custom checkout field required?
Set required to true in the field array, and add validation in woocommerce_checkout_process with wc_add_notice when the value is empty. Setting required alone may not block submission in every theme, so the validation step is essential.
Do custom checkout fields work with the WooCommerce Checkout block?
Not with the classic filter. The Checkout block needs fields registered with woocommerce_register_additional_checkout_field. If you want to use the classic filter method, switch the checkout page back to the classic shortcode.
Last updated: November 2026.