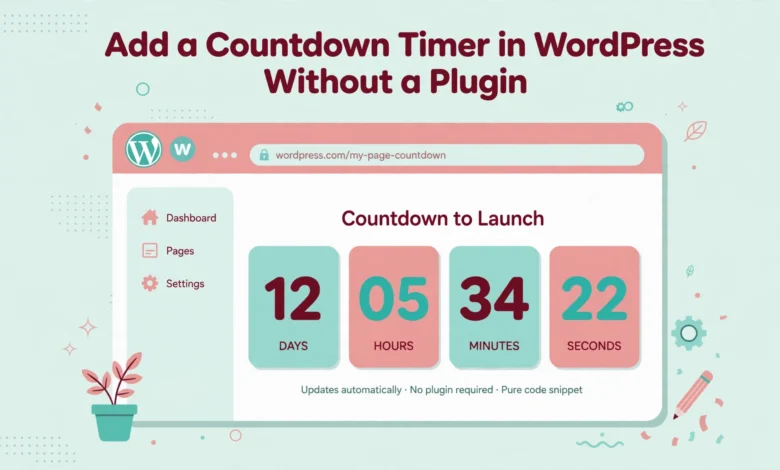
A countdown timer adds urgency to a sales page, an event page, or a course launch. Visitors see days, hours, minutes, and seconds ticking down, and that visible deadline makes them act sooner. Many site owners search for a plugin first, but you can build a clean, fast timer with code and keep full control over the design.
Here is the honest starting point. WordPress has no built-in countdown block. The block editor has no timer block, and the Customizer has no timer setting. That means every no plugin method in this guide builds the timer with code. The code is short, you can copy it, and you do not need to be a developer to use it. If you want scheduling and templates with no code at all, a plugin is easier, and we say that plainly near the end.
This guide gives you three methods. Method 1 uses a Custom HTML block with HTML, CSS, and JavaScript for a fixed date timer that ticks live. Method 2 turns the same timer into a reusable shortcode in your child theme, so you can place it on any page with a date attribute. Method 3 builds an evergreen style timer that starts when each visitor first sees the page, using localStorage.
What do you need before you start?
Decide the exact end date and time, including the time zone, and decide where the timer will appear. A timer on a sales page needs to be large and near the buy button, while a timer on an event page can sit under the main heading. Use a child theme for any PHP change in Method 2, so a theme update does not delete your code. If you have never created one, read our guide to create a WordPress child theme first.
Also decide what should happen when the timer reaches zero. A timer that keeps showing zeros looks broken, and a timer that disappears without a message confuses visitors. Plan the expired message now, for example “Registration is now closed” or “The offer has ended.” Each method below includes an expired state, so test it before you publish.
Method 1: How do I add a timer with a Custom HTML block?
Method 1 is the fastest way to add a countdown timer in WordPress without a plugin. Add a Custom HTML block to the page, paste in HTML for the timer boxes, add a small amount of CSS for the design, and add JavaScript that updates the numbers every second. Open the page in the editor, add the block where you want the timer, paste the code below, and change the date to your own end date.
<div class="vu-countdown" id="vu-countdown">
<div class="vu-time"><span id="vu-days">00</span><small>Days</small></div>
<div class="vu-time"><span id="vu-hours">00</span><small>Hours</small></div>
<div class="vu-time"><span id="vu-minutes">00</span><small>Minutes</small></div>
<div class="vu-time"><span id="vu-seconds">00</span><small>Seconds</small></div>
</div>
<p id="vu-expired" style="display:none;">The offer has ended.</p>
<style>.vu-countdown{display:flex;gap:12px;justify-content:center;text-align:center}.vu-time{background:#111827;color:#fff;border-radius:12px;padding:16px 18px;min-width:84px}.vu-time span{display:block;font-size:32px;font-weight:700}.vu-time small{font-size:13px;text-transform:uppercase;opacity:.8}</style>
<script>(function(){var target=new Date("2026-12-31T23:59:59").getTime();function tick(){var now=new Date().getTime();var d=target-now;if(d<0){document.getElementById("vu-countdown").style.display="none";document.getElementById("vu-expired").style.display="block";clearInterval(t);return}document.getElementById("vu-days").textContent=Math.floor(d/(1000*60*60*24));document.getElementById("vu-hours").textContent=Math.floor((d%(1000*60*60*24))/(1000*60*60));document.getElementById("vu-minutes").textContent=Math.floor((d%(1000*60*60))/(1000*60));document.getElementById("vu-seconds").textContent=Math.floor((d%(1000*60))/1000)}tick();var t=setInterval(tick,1000)})();</script>
The code above is a fixed date timer. It counts down to 31 December 2026 at 23:59, so change that date and time to your own deadline before you publish. The JavaScript calculates the gap between now and the target, splits it into days, hours, minutes, and seconds, and updates the numbers every second. When the gap reaches zero, it hides the timer and shows the expired message instead.
One detail matters a lot. Some caching plugins move JavaScript or delay it, which can stop a timer from starting. If your timer shows 00 for every value, check your caching settings, exclude the page from JavaScript delay, clear the cache, and test again while logged out, because a timer that only works for the admin is not a working timer.
Method 2: How do I make a reusable countdown shortcode?
Method 2 is better if you use timers on more than one page. Instead of pasting the same code into every page, add a small PHP function to your child theme functions.php file. That function registers a shortcode, and you can then place a timer anywhere with one line and a date attribute. Do not edit the parent theme file, because a theme update will remove your change.
function vu_countdown_shortcode($atts) {
$atts = shortcode_atts(array('date' => '2026-12-31 23:59:59', 'message' => 'The offer has ended.'), $atts);
$id = 'vu-timer-' . wp_rand(1000, 9999);
$html = '<div class="vu-countdown" id="' . esc_attr($id) . '" data-date="' . esc_attr($atts['date']) . '">';
$html .= '<div class="vu-time"><span class="vu-d">00</span><small>Days</small></div>';
$html .= '<div class="vu-time"><span class="vu-h">00</span><small>Hours</small></div>';
$html .= '<div class="vu-time"><span class="vu-m">00</span><small>Minutes</small></div>';
$html .= '<div class="vu-time"><span class="vu-s">00</span><small>Seconds</small></div></div>';
$html .= '<p class="vu-expired" style="display:none;">' . esc_html($atts['message']) . '</p>';
$html .= '<script>(function(){var box=document.getElementById("' . esc_js($id) . '");var target=new Date(box.getAttribute("data-date")).getTime();function tick(){var now=new Date().getTime();var d=target-now;if(d<0){box.style.display="none";box.nextElementSibling.style.display="block";clearInterval(t);return}box.querySelector(".vu-d").textContent=Math.floor(d/(1000*60*60*24));box.querySelector(".vu-h").textContent=Math.floor((d%(1000*60*60*24))/(1000*60*60));box.querySelector(".vu-m").textContent=Math.floor((d%(1000*60*60))/(1000*60));box.querySelector(".vu-s").textContent=Math.floor((d%(1000*60))/1000)}tick();var t=setInterval(tick,1000)})();</script>';
return $html;
}
add_shortcode('countdown', 'vu_countdown_shortcode');
Once the code is saved, add a Shortcode block on any page and enter the shortcode with your own date: [countdown date=”2026-12-31 23:59:59″ message=”Registration is now closed.”]. The date attribute sets the end date, and the message attribute sets the text that appears after the timer expires. Add the CSS from Method 1 once in the Customizer under Additional CSS, using our guide to add custom CSS in WordPress, and every shortcode timer on the site will share the same style.
Test the shortcode on a draft page first. Enter a date two minutes in the future, preview the page, and watch the timer reach zero. You should see the expired message appear. If the timer shows zeros and never starts, check that the shortcode is spelled correctly and that no plugin is stripping script tags from the page.
Method 3: How do I build a per-visitor evergreen timer?
An evergreen timer is different from a fixed date timer. A fixed date timer ends at the same time for everyone. An evergreen timer starts when each visitor first sees the page and runs for a set length, for example 24 hours, no matter when they arrive. You can build a simple version with localStorage, a small storage area in the visitor browser. When a visitor first loads the page, JavaScript saves an end time 24 hours ahead. On later visits, it reads that saved end time and continues from there.
<script>(function(){var key="vu-evergreen-end";var saved=localStorage.getItem(key);var target=saved?parseInt(saved,10):new Date().getTime()+(24*60*60*1000);if(!saved){localStorage.setItem(key,target)}function tick(){var now=new Date().getTime();var d=target-now;if(d<0){document.getElementById("vu-countdown").style.display="none";document.getElementById("vu-expired").style.display="block";clearInterval(t);return}document.getElementById("vu-days").textContent=Math.floor(d/(1000*60*60*24));document.getElementById("vu-hours").textContent=Math.floor((d%(1000*60*60*24))/(1000*60*60));document.getElementById("vu-minutes").textContent=Math.floor((d%(1000*60*60))/(1000*60));document.getElementById("vu-seconds").textContent=Math.floor((d%(1000*60))/1000)}tick();var t=setInterval(tick,1000)})();</script>Use this method with care, because it has a clear caveat. The timer is per browser, not per person. If a visitor clears browser data, uses a different browser, or opens the page on a phone after seeing it on a laptop, the timer restarts from the full 24 hours. It also does not sync with your server, so you cannot use it to enforce a real deadline. Treat it as a visual urgency prompt, not as a security control, and never use it to imply a deadline that does not exist.
How should I style the timer so it looks good?
A good timer is easy to read at a glance. Use large numbers, clear labels, and strong contrast between the numbers and the background. The dark boxes in Method 1 work on a light page, while white boxes with a dark border work on a dark page. Keep the four boxes in one row on desktop, and let them wrap into two rows on mobile instead of shrinking them until they are unreadable.
Add a short label above the timer, such as “Offer ends in,” and keep the numbers much darker or lighter than the box.
Where should I place the timer on the page?
On a sales page, place the timer near the price and the buy button, where the decision happens. Visitors should see the deadline at the same moment they see the price. On an event page, place it under the main heading and above the event details. On a landing page built with Elementor, add an HTML widget and paste the Method 1 code into it. If you prefer a visual widget instead of code, read our guide to add a countdown timer in Elementor free.
Do not place a timer in the site header or footer on every page. A timer that follows visitors everywhere feels pushy, and it loses its meaning on pages that have nothing to do with the offer. Use one timer per offer, on the page where that offer lives. If your sales page loads slowly, check the hosting side in our web hosting guide, because a slow host can delay the JavaScript that starts the timer.
How do I test the timer and the expired state?
- Set the date two minutes in the future and preview the page while logged out.
- Watch the seconds tick down and confirm the numbers change every second.
- Wait for the timer to reach zero and confirm the expired message appears.
- Change the date to your real deadline and preview the page again.
- Open the page on a phone and confirm the boxes fit the screen without overflow.
- Clear the cache, reload the page, and confirm the timer still starts correctly.
For the evergreen timer, test in a private window, then close it and open the page again in a new private window. The timer should restart, because a private window has no saved localStorage from the earlier visit. In a normal window, the timer should continue from the saved end time. That difference is expected behaviour, and it confirms the code is working as designed.
When is a plugin the better choice?
The code methods here are free, light, and fast, and they suit a single fixed deadline very well. A plugin is better when you need scheduling, different timers for different visitors, email capture, or ready made designs without writing CSS. If you are not comfortable editing functions.php, use Method 1 or the Elementor Countdown widget instead.
Whichever route you choose, keep the timer honest. Use a real deadline, show the expired message when it passes, and remove the timer after the offer ends. A timer that stays on a page after the offer has ended tells visitors that the urgency was never real. For more on keeping WordPress pages clean and fast, see the official documentation at WordPress.org and the web performance guidance at Google Developers. A related design habit, keeping a page tidy after a change, also applies when you create a custom 404 page in WordPress.
Frequently asked questions
Does WordPress have a built-in countdown timer block?
No. WordPress has no built-in countdown block, and the block editor has no timer setting. You need to add a timer with code in a Custom HTML block, with a shortcode in your child theme, with the Elementor Countdown widget, or with a countdown plugin.
Can I add a countdown timer in WordPress without a plugin?
Yes. Paste the HTML, CSS, and JavaScript from Method 1 into a Custom HTML block and change the date to your deadline. For reuse across pages, add the shortcode from Method 2 to your child theme functions.php file and use [countdown date=”2026-12-31 23:59:59″] on any page.
How does an evergreen countdown timer work?
An evergreen timer starts when each visitor first loads the page and runs for a set length, such as 24 hours. The code in Method 3 saves the end time in localStorage in the visitor browser, so later visits continue from the same end time. The timer is per browser, so it restarts if the visitor clears browser data or uses a different browser.
Why is my countdown timer showing 00 for every value?
The JavaScript is probably not running. Check that the date format matches the code, that no caching plugin is delaying the script, and that the Custom HTML block saved correctly. Clear the cache, test the page while logged out, and check the browser console for a JavaScript error.
Last updated: November 2026.