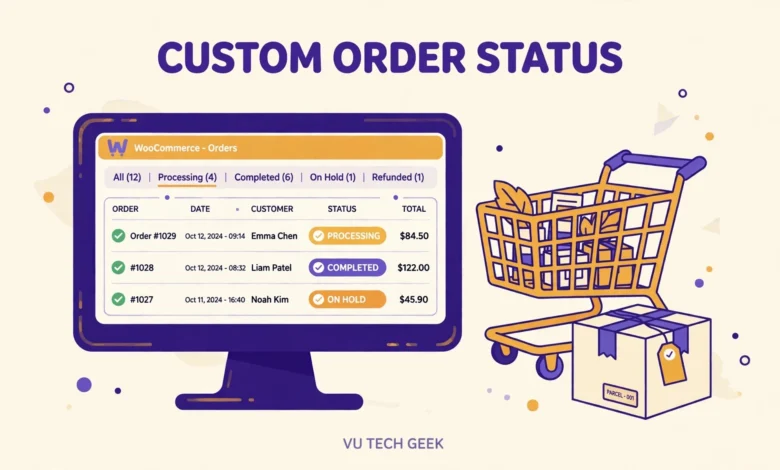
WooCommerce ships with a useful set of order statuses, from Pending Payment to Completed, but real stores often need one more. A local shop may need an Awaiting Pickup status for customers who collect in person. A food store may need a Preparing status between Processing and Completed. A print shop may need an In Production status so staff know which orders are on the press. WooCommerce has no built-in way to add these, so this guide shows you how to add a custom order status with a small PHP snippet and no dedicated plugin.
The method uses two WordPress hooks and about twenty lines of code. You register the status, add it to the status dropdown on the orders screen, and optionally add a bulk action and an email trigger. The whole job takes under half an hour, and the status behaves like a built-in one once it is registered. You can test it on a staging site first, and you can remove it later without touching your order data.
What is a custom order status in WooCommerce?
An order status is a label that tells you where an order sits in your workflow. WooCommerce stores it as a post status with a wc prefix, such as wc-processing or wc-completed. A custom order status is simply a new label in that same system, for example wc-awaiting-pickup for orders waiting at your counter. Once registered, it appears in the orders list, in the status filter counts, and in the status dropdown on the order edit screen.
Custom statuses do not change how payment works. They only describe the order. You decide which status an order moves to and when, either by hand or with a small piece of automation. Because the status lives in the same system as the built-in ones, it also works with order search, exports, and most reporting tools, though a few reports only count the default statuses, which we cover later in this guide.
Why add a custom order status instead of using the built-in ones?
The built-in statuses cover payment and fulfilment in general terms, but they cannot describe every real workflow. Processing covers everything from packing to printing to cooking, so staff cannot tell at a glance what an order needs next. Completed means the order is done, yet a store that offers pickup still needs to know whether the customer has collected it. A custom status fills that gap with a label your team actually understands.
A clear status also improves the customer experience. A buyer who sees Awaiting Pickup knows exactly what to do next, while a buyer stuck on Processing has to email you to ask. Staff make fewer mistakes too, because an order cannot be marked Completed by accident while it is still waiting on a shelf. If your workflow has a step that no built-in status describes, that step deserves its own status.
Where do I add the code: Code Snippets or functions.php?
You have two safe places for the snippet in this guide. The Code Snippets plugin is the easiest option for most store owners. Install it, create a new snippet, paste the code, set it to run on the front end and in the admin area, and activate it. You can turn the snippet off with one click if anything goes wrong, and a theme update will never wipe it out.
The other option is your child theme functions.php file. This works well if you already manage custom code there, but never add code to a parent theme functions.php file, because the next theme update will delete it. Whichever place you choose, add the snippet on a staging copy of your site first. Our guide to a WordPress staging site without a plugin shows you how to set one up, and always back up the site before you edit PHP.
How do I register a custom order status with PHP?
Registration has two parts. First, register_post_status creates the status itself, with the wc-awaiting-pickup slug and the label your staff will see. Second, the wc_order_statuses filter adds that status to the dropdown on the orders screen. The slug must start with wc- and stay short, because WordPress limits post status slugs to 20 characters in total. Our example uses Awaiting Pickup, which suits a store that offers local collection.
add_action( 'init', 'vutg_register_custom_order_status' );
function vutg_register_custom_order_status() {
    register_post_status( 'wc-awaiting-pickup', array(
        'label'                     => 'Awaiting Pickup',
        'public'                    => true,
        'show_in_admin_status_list' => true,
        'show_in_admin_all_list'    => true,
        'label_count'               => _n_noop( 'Awaiting Pickup <span class="count">(%s)</span>', 'Awaiting Pickup <span class="count">(%s)</span>' ),
    ) );
}
add_filter( 'wc_order_statuses', 'vutg_add_custom_order_status' );
function vutg_add_custom_order_status( $order_statuses ) {
    $order_statuses['wc-awaiting-pickup'] = 'Awaiting Pickup';
    return $order_statuses;
}
Save the snippet and open WooCommerce, then Orders, in your dashboard. You should see Awaiting Pickup in the status filter counts at the top and in the status dropdown when you edit an order. If it does not appear, check that the snippet is active and that the slug starts with wc-. Change the slug and the label to match your own workflow, for example wc-in-production with the label In Production, and keep the two in sync.
How do I show the custom status in the order actions dropdown?
The wc_order_statuses filter above already puts your status in the main dropdown on the order edit screen. The quick actions menu on the orders list, the small dropdown that appears when you hover over an order row, is a separate menu. WooCommerce builds it from the same status list, so your new status appears there too once it is registered, with no extra code needed.
Order matters in that dropdown, because staff read it from top to bottom. The snippet above adds Awaiting Pickup at the end of the list. If you want it in a specific spot, for example right after Processing, rebuild the array in your filter function and place your status between the two built-in entries. Test the order on your staging site and ask your staff whether the flow reads naturally from top to bottom.
How do I add bulk actions for the custom status?
Bulk actions let staff move many orders to the new status at once, which matters when twenty pickup orders are ready at the same time. WooCommerce reads bulk actions from a filter on the orders list screen, so you add one entry that points at your status. The snippet below adds a “Change status to Awaiting Pickup” option to the Bulk Actions dropdown.
add_filter( 'bulk_actions-edit-shop_order', 'vutg_custom_order_bulk_action' );
function vutg_custom_order_bulk_action( $actions ) {
    $actions['mark_awaiting-pickup'] = 'Change status to Awaiting Pickup';
    return $actions;
}
Tick the orders you want to move, choose the new bulk action, and click Apply. WooCommerce changes each order status and records the change in the order notes. If the bulk action does not appear, check that the filter name matches your WooCommerce version and that the snippet is active. Bulk actions are a small time saver that quickly becomes essential once your team handles more than a few orders a day.
How do I send an email when an order moves to the custom status?
A status is most useful when the customer hears about it. WooCommerce fires a hook every time an order changes status, named woocommerce_order_status_ followed by the destination status slug. For our example the hook is woocommerce_order_status_wc-awaiting-pickup. You can attach a small function to that hook to send an email, add an order note, or trigger an SMS through your provider.
Keep the email short and clear. Tell the customer the order is ready, give the pickup address and opening hours, and remind them to bring the order number. Test the email with a real order on staging before you turn it on for customers, because a broken hook can fail quietly and leave buyers waiting without a message. The official reference on developer.woocommerce.com lists every order status hook if you want to automate more steps.
What should I know about paid statuses and reporting?
A custom status is not a paid status by default. WooCommerce treats only certain statuses, such as Processing and Completed, as paid, which affects downloads, stock reduction, and some reports. If your custom status comes after payment, for example a Preparing status for a paid order, that is fine, because the order already passed through Processing and was counted as paid there. The custom status only describes the next step.
Problems appear when a custom status replaces a paid status instead of following it. An order that jumps straight from Pending Payment to your custom status may not count as paid, may not reduce stock, and may not appear in sales reports. The fix is to mark the order as paid first, or add your status to the paid list with the woocommerce_order_is_paid_statuses filter, and test a full order on staging to confirm stock and reports behave as you expect. If you sell with discounts, our guide to create a coupon code in WooCommerce pairs well with custom statuses for pickup and local orders, and our WooCommerce shipping zones guide covers local pickup zones that match an Awaiting Pickup status.
How do I test and remove a custom order status safely?
Test every new status on staging with a full order, from checkout to the custom status and on to Completed. Check that the status appears in the dropdown, that bulk actions work, that the email arrives, and that reports still count the order. Then repeat the test on the live site with one real order before your staff start using the status for every order.
Removing a status is safe if you move orders off it first. Change every order in the custom status to Completed or another built-in status, then deactivate the snippet. Orders that still carry the old status will show a blank or missing label in the orders list, so never remove the code while orders still use the status. If you run a store with local delivery as well as pickup, our guide to set a minimum order amount in WooCommerce helps you shape which orders reach each status in the first place. Good hosting also matters when you test store changes, and our web hosting guide compares hosts that handle WooCommerce stores well.
Frequently asked questions
Can I add a custom order status in WooCommerce without a plugin?
Yes. A small PHP snippet registers the status with register_post_status and adds it to the dropdown with the wc_order_statuses filter. Add it through the Code Snippets plugin or your child theme functions.php file. You do not need a dedicated order status plugin for a single custom status.
Why is my custom order status not showing in the dropdown?
The most common causes are a slug that does not start with wc-, a slug longer than 20 characters, or a snippet that is not active. Check that both the register_post_status call and the wc_order_statuses filter are present, then clear your browser cache and reload the orders screen.
Does a custom order status affect payment or stock?
Not on its own. Payment and stock are handled when the order enters a paid status such as Processing. A custom status that follows Processing only describes the next step. If your status replaces a paid status, add it to the paid list with the woocommerce_order_is_paid_statuses filter and test a full order.
Can I delete a custom order status after orders have used it?
Yes, but move every order off the status first. Change those orders to Completed or another built-in status, then deactivate the snippet. Orders left on a removed status will show a blank label in the orders list, so check the status filter counts before you remove the code.
Last updated: November 2026.