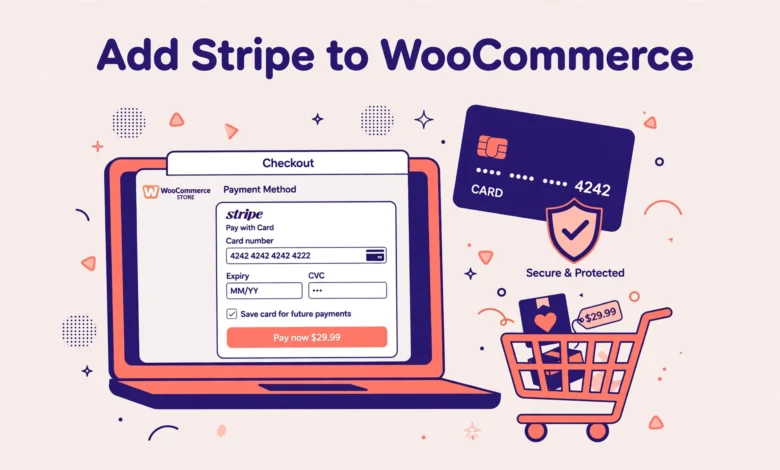
Stripe is one of the easiest ways to accept card payments in a WooCommerce store. Customers can pay with Visa, Mastercard, American Express, Apple Pay, and Google Pay without leaving your checkout page, and you get a clean dashboard for refunds, payouts, and disputes.
The setup is friendlier than most store owners expect. The official plugin connects your store to Stripe with a single click, and there are no API keys to copy in the normal flow. This guide walks through the whole process, from account setup to live payments.
What Do You Need Before You Add Stripe to WooCommerce?
Check that you have four things before you start. First, a WooCommerce store that already works, with at least one product and a working checkout page. Second, an SSL certificate so your site runs over HTTPS, because Stripe will not process live payments on an insecure site. Third, an email address you control. Fourth, your business details, including your legal business name, country, and bank account details for payouts.
Stripe availability depends on your country. Stripe operates in more than 40 countries, including the United States, the United Kingdom, Canada, Australia, and most of Europe. If your country is not supported, Stripe will not let you activate the account. Store owners in Pakistan, for example, cannot open a Stripe account directly and usually use local gateways instead. Our guide on JazzCash and Easypaisa payments in WooCommerce covers the local options, and our web hosting guide explains how to pick a host with free SSL.
How Do You Create a Stripe Account?
Go to stripe.com and click Start now. Enter your email address, your full name, and a strong password, then confirm your email. Stripe then asks for your business details: your country, the type of business, your business name, and your website address. Fill these in accurately, because Stripe verifies them before it lets you receive live payments.
Next, add the bank account where you want payouts sent, plus identity details for the account owner, such as date of birth and a government ID number where required. Stripe uses this for anti fraud checks. Your account starts in test mode, which is what you want: you can connect it and test everything before any real money moves. Stripe may ask for extra documents, so upload clear scans and wait before taking live payments.
How Do You Install the WooCommerce Stripe Payment Gateway Plugin?
Stripe offers an official plugin called WooCommerce Stripe Payment Gateway, built and maintained by WooCommerce itself. Always use the official plugin rather than a random third party Stripe plugin, because the official one is tested against new WooCommerce releases and gets prompt fixes when Stripe changes its API.
Install it from your WordPress dashboard. Go to Plugins, then Add New, search for WooCommerce Stripe Payment Gateway, and click Install Now, then Activate. You can also download it from WooCommerce.com if you prefer a manual upload. After activation, a Stripe option appears under WooCommerce, then Settings, then Payments. Keep the plugin updated, and test a checkout after every major update, ideally on a staging copy. Our guide on how to create a WordPress staging site without a plugin shows a safe way to do that.
How Do You Connect Stripe to WooCommerce?
Connecting uses OAuth, which means you sign in to Stripe inside the plugin settings instead of copying secret keys by hand. Go to WooCommerce, then Settings, then Payments, and click Manage next to Stripe. Click the Connect with Stripe button, or Set up, depending on your plugin version. A Stripe window opens, asks you to log in, and asks you to confirm which account to connect. Approve it, and you return to your dashboard with the connection active.
This one click flow is the normal path, and you should use it. Manual API keys are only needed in unusual setups, such as when a firewall blocks the OAuth popup. If you ever do paste keys manually, never paste a live secret key into a shared document, a chat, or a screenshot, because anyone with that key can charge or refund through your account. After connecting, check the status line in the Stripe settings: it should show your account name and whether you are in test mode or live mode. WooPayments is a different integration, built on Stripe infrastructure but managed inside the WordPress dashboard, so do not run both gateways at once for the same payment methods.
How Do You Enable Card Payments, Apple Pay, and Google Pay?
With the connection active, the settings page lists the payment methods Stripe can offer. Enable Stripe itself first, which covers Visa, Mastercard, American Express, and other major cards. The card fields appear directly on your checkout page, so customers never leave your site to pay. That alone covers most buyers.
Next, enable the payment request buttons for Apple Pay and Google Pay. These appear as wallet buttons on the checkout page and, in many themes, on the product and cart pages too. A customer with a saved card in their phone wallet can complete a purchase with a fingerprint or face scan instead of typing a card number. Apple Pay only shows on Apple devices with a card saved in Apple Wallet, and Google Pay only shows to customers signed in to a Google account with a saved payment method. Turn on only the methods your customers actually use, because a clean checkout converts better.
How Do You Set Up Stripe Webhooks in WooCommerce?
Webhooks are how Stripe tells your store what happened to a payment after the customer leaves checkout. Without them, events such as a delayed payment confirmation or a refund made in Stripe can fail to update the order status in WooCommerce, leaving orders stuck on pending payment even though the money arrived.
The official plugin usually creates the webhook for you during the OAuth connection. Verify it in your Stripe dashboard under Developers, then Webhooks. Look for an endpoint pointing to your site, with an address like yoursite.com/?wc-api=wc_stripe. If no endpoint exists, create one manually: go to Developers, then Webhooks, click Add endpoint, enter your site address followed by /?wc-api=wc_stripe using your real domain in place of yoursite.com, select the events, save, and paste the signing secret into the webhook secret field in the WooCommerce Stripe settings.
How Do You Test Stripe Payments With the 4242 Test Card?
Never test with a real card. Stripe provides test card numbers that work only while your account is in test mode. The best known is 4242 4242 4242 4242, a Visa test card that always succeeds. Use any future expiry date, any three digit CVC, and any postal code. Place a test order through your normal checkout as if you were a customer, and confirm that the order completes and shows as processing in WooCommerce.
- 4242 4242 4242 4242: Visa test card that always succeeds, the standard first test for any new Stripe setup.
- 4000 0000 0000 0002: a card that always declines, useful for checking that your store shows a clear error message.
- 4000 0025 0000 3155: a card that requires 3D Secure authentication, for testing the extra verification step European customers often see.
- 4000 0000 0000 9995: a card that fails with insufficient funds, for checking how your store handles a failed payment.
Test the full journey, not just the payment: add a product to the cart, check out with the test card, then confirm the order email, the order status, and the test payment in your Stripe dashboard. Our guide on how to create a coupon code in WooCommerce is handy if you want to test discounts too.
How Do You Switch Stripe From Test Mode to Live Mode?
Switching to live mode is a small step with a big consequence, so do it deliberately. In the WooCommerce Stripe settings, uncheck the test mode box, or toggle the mode switch to live, depending on your plugin version. Save the settings, then confirm in your Stripe dashboard that the account shows live mode and that verification is complete.
Before you announce that payments are open, place one small real order with a real card and refund it immediately. This proves the live connection, the webhook, and the payout path all work with real money. Remember that test orders never appear in the live dashboard, and live payments never appear in test mode.
What Are Stripe Fees for WooCommerce Stores?
Stripe charges a percentage plus a small fixed fee on every successful card payment. The exact rate depends on your country and card type. In the United States the standard rate is 2.9 percent plus 30 cents per successful card charge, while rates in the United Kingdom and Europe are usually lower for domestic cards and higher for international ones.
Watch for the extra charges that surprise new store owners. International cards usually add about 1 percent, currency conversion adds about 1 percent, and disputed payments carry a dispute fee that you lose even if you win the dispute. Payouts to your bank account are normally free and arrive in two to seven business days. Check current rates on the Stripe pricing page for your own country before you set prices. If taxes are part of your pricing, our guide on how to set up taxes in WooCommerce will help you get the numbers right.
How Do You Fix Common Stripe Problems in WooCommerce?
- Webhook failures: open the Stripe dashboard under Developers, then Webhooks, and check for failed deliveries. A 404 usually means the endpoint address is wrong. A 403 often means a security plugin or firewall is blocking Stripe requests.
- Test vs live mode confusion: confirm the mode toggle in the WooCommerce Stripe settings matches the mode in your Stripe dashboard. Test cards only work in test mode, and real cards only work in live mode.
- Country not supported: Stripe will block activation and ask for a supported business location. Use a gateway that supports your country instead of registering with a foreign address, which can get the account closed.
- Checkout error after payment: check WooCommerce, then Status, then Logs for the Stripe log entries. A blank checkout page usually points to a plugin or theme conflict, so test with a default theme and only WooCommerce and Stripe active.
- Orders stuck on pending payment: the payment probably succeeded but the webhook never confirmed it. Verify the webhook endpoint, check the signing secret, and resend the event from Stripe.
- Apple Pay button missing: Apple Pay only appears on Safari on Apple devices with a card in Apple Wallet, and only on a site with a verified domain in Stripe.
Frequently Asked Questions
Is Stripe free to add to WooCommerce?
Yes. The official plugin and the Stripe account are both free. You only pay a per transaction fee when a customer pays you, and there is no monthly fee for a standard account.
Do I need to copy API keys to add Stripe to WooCommerce?
No, not in the normal flow. The plugin connects through OAuth: you click Connect with Stripe, sign in, and approve the connection. Manual API keys are only needed where the OAuth popup is blocked.
Can I use Stripe in Pakistan with WooCommerce?
No. Stripe does not support businesses registered in Pakistan. Pakistani stores usually accept JazzCash, Easypaisa, bank transfer, or cash on delivery instead.
Why is my Stripe order stuck on pending payment?
The most likely cause is a broken webhook: Stripe could not tell WooCommerce that the payment succeeded. Check the webhook endpoint, confirm the signing secret matches, and resend the event.
Last updated: November 2026.